Sal D'Alia (@timbuz) is a filmmaker, photographer, member of the Alpha Collective and senior content producer at Adorama. He moved to New York City from Italy in 2010 after graduating from the Academy of Cinema and TV of Milan. You could call D’Alia a pioneer for original video content on the web, with his work reaching over 100 million views on YouTube. He’s worked for many major brands and knows the ins and outs of producing solid photo and video content with a cinematic flavor. With video continuing to rise in popularity, we connected with D’Alia for the scoop on how he sets up his Sony Alpha 7S III for video.
Filmmaker and photographer Sal D'Alia of the Alpha Collective gives us a step-by-step guide for setting up your camera to shoot cinematic videos.
1. Customize Your Menu
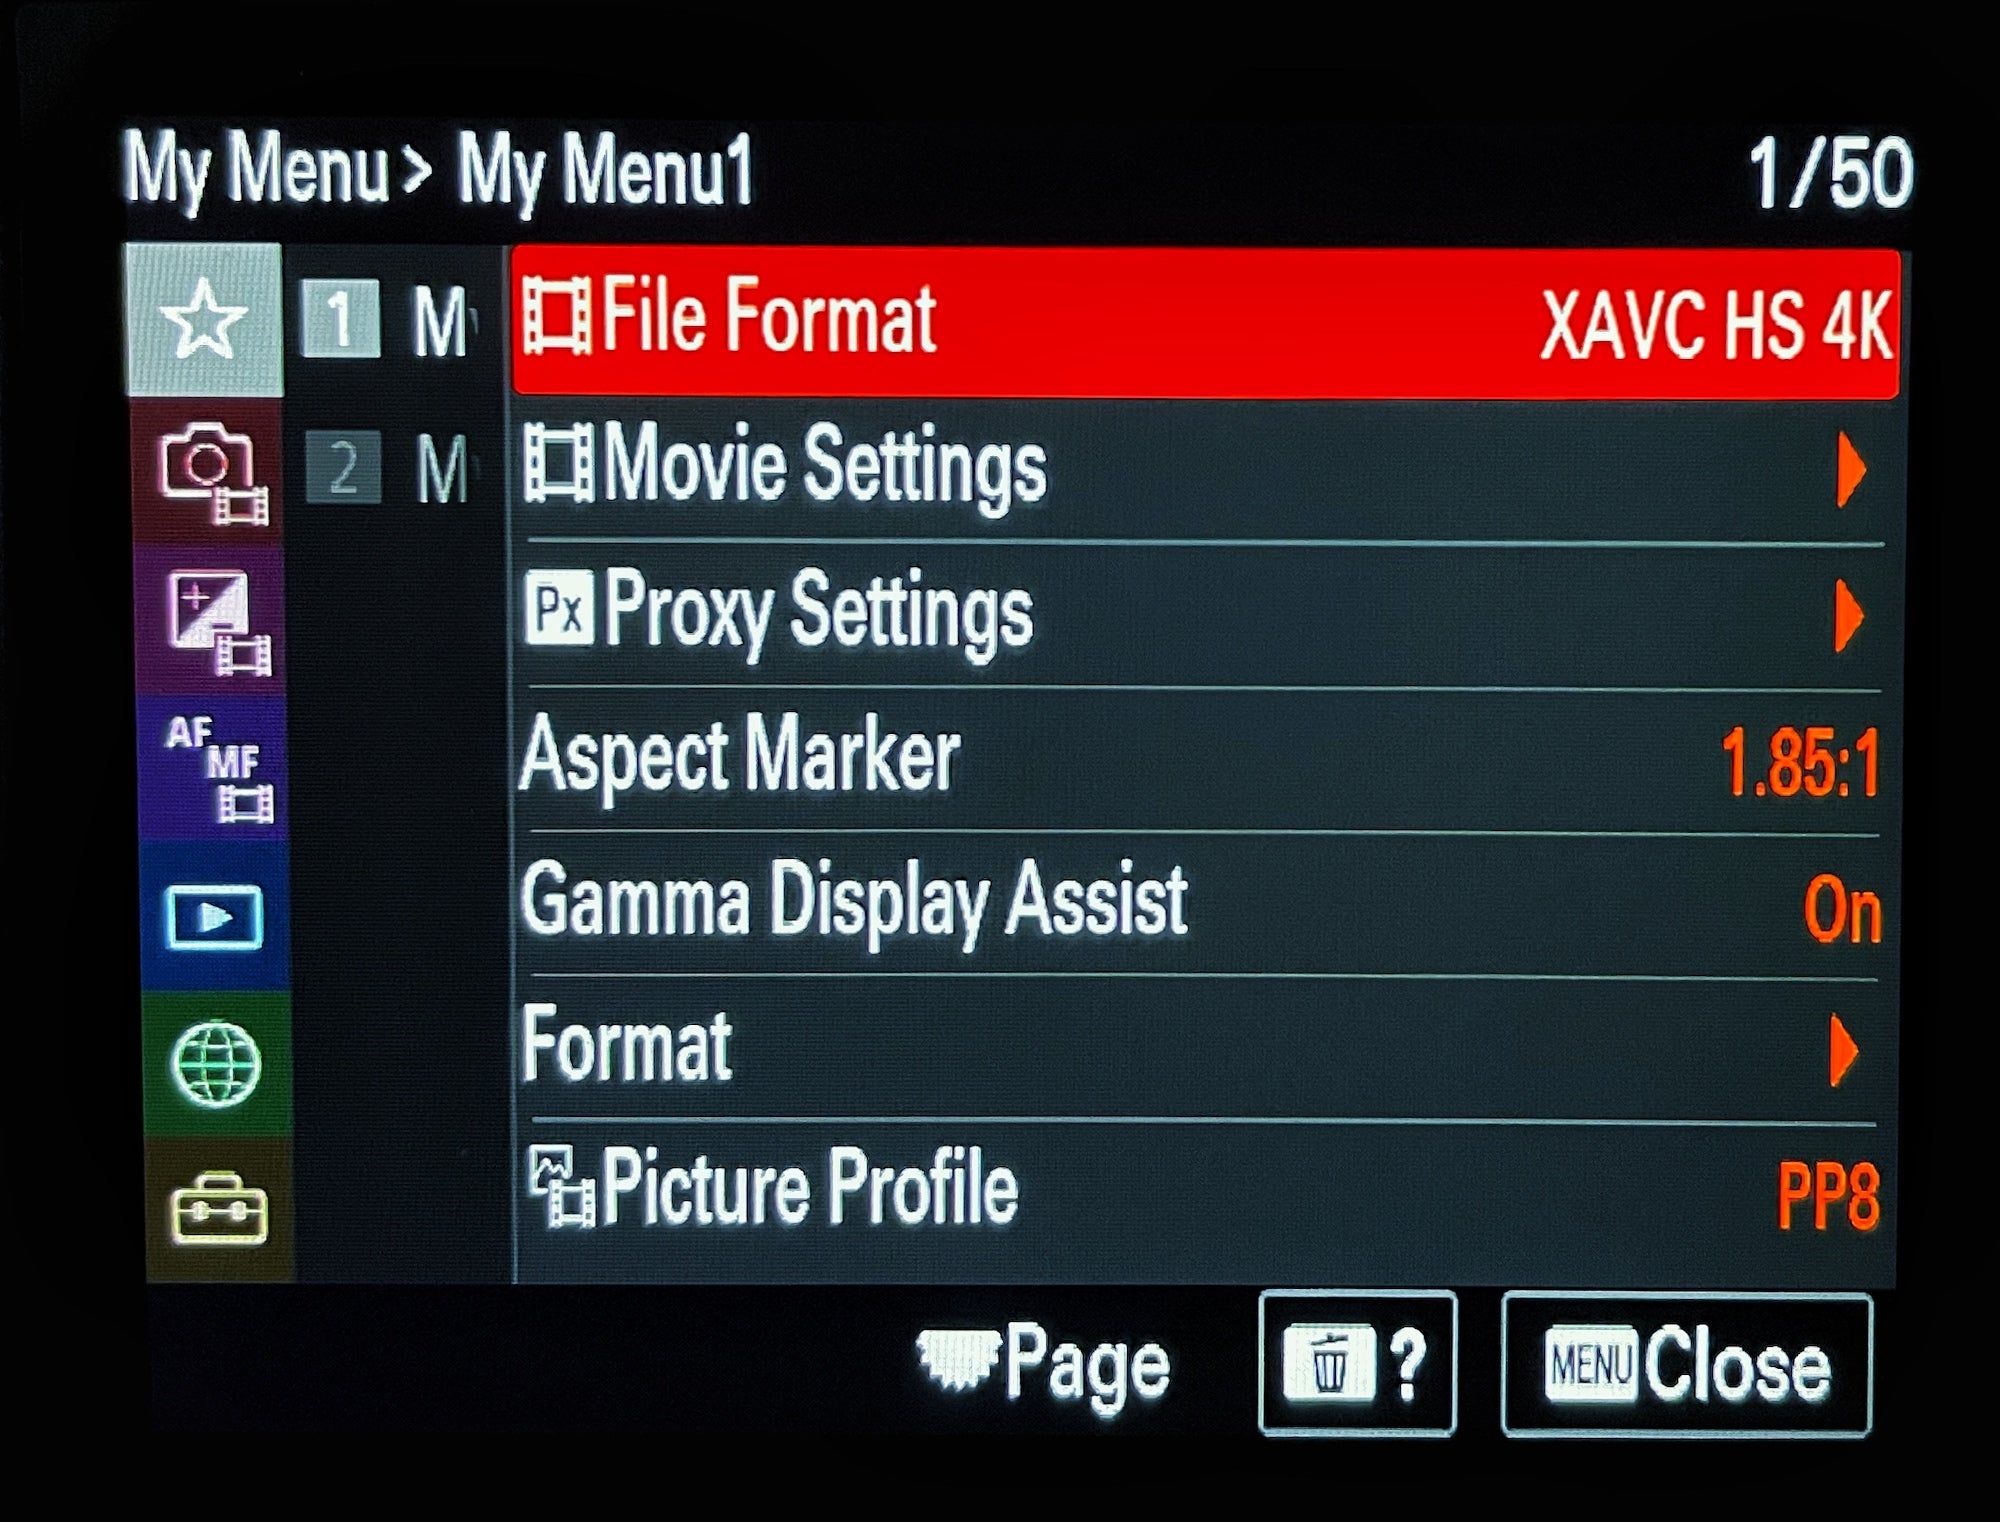
For D’Alia, the first big thing when switching his camera to shoot video is to customize the menu. “For video and to get cinematic visuals you often have to change settings in your camera to get the best settings for that moment,” he explains. “In video you don't have the same range and lay away that a RAW file gives you for photography. So you basically have to get closer to what you want your final image to be because you can't change as much as you can for a RAW file.”
He says you have to have the menu set up so you can change the settings quickly, and how you customize yours will depend on your style and what you’re shooting that day. “Whatever your style is going to be as a filmmaker,” D’alia says, “you are probably going to save specific settings that you often change while shooting.”
2. Choose The Proper File Format
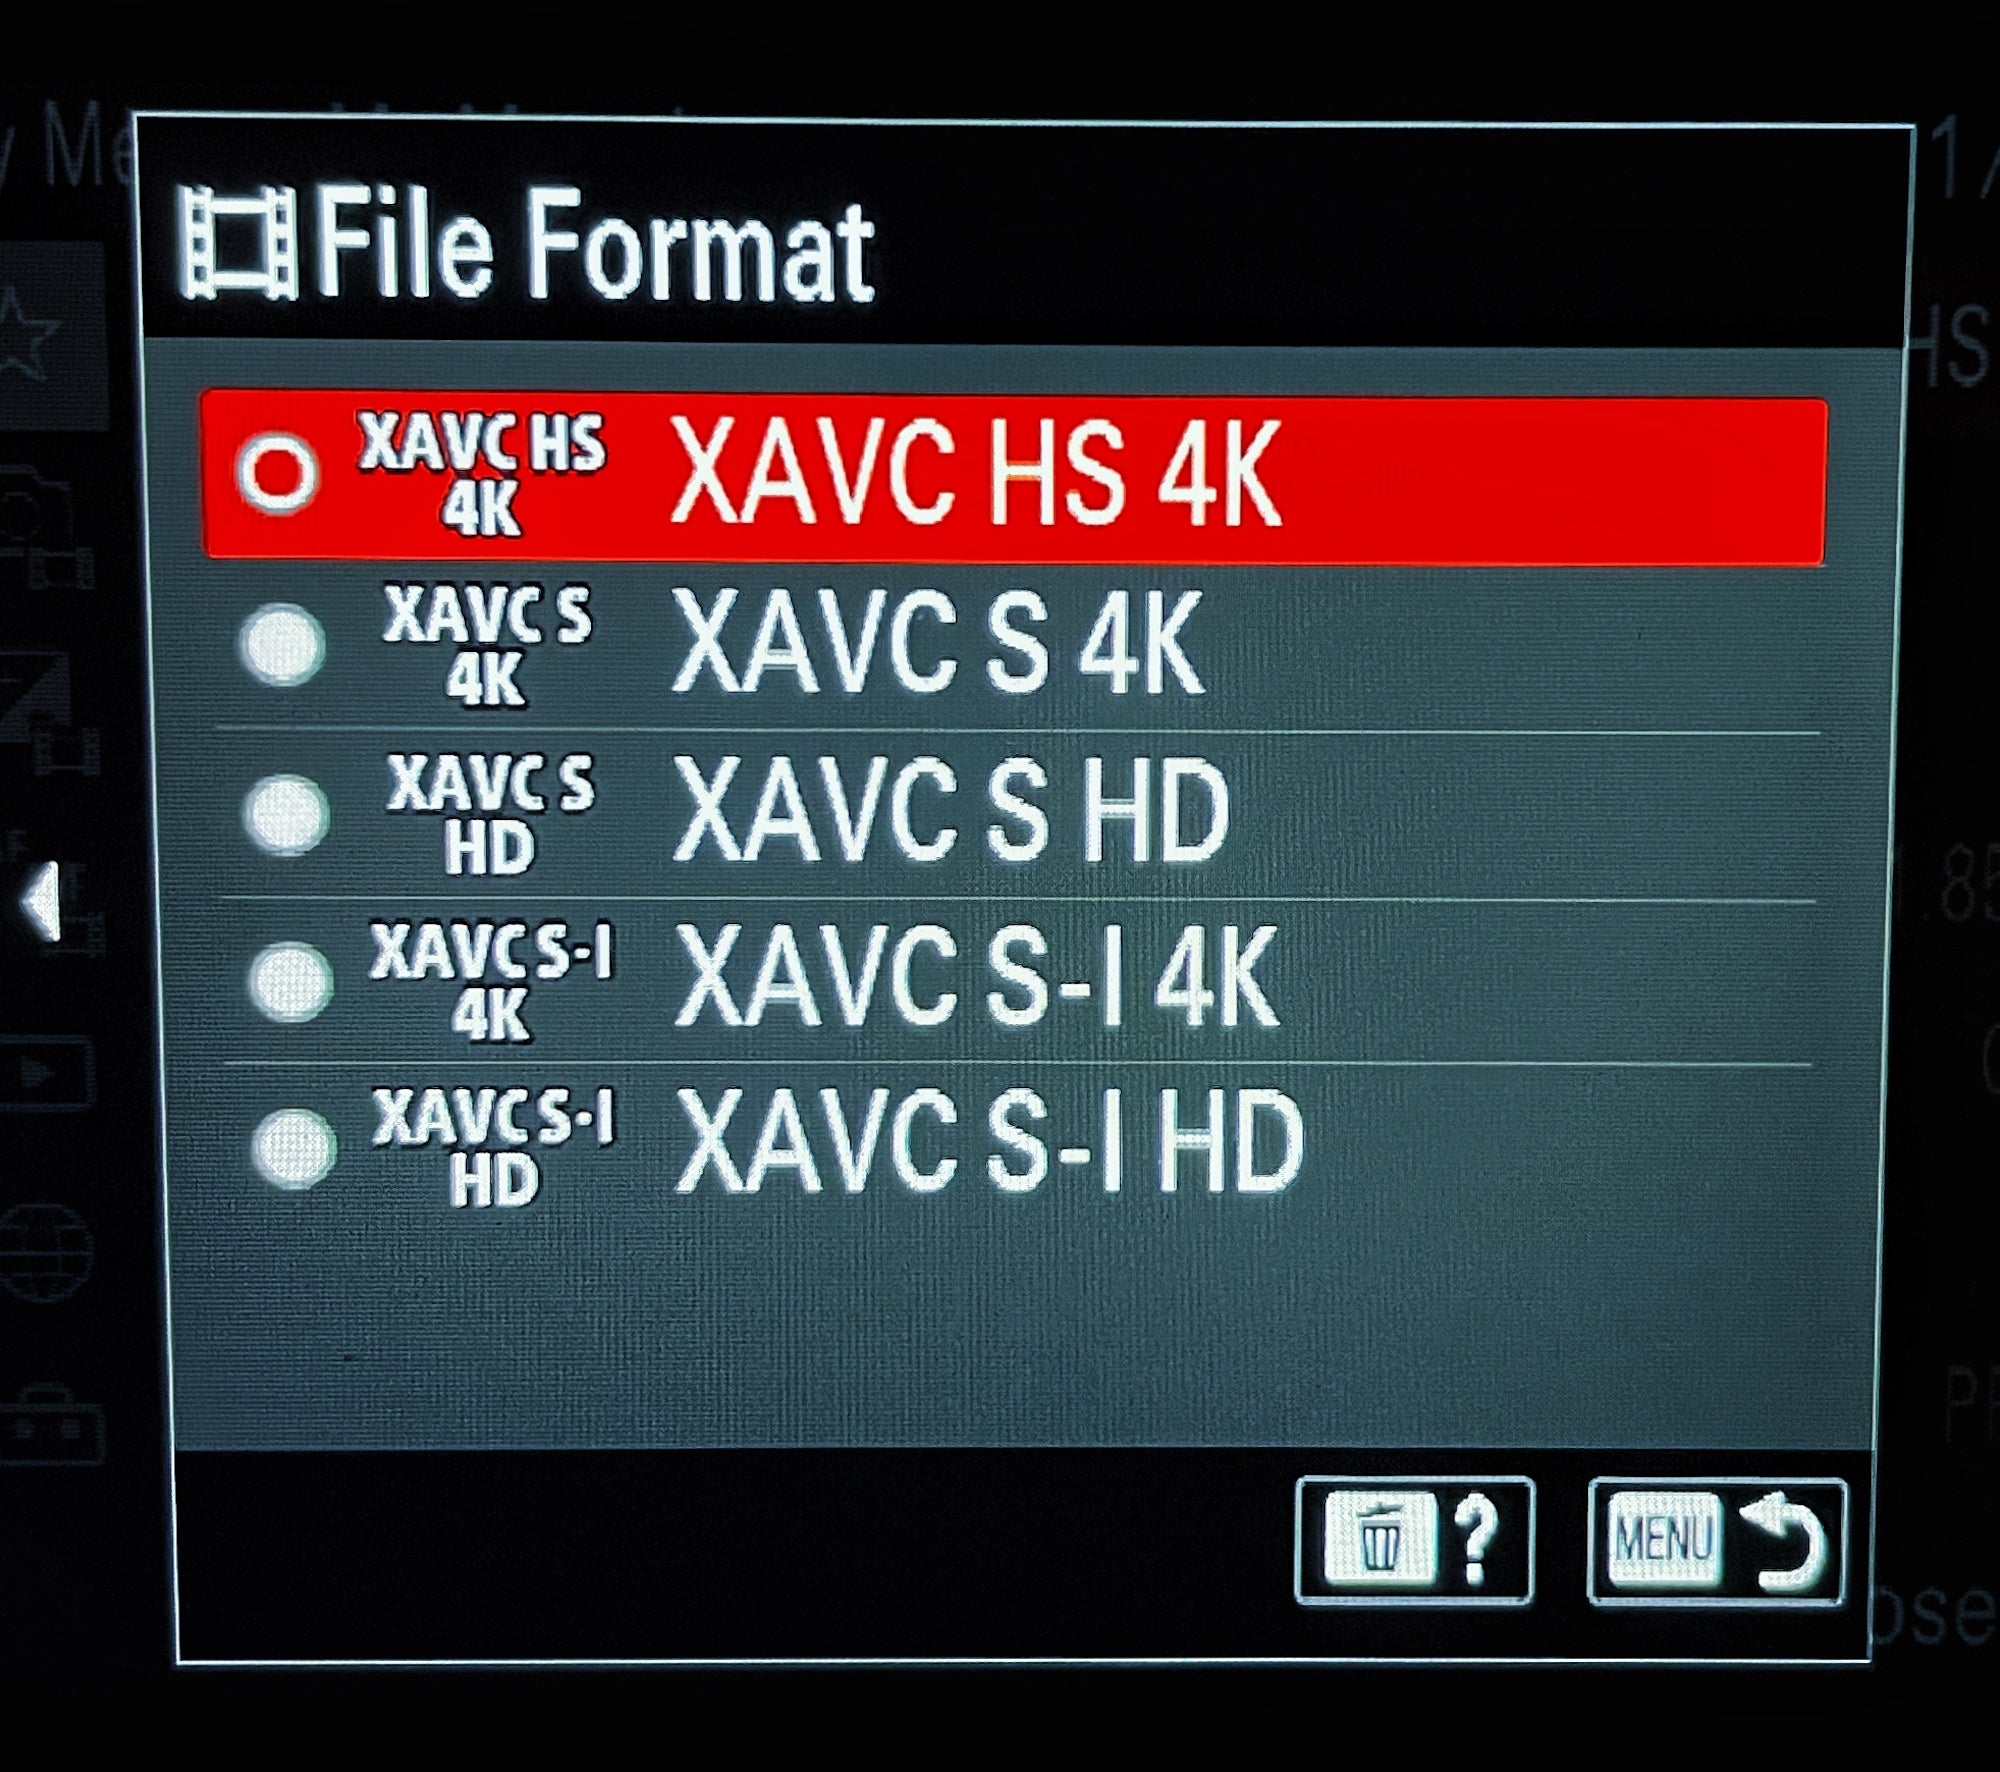
The first thing D’Alia sets on his custom menu is the file format. For this, he says you have to ask yourself what you are shooting. “How big are you shooting? How much resolution? Are you doing something for the web? Are you doing something for high-end videos? Are you doing 4K? Are you doing full HD? That's the most important thing. If you’re going for cinematic, you want the highest quality. The Alpha 7S III has the XAVC S-I 4K which is like the best resolution that you can get. So I shoot 4K basically all the time. If you have the Alpha 1 you can go to 8K.”
3. Select Your Movie Settings
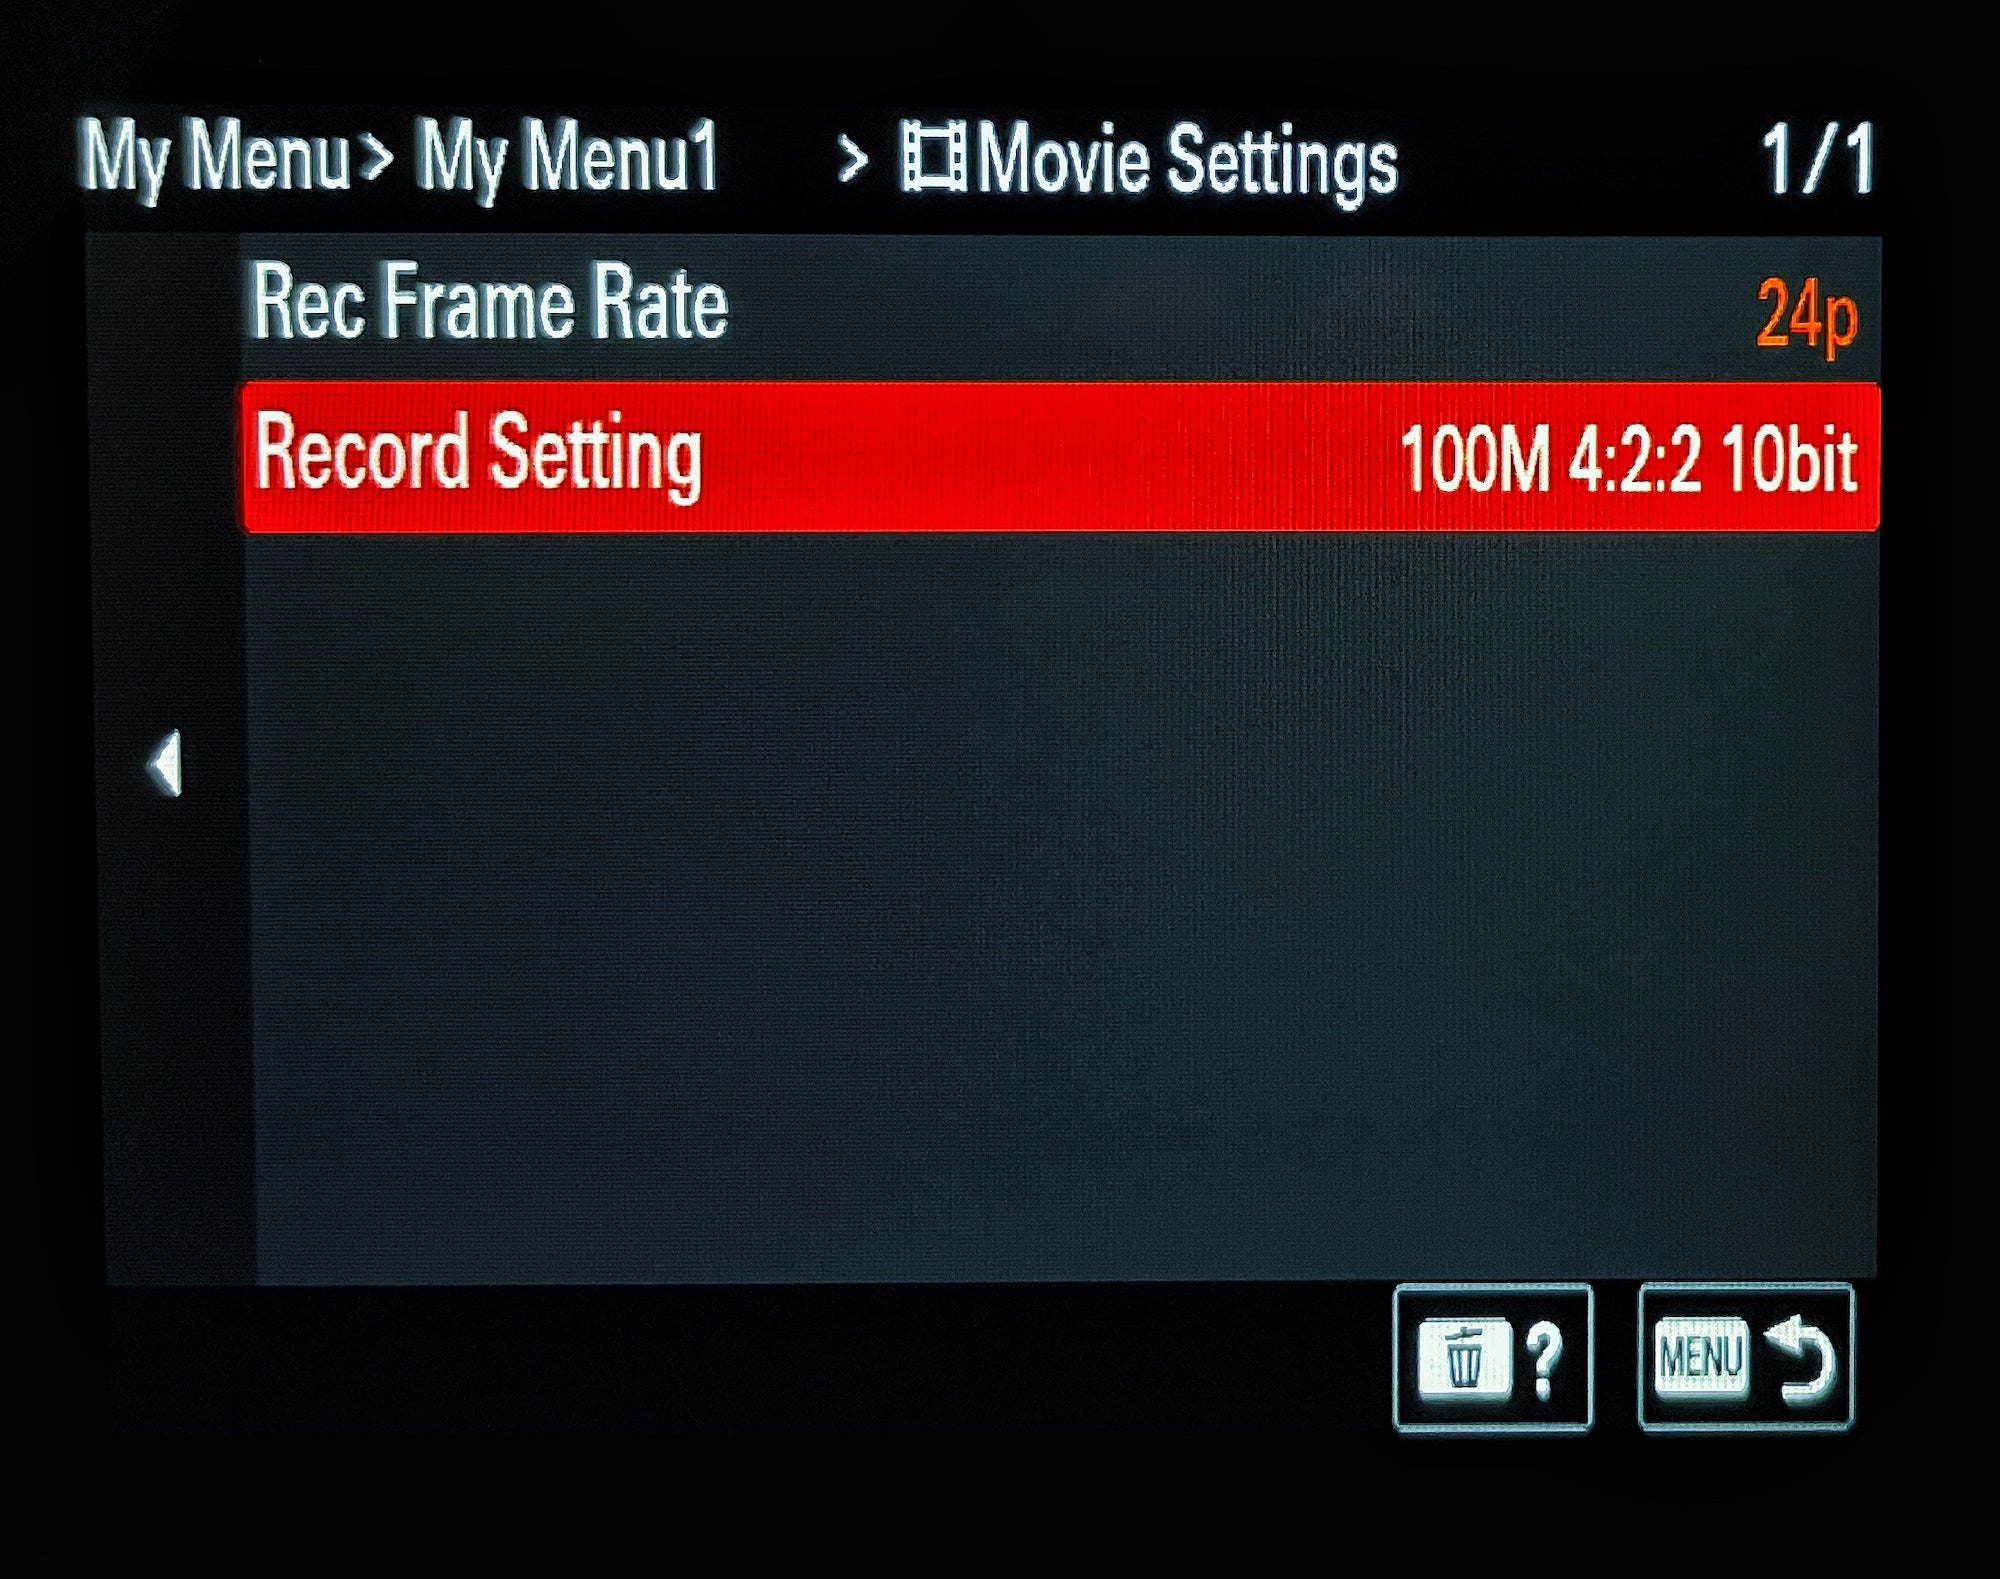
The second part of D’Alia’s custom menu for shooting video is his movie settings. This is where he has his recording frame rate and recording setting. For his cinematic style, he shoots 24p for his frame rate and has his recording setting at 100M 4:2:2 10-bit. “Many people shoot at frame rates of 30 or 60 because that's kind of like the broadcast standard TV, but if you're looking for a cinematic flow and cinematic style then, you have to shoot for 24, so that’s what I do most of the time.”
He continues, “And gladly on the Alpha 7S III the 10-bit 4:2:2 is on the same movie settings menu and it’s improved the quality of video a lot compared to older cameras and now all the newer ones have it. Shooting 10-bit 4:2:2 is basically going to give you a lot more information in your color and then it's going to allow you to play more in post production with the color and get a better definition. This is a very important aspect when shooting cinematic video.”
4. Set Your Picture Profile
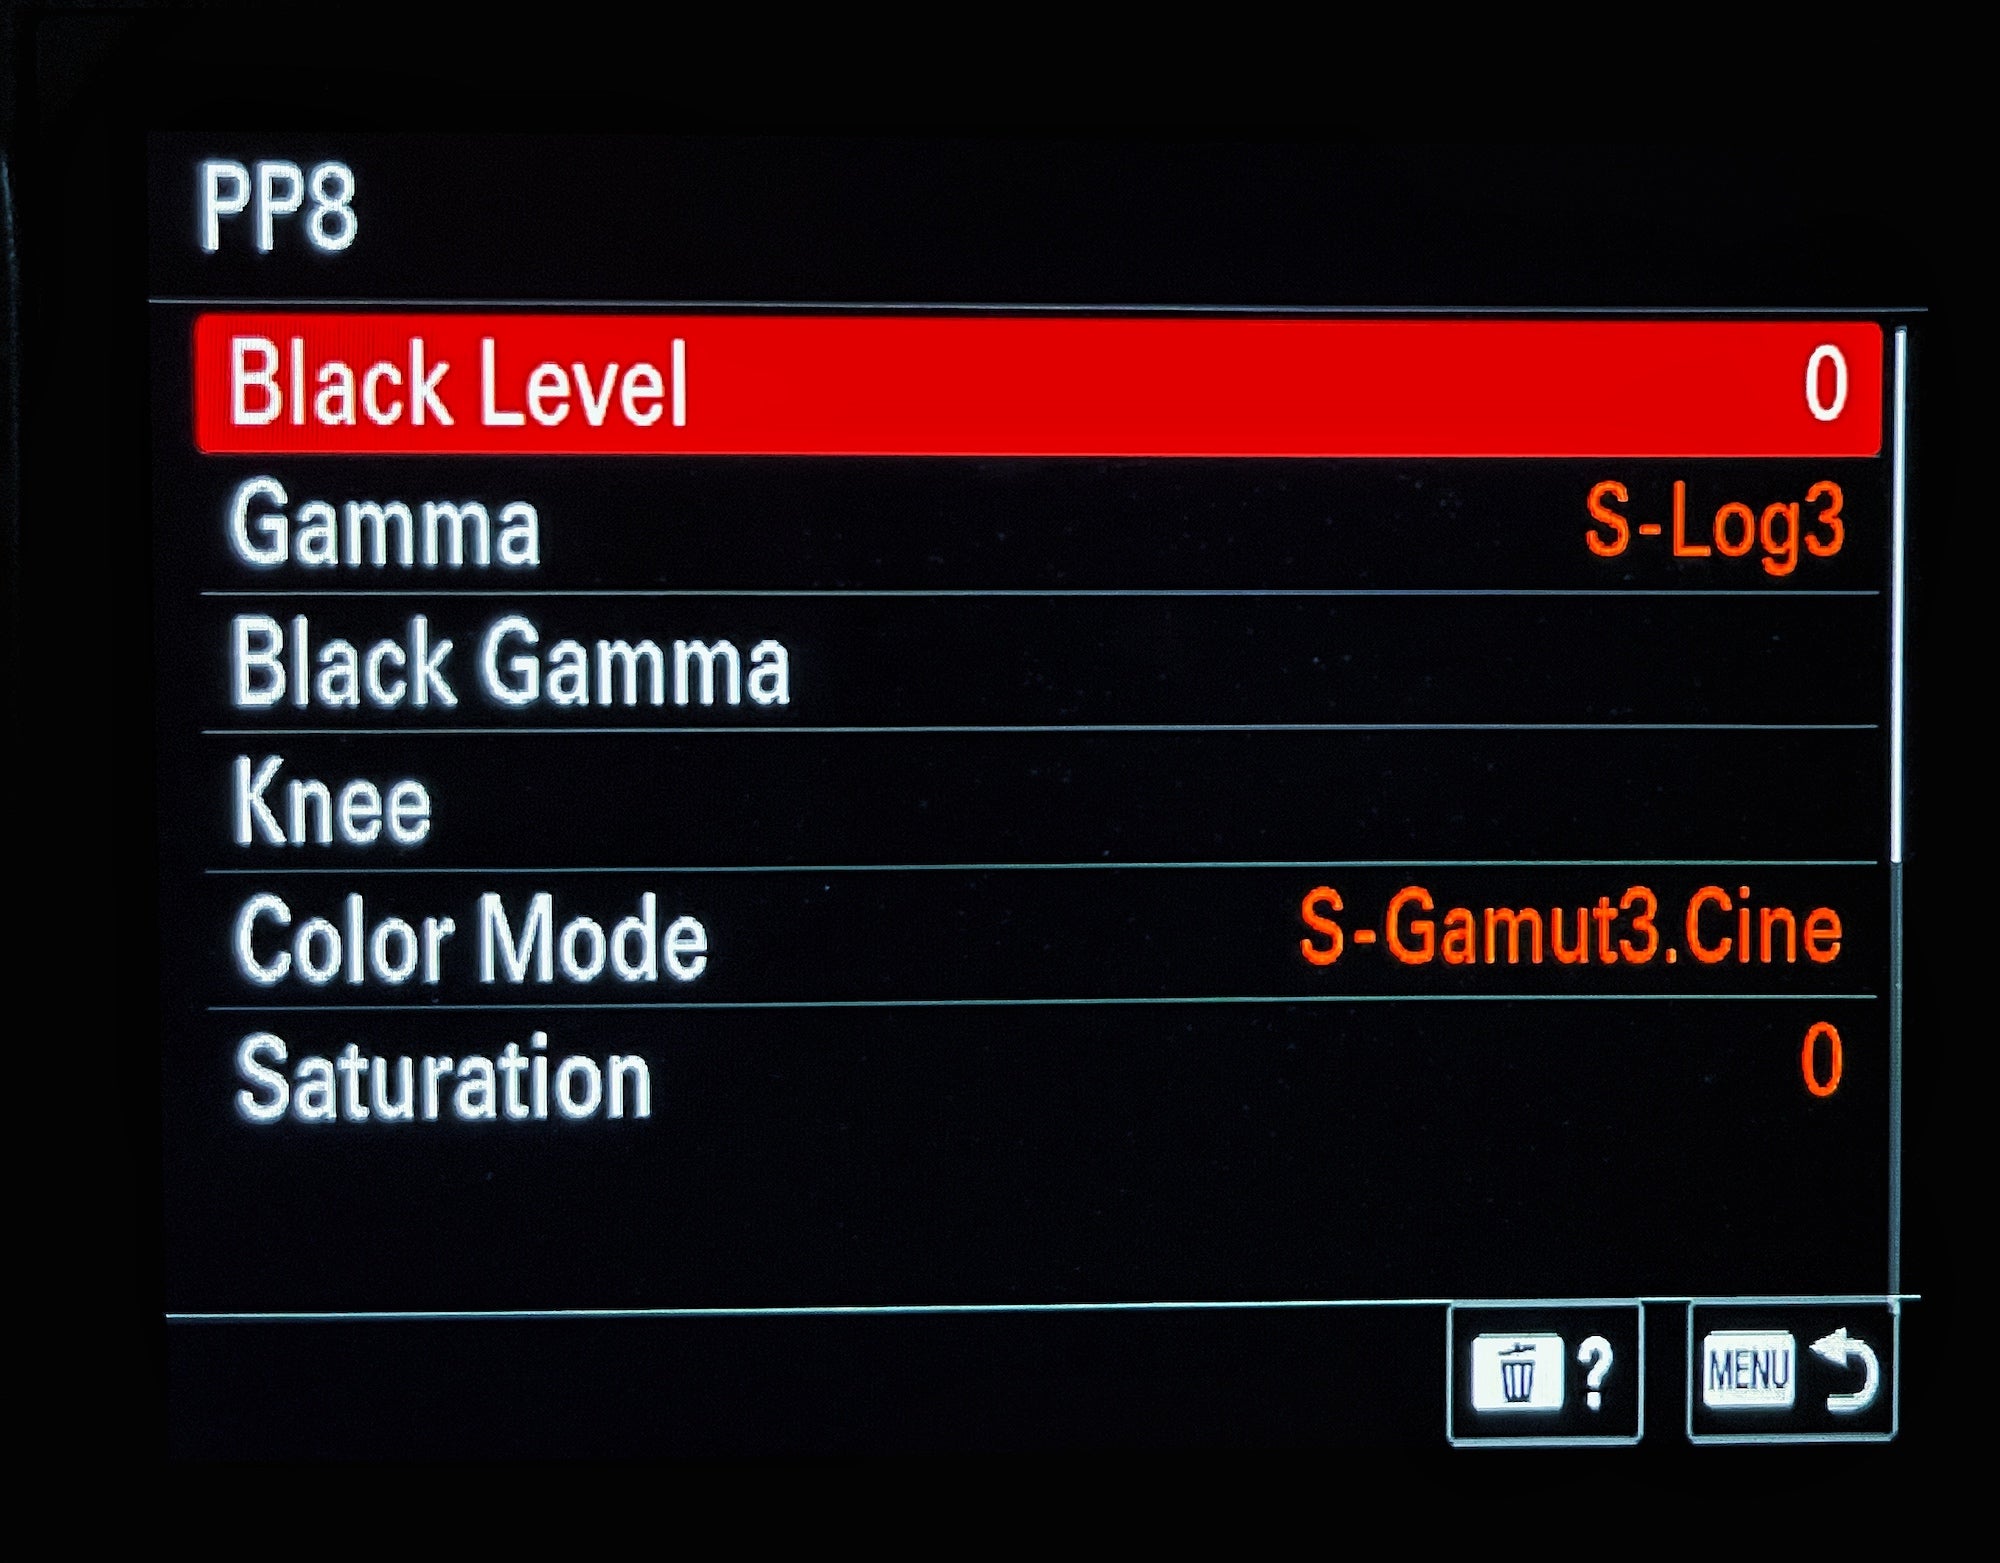
The third setting he customizes on his menu is one he says is also important for cinematic style – the picture profile. “The picture profile is what gives the actual tone and color and dynamic range to your video,” he explains. “And all of these beautiful new cameras have S-log. It is not just dynamic range, but it’s really going to give the final flavor to your video. If we’re talking about cinematic video, this is what most people think about. Cinematic is the flavor, the color palette. So since I’ve been using this camera I use a lot of the S-log and especially with the Alpha 7S III, I use the S-log3 Gamma and S-Gamut3.Cine which is the color mode.”
He continues, “This particular picture profile and color profile is going to give me an amazing dynamic range so I can play with the highlights and the shadows. But what I especially love about it is that I can crank the blacks and play with the warm tones or the blue and make it my own, make the actual image something that I like that has the flavor that I want. So if 10 people shoot with this color profile they can basically have 10 totally different results. And that's what really gives that cinematic vibe to your work.”
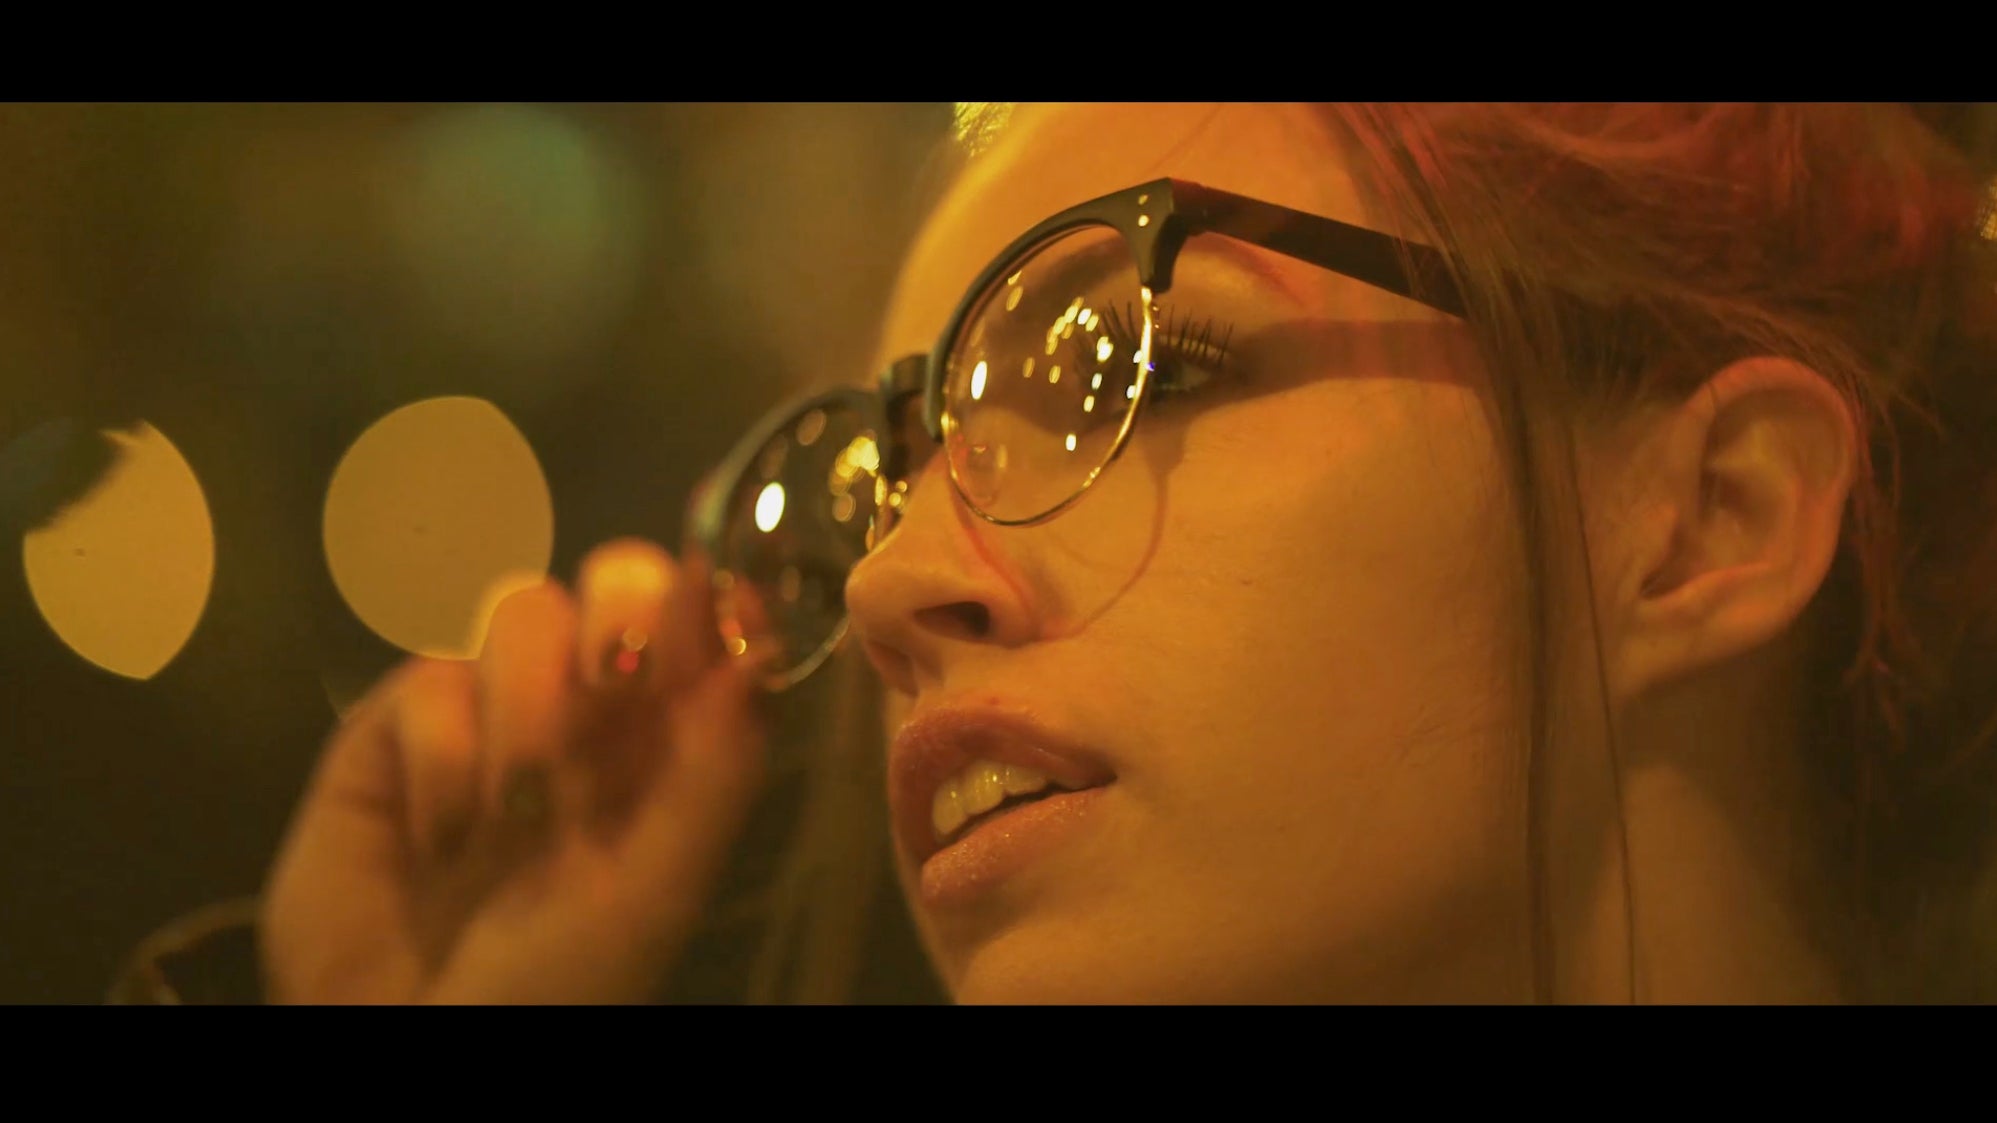
Photo from Sal D'Alia's video. Sony Alpha 7S III.
5. Picture Profile For Projects With A Quick Turnaround
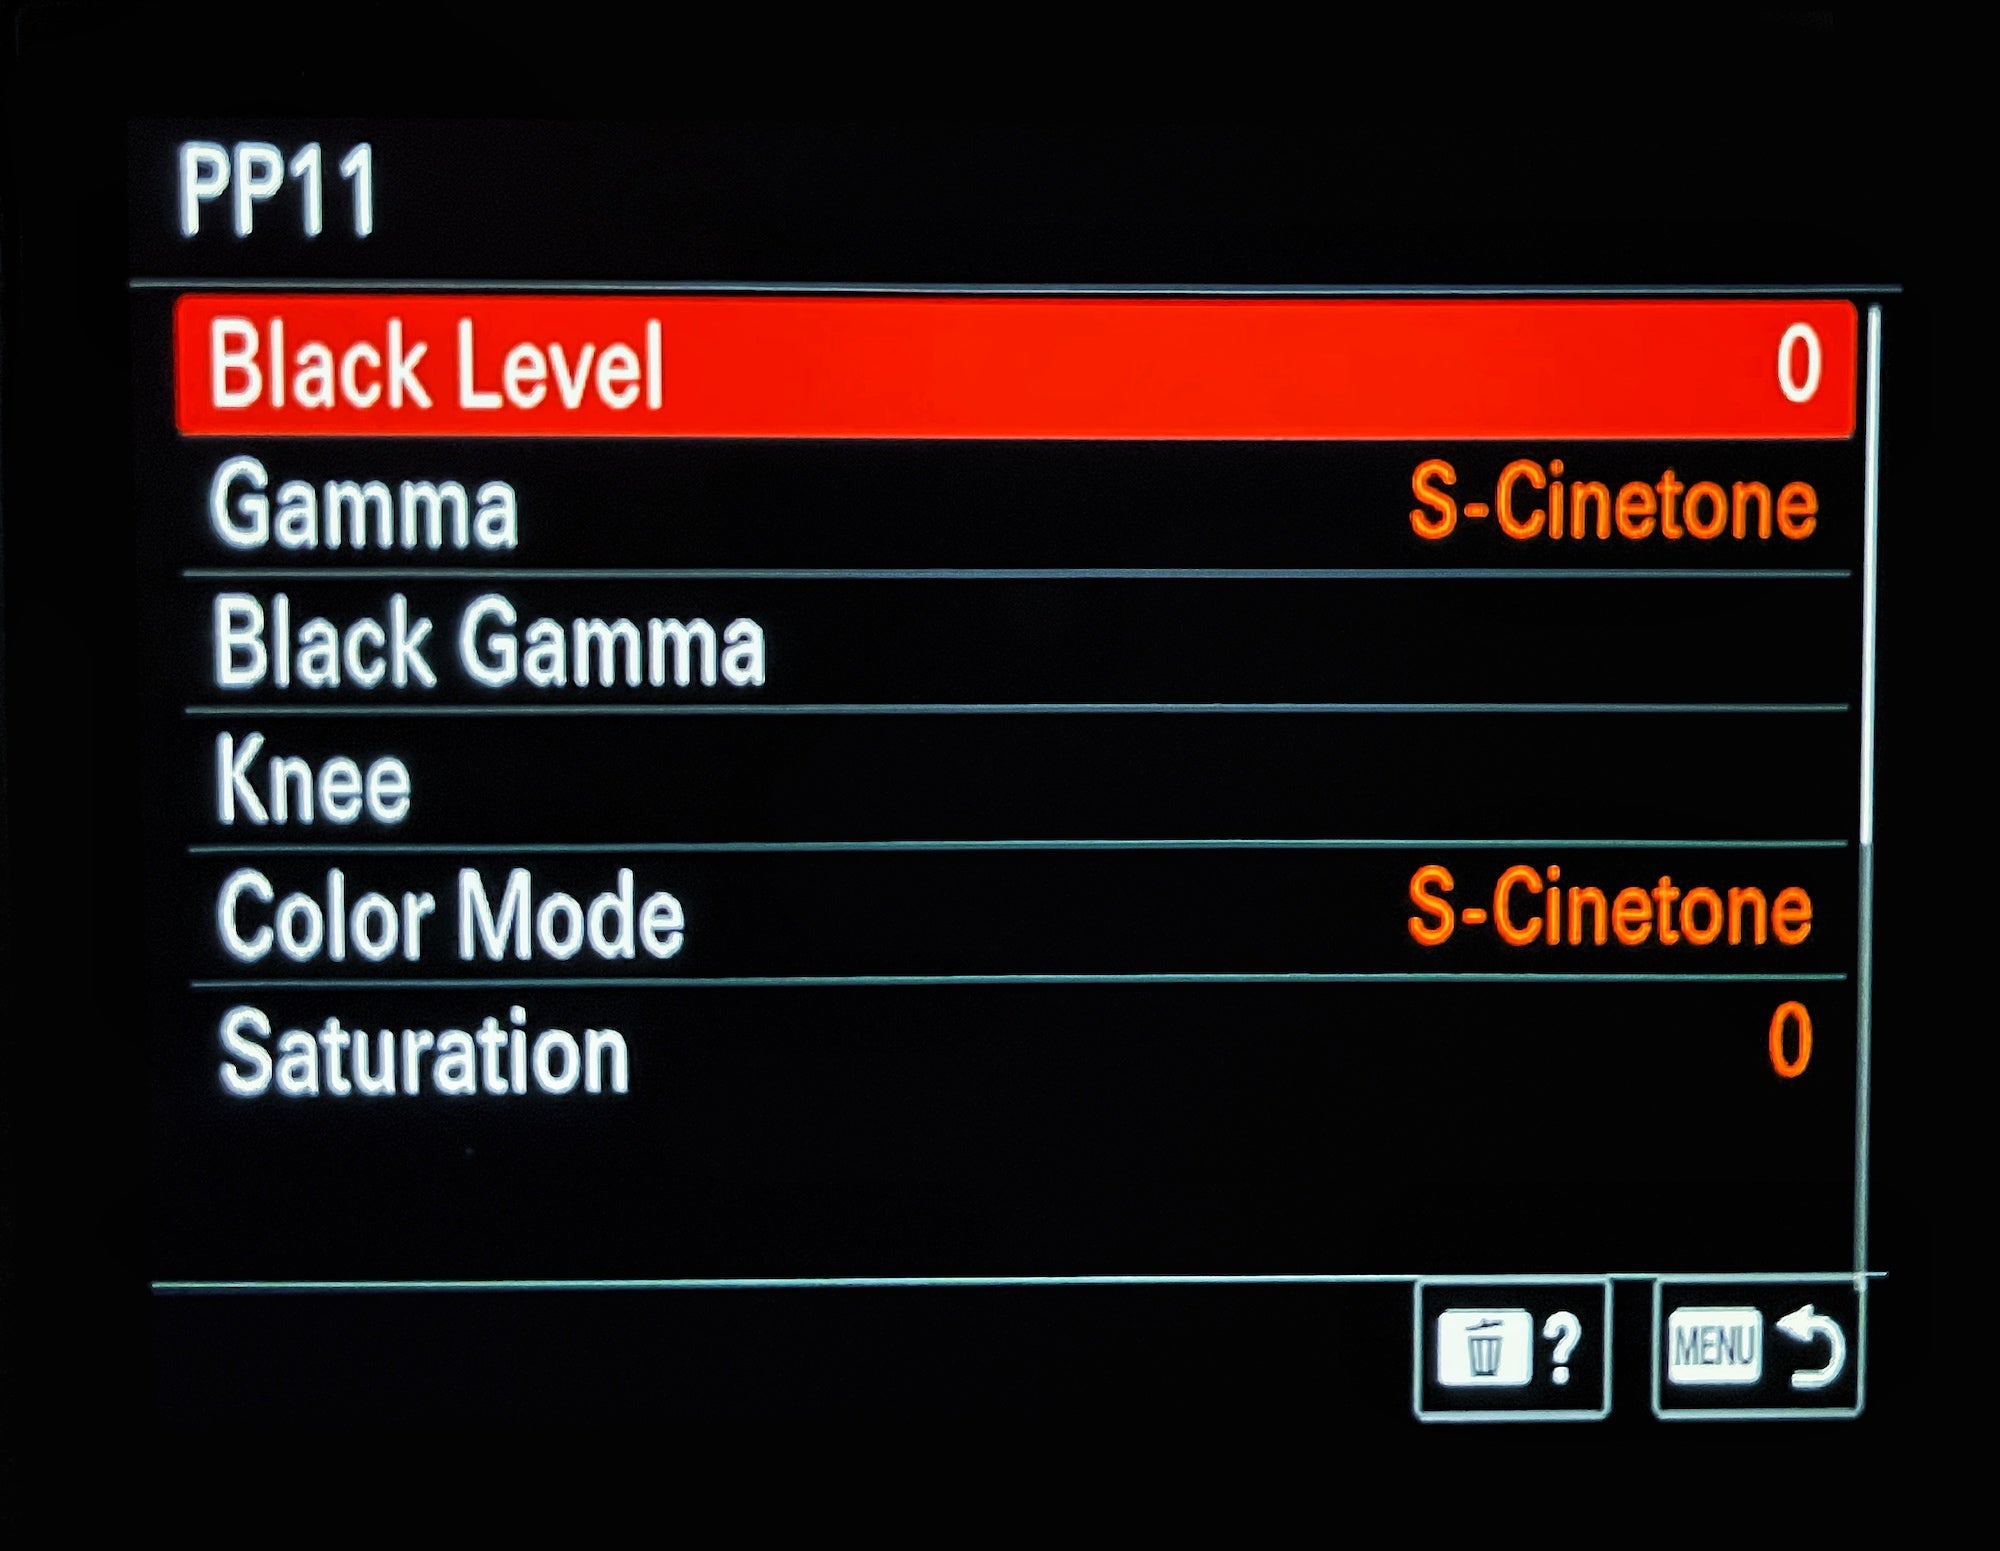
D’Alia has a different setting he uses if he’s on a time crunch to deliver a completed video. “Let's say I’m shooting a job for a client and I have to basically edit and deliver within a few hours or within a day and maybe I don't have the time to do color correction,” he explains, “I use the new S-Cinetone profile that Sony implemented in some of the cameras. The S-Cinetone basically is already locked and applied to your profile so no need to do color correction, it's just already a beautiful color. That's basically the Sony color so it's going to have a very great skin tone and everything that's already good to go. So whatever you see on the back of your camera on your viewfinder, that's what you get. So that’s what you can do if you’re on a time constraint, otherwise for strong cinematic video use the S-log3 for sure.”
6. Use The Gamma Display Assist Display Option
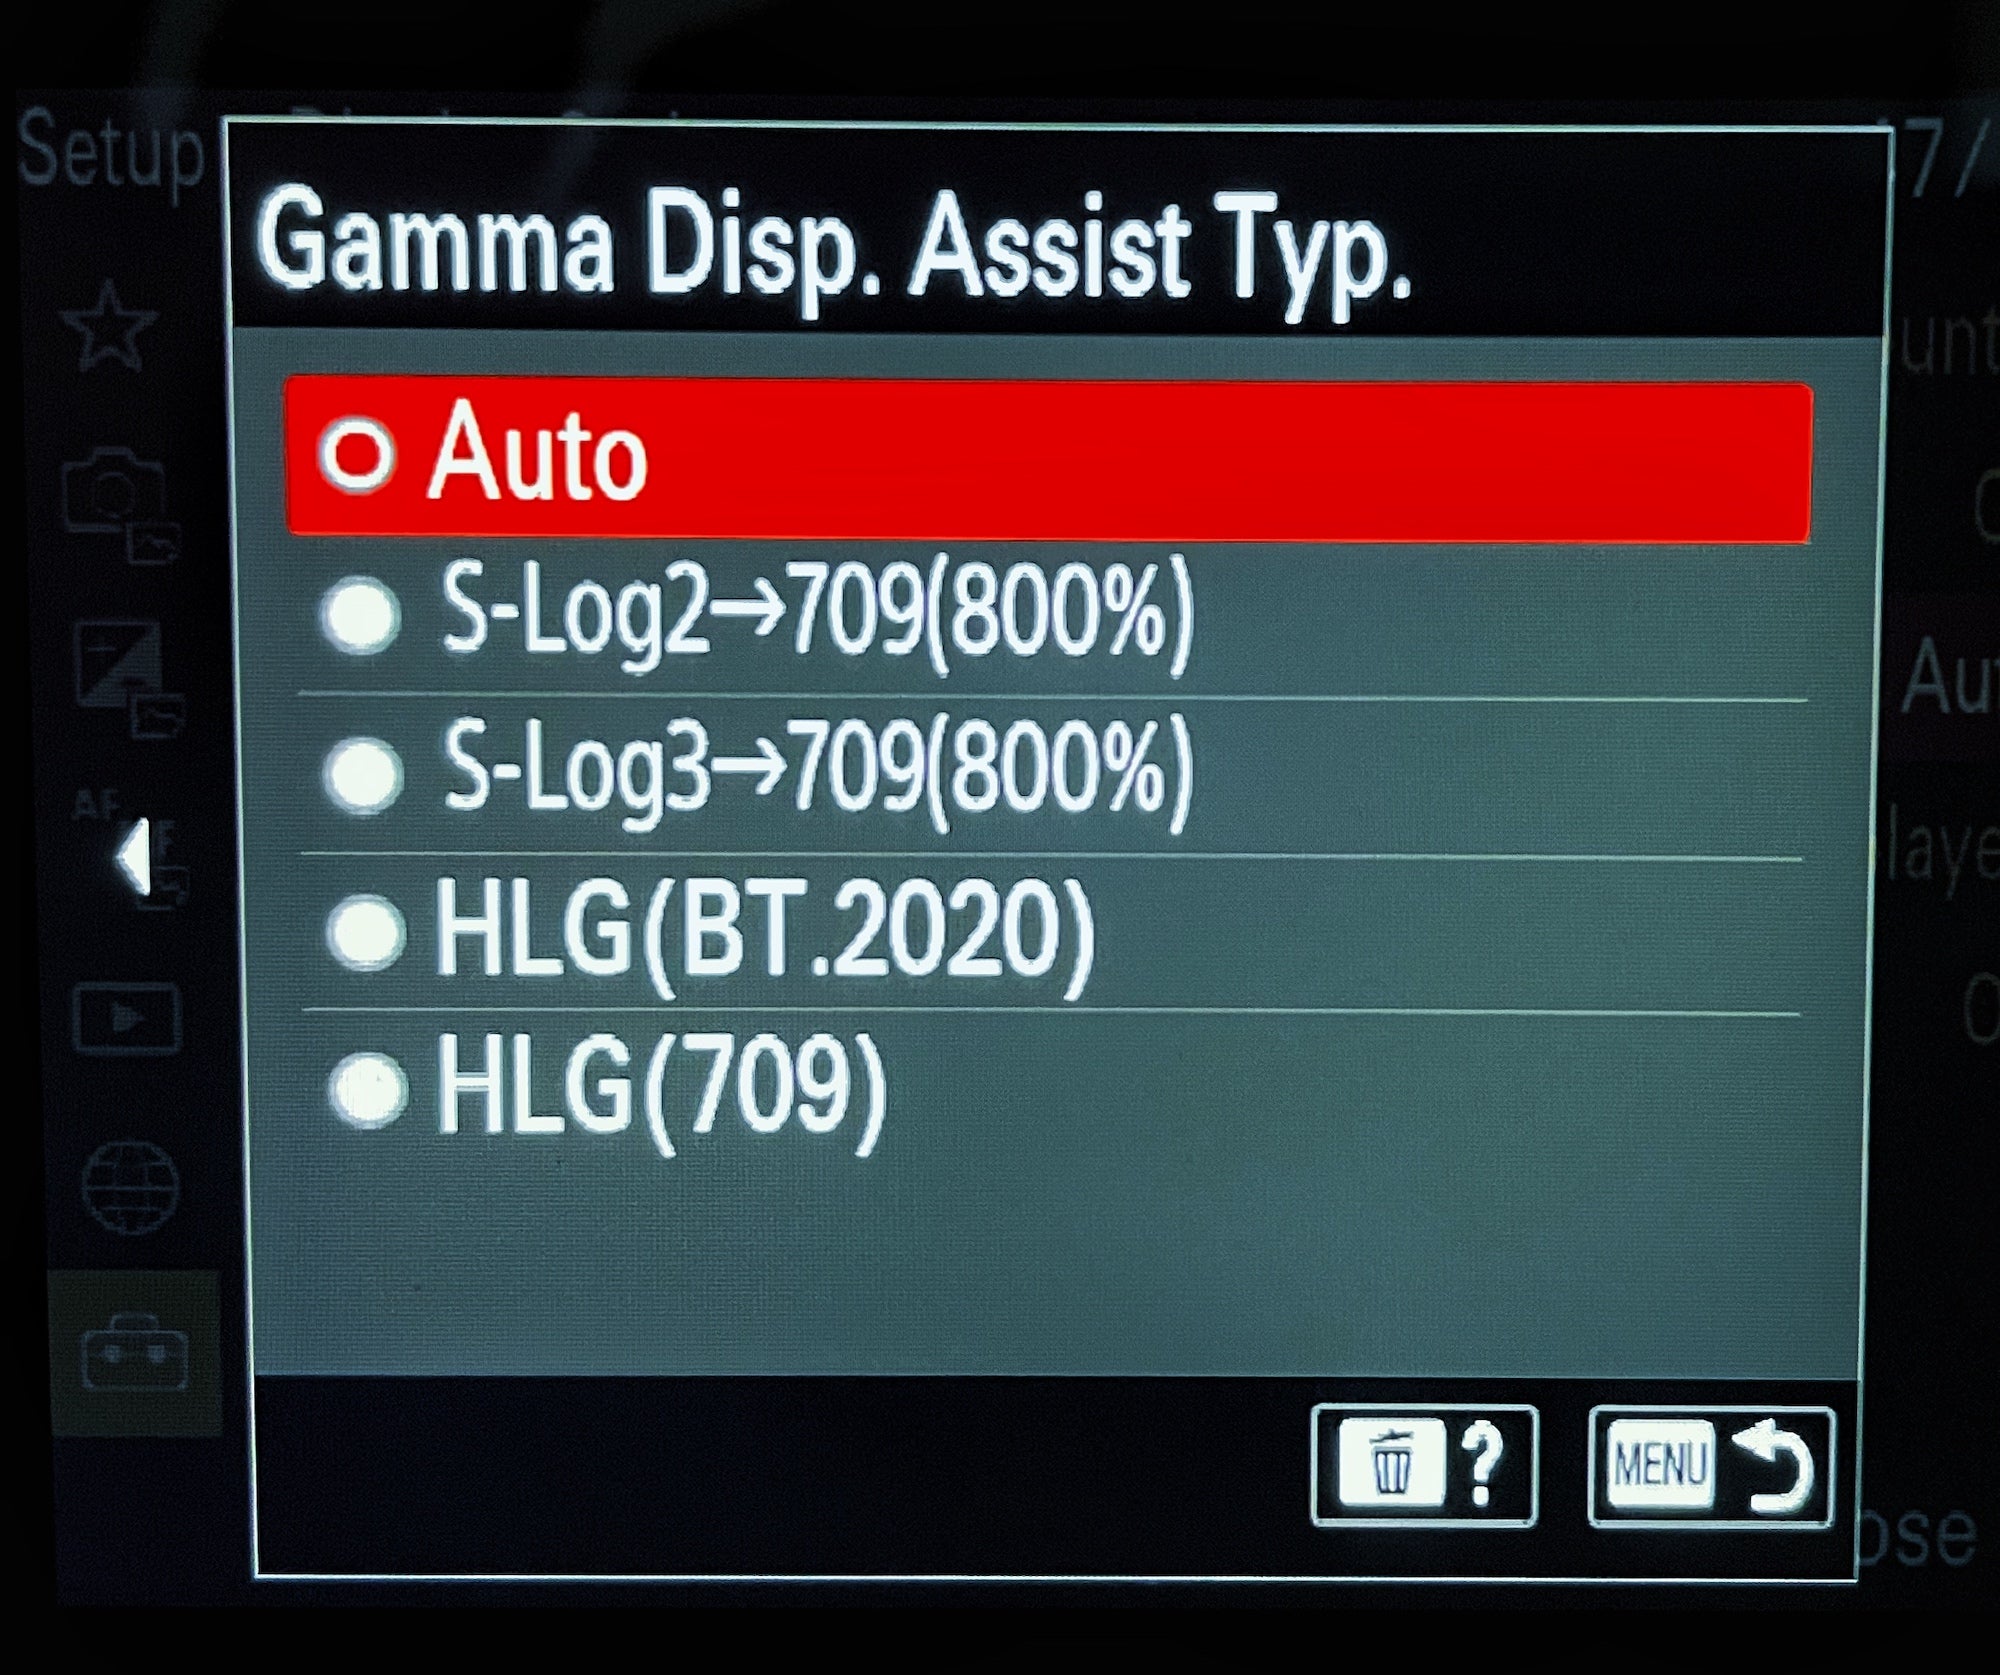
Another setting that D’Alia says many people don’t know about that he likes to use is called Gamma Display Assist Typ. “In the menu there is a display option called Gamma Display Assist Typ., he explains. “Not many people know but that’s basically a 307 lut. By turning that on, if you’re using S-log3, it’s going to give you that color preview on the back of your camera.”
He continues, “It’s going to record S-log, so it will record that flat image that you can color correct in post-production. But what you’re going to see on the back of the camera is actually going to have color and contrast. It's a useful tool to have that Gamma Display Assist on so you can actually see the colors and not be scared of overexposing, underexposing or anything like that.”
7. Add Aspect Marker Under Marker Display
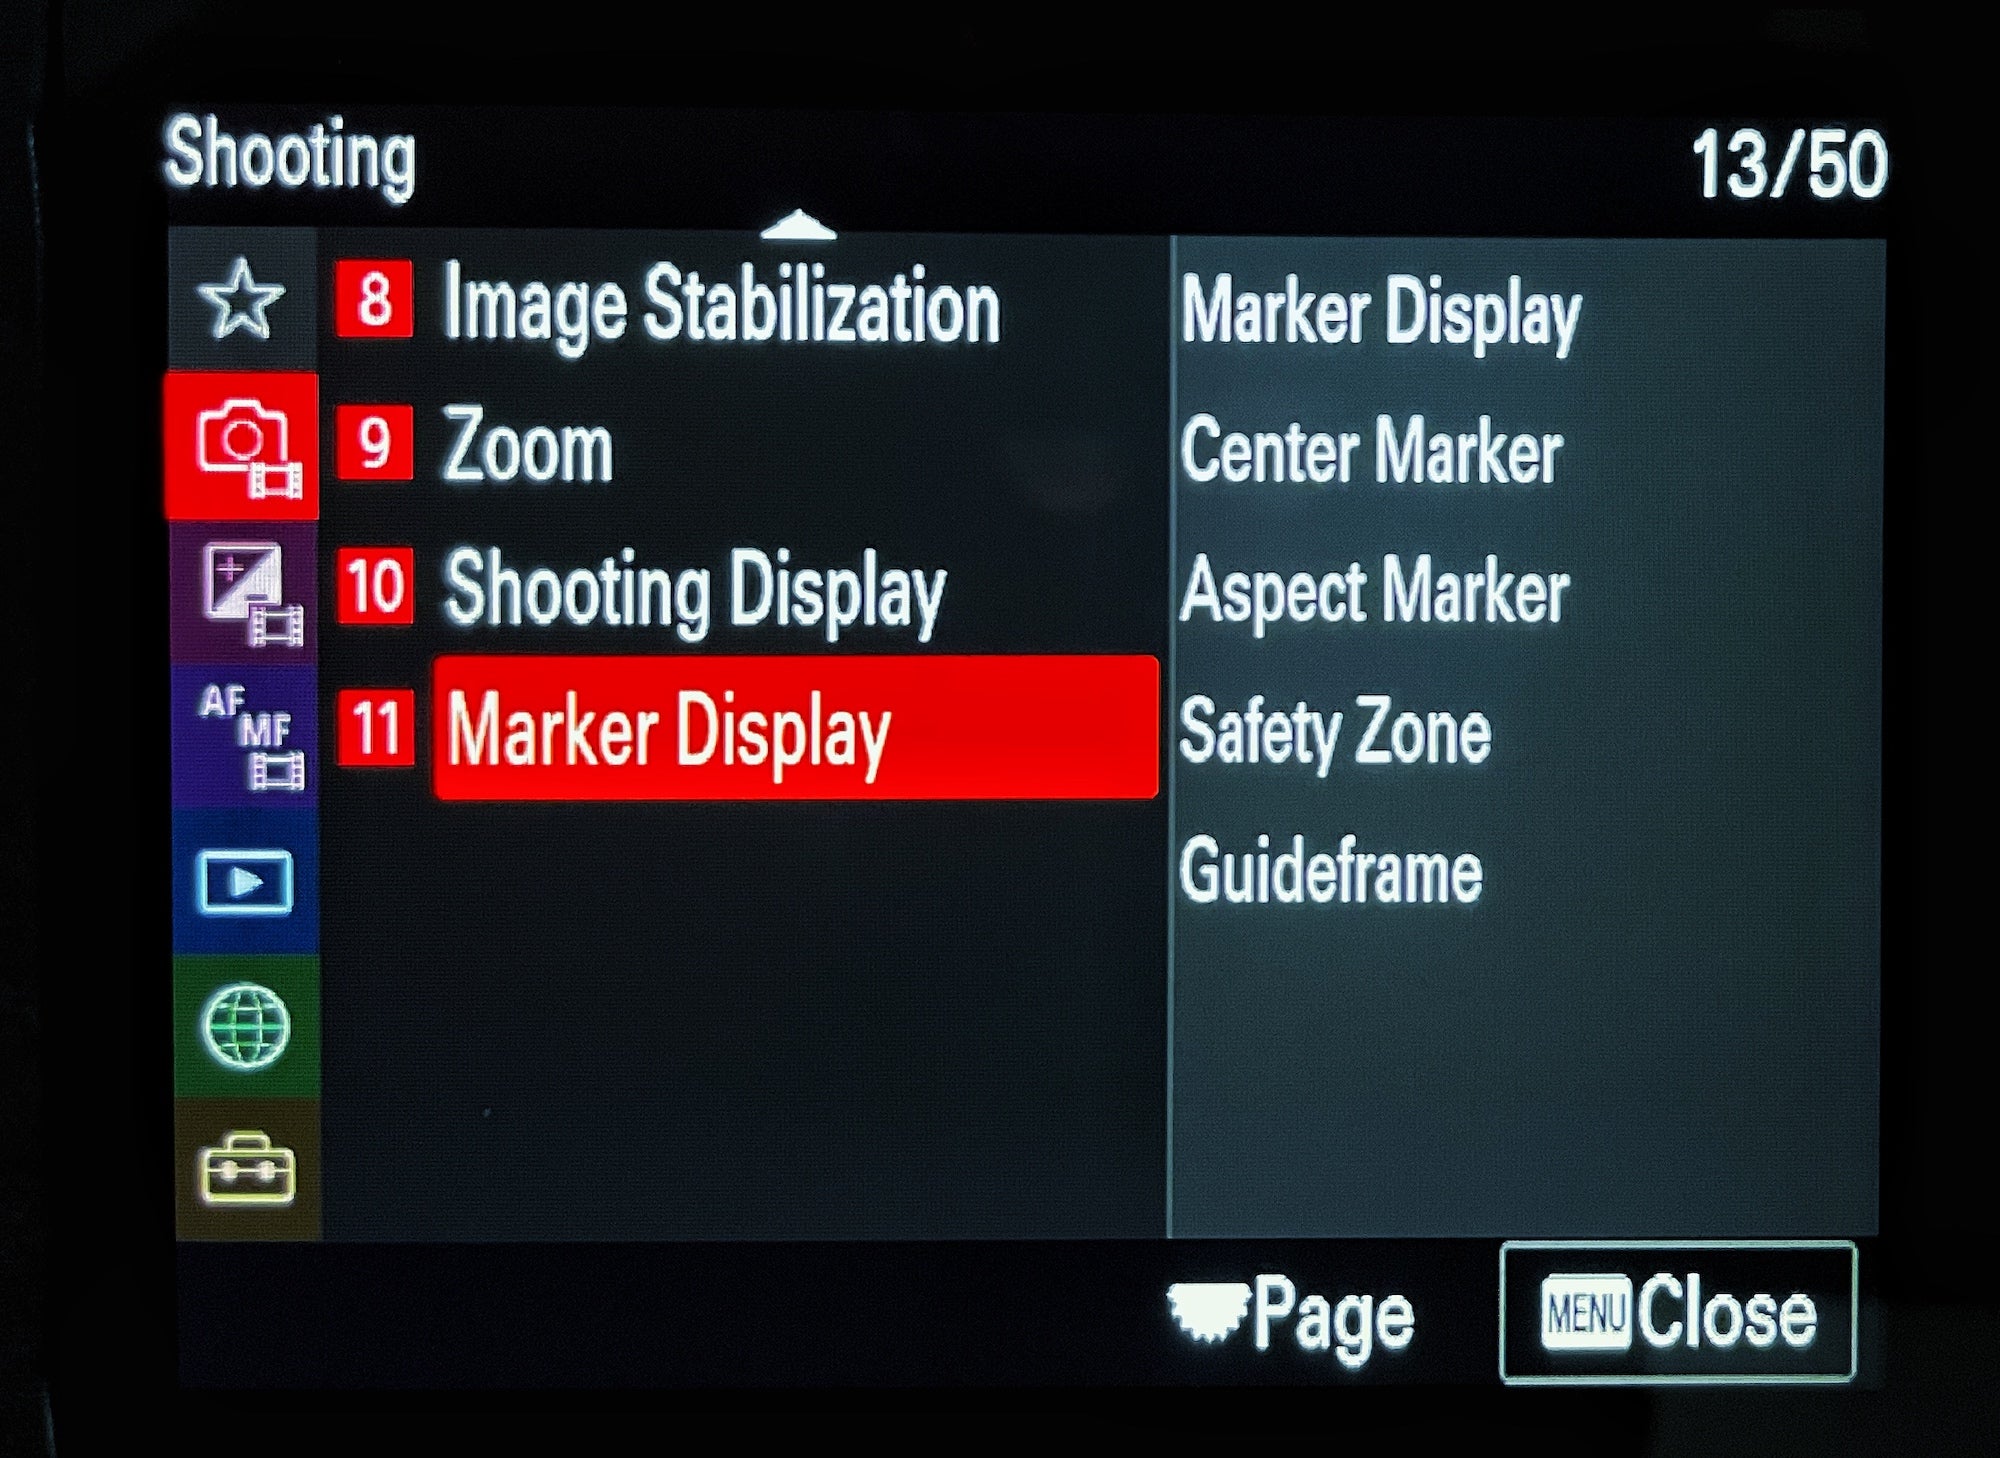
Another important setting for D’Alia is the Aspect Marker under Marker Display in his menu settings. This will bring up lines on your screen to tell you where the frame of your video will be. “For example I shoot a lot in a more panoramic format,” explains D’Alia, “so instead of the regular 16x9 that the camera has, I like to shoot more panoramic. It shows black bars on the top and bottom to give that more cinematic look. It’s going to look closer to a cinema format that is usually 2:35:1 or something more compressed and landscape. Using the Aspect Marker I can have white lines on the screen that will give me reference to what exactly I’m shooting.”
Stay tuned to AlphaUniverse.com for bonus cinematic video tips from Sal D’Alia. See more of his work on his Alpha Universe Profile and on Instagram @timbuz.

