In December I wrapped up a busy 2021 photo workshop schedule with my Yosemite Winter Moon workshop. Always hopeful for snow when scheduling a Yosemite winter workshop, I timed this workshop for the December full moon—specifically for the opportunity to photograph the moon rising between El Capitan and Half Dome on our final night. The alignment for this magnificent spectacle only happens a couple of times each year, and I never tire of seeing (and sharing) it.
Get ready for the spring & summer full moons. Sony Artisan Of Imagery Gary Hart shares how he photographed this full moon rising in Yosemite NP.

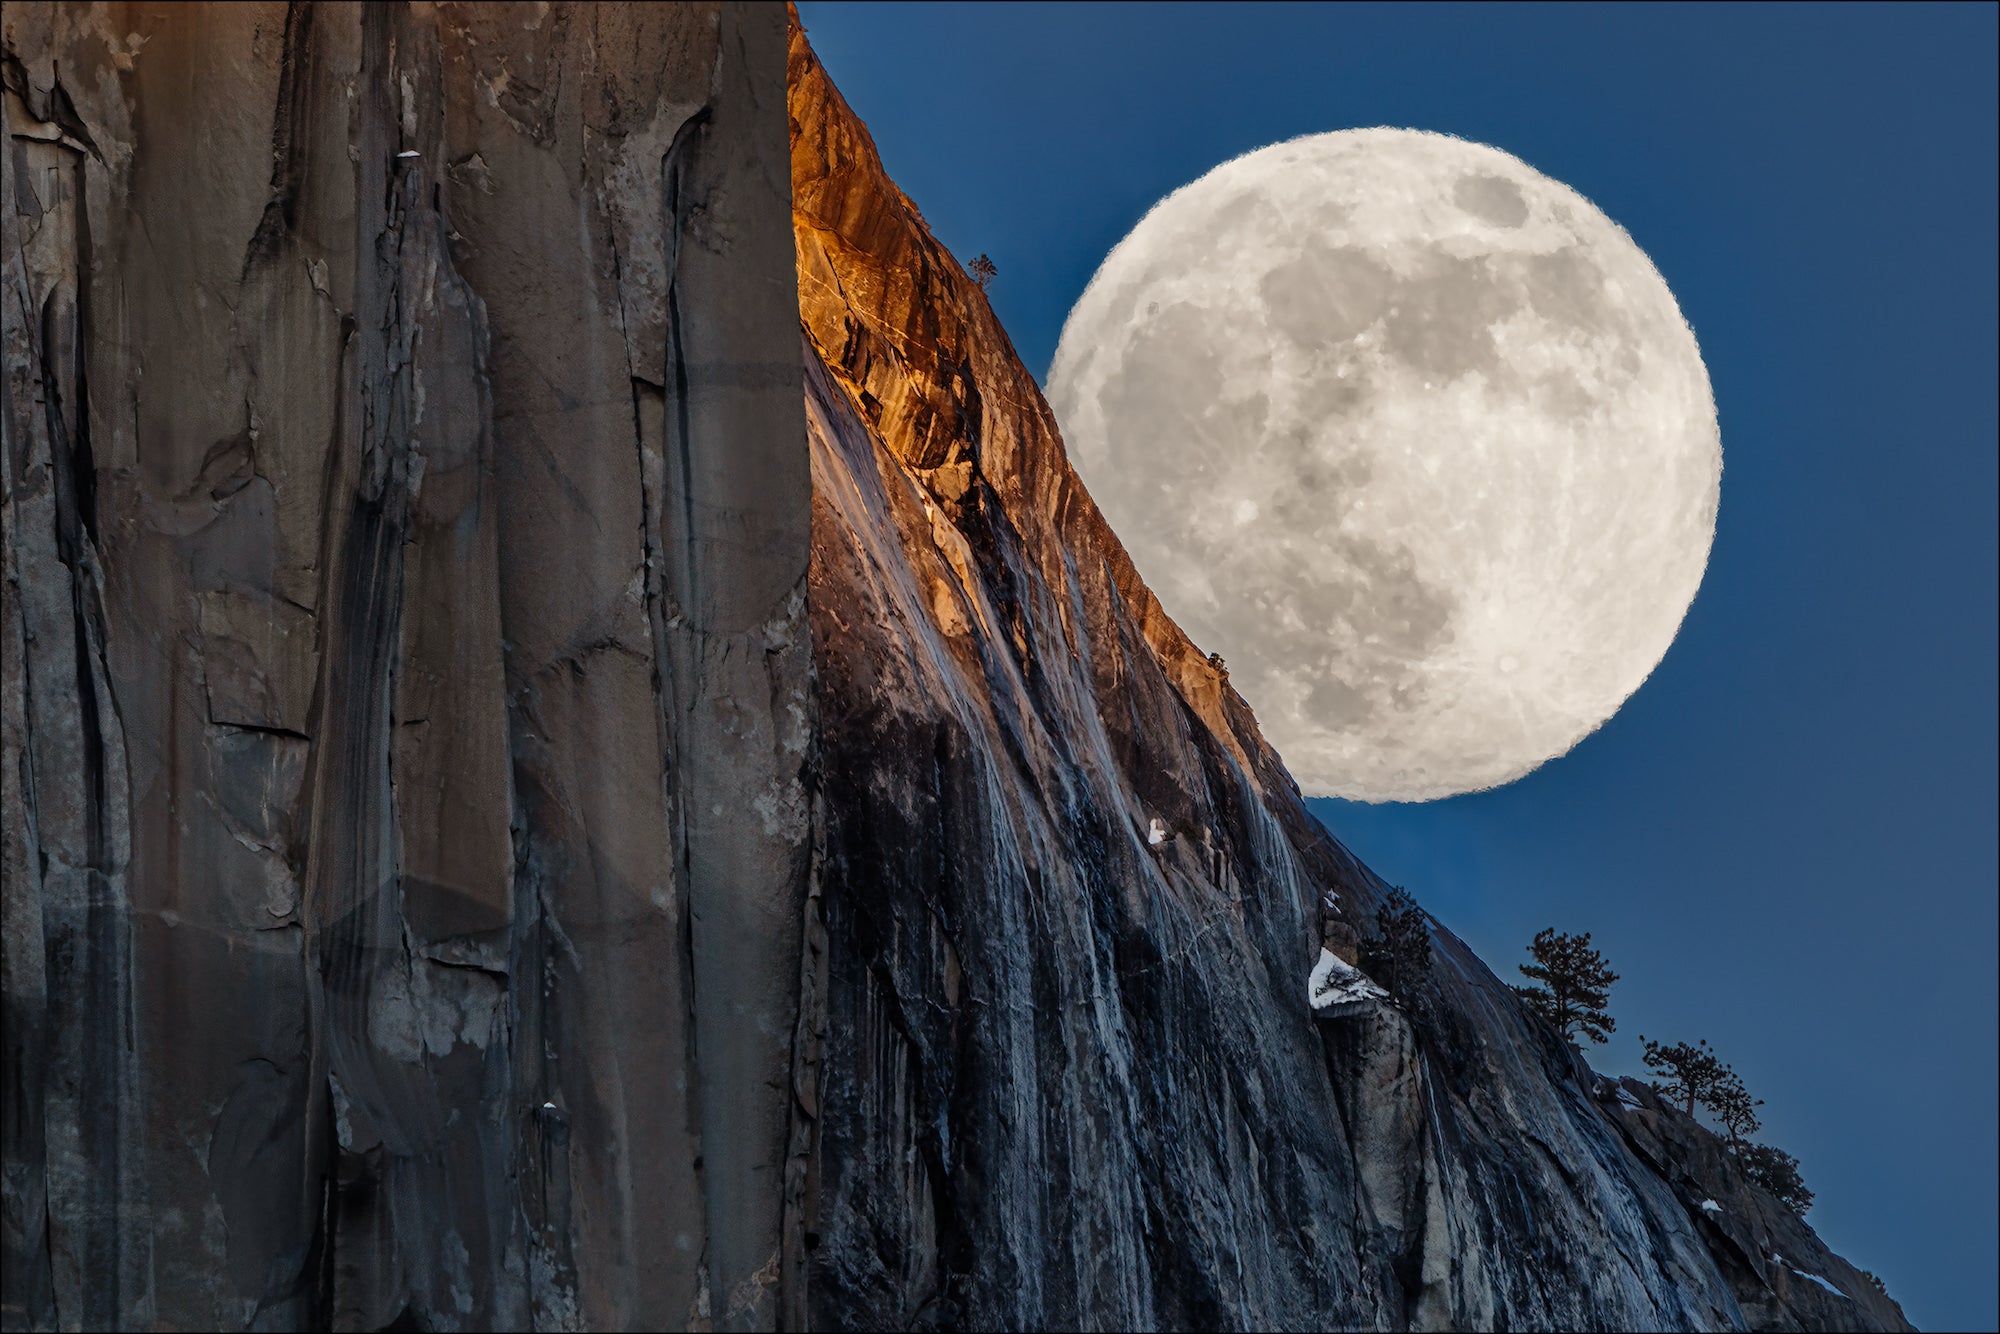
Photo by Gary Hart. Sony Alpha 7R IV. Sony 200-600mm f/5.6-6.3 G + 2X TC. 1/80-sec., f/16, ISO 400
Much to everyone’s delight, a storm blanketed Yosemite Valley in snow on the workshop’s first day. But persistent clouds, while great for the photography, put our moonrise plans in doubt until they cleared on the final day—we were in business.
Over the years I’ve photographed moonrises all over Yosemite, but Tunnel View is probably my favorite spot. Not only do wide compositions from Tunnel View allow me use the moon to accent a veritable who’s who of Yosemite icons, both El Capitan and Half Dome are distant enough to be included with the moon in telephoto compositions.
Tunnel View is Yosemite’s most popular vista, and while there’s quite a bit of room here, the parking isn’t infinite. Another concern here is the handful of towering evergreens that frame the scene and limit the unobstructed vantage points. To ensure that everyone got a good spot, I got my group up to Tunnel View about 90 minutes before sunset. Our early arrival also gave them time to set up, settle in, and get comfortable with the composition options well before the show started.
My general approach to all moonrises is telephoto when the moon appears, then gradually widening as the moon gains separation from the landscape. For the first telephotos, I’ll often add the Sony 2X Teleconverter to my Sony 200-600mm f/5.6-6.3 G lens to get a 1200mm focal length. When I really want to go crazy, I put my Sony Alpha 7R IV in APS-C mode for a whopping 1800mm effective focal length—with 27 megapixels of resolution. The downside of going this long is that it’s far too much magnification to include any more than a fraction of El Capitan or Half Dome, but the huge moon against distant detail is spectacular.
When crowds aren’t a problem, I’ll set up my two Alpha 7R IVs on two tripods, mounting one with a telephoto and the other with my Sony 24-105mm f/4 G. But this evening, given the number of people trying to squeeze in limited space, I used only one tripod and started with an Alpha 7R IV and the 200-600mm/Teleconverter combo (full frame, for 1200mm). Within easy arm’s reach was the other Alpha 7RIV, mounted with the Sony 24-105mm f/4 G.
As many times as I’ve photographed the moon rising over Yosemite Valley, the instant it slides into view still thrills me. This time the moon ascended from behind El Capitan just as the day’s last light kissed the granite—game on. From then until darkness was nearly complete, I clicked pretty much nonstop, with a few pauses just to appreciate the moment.
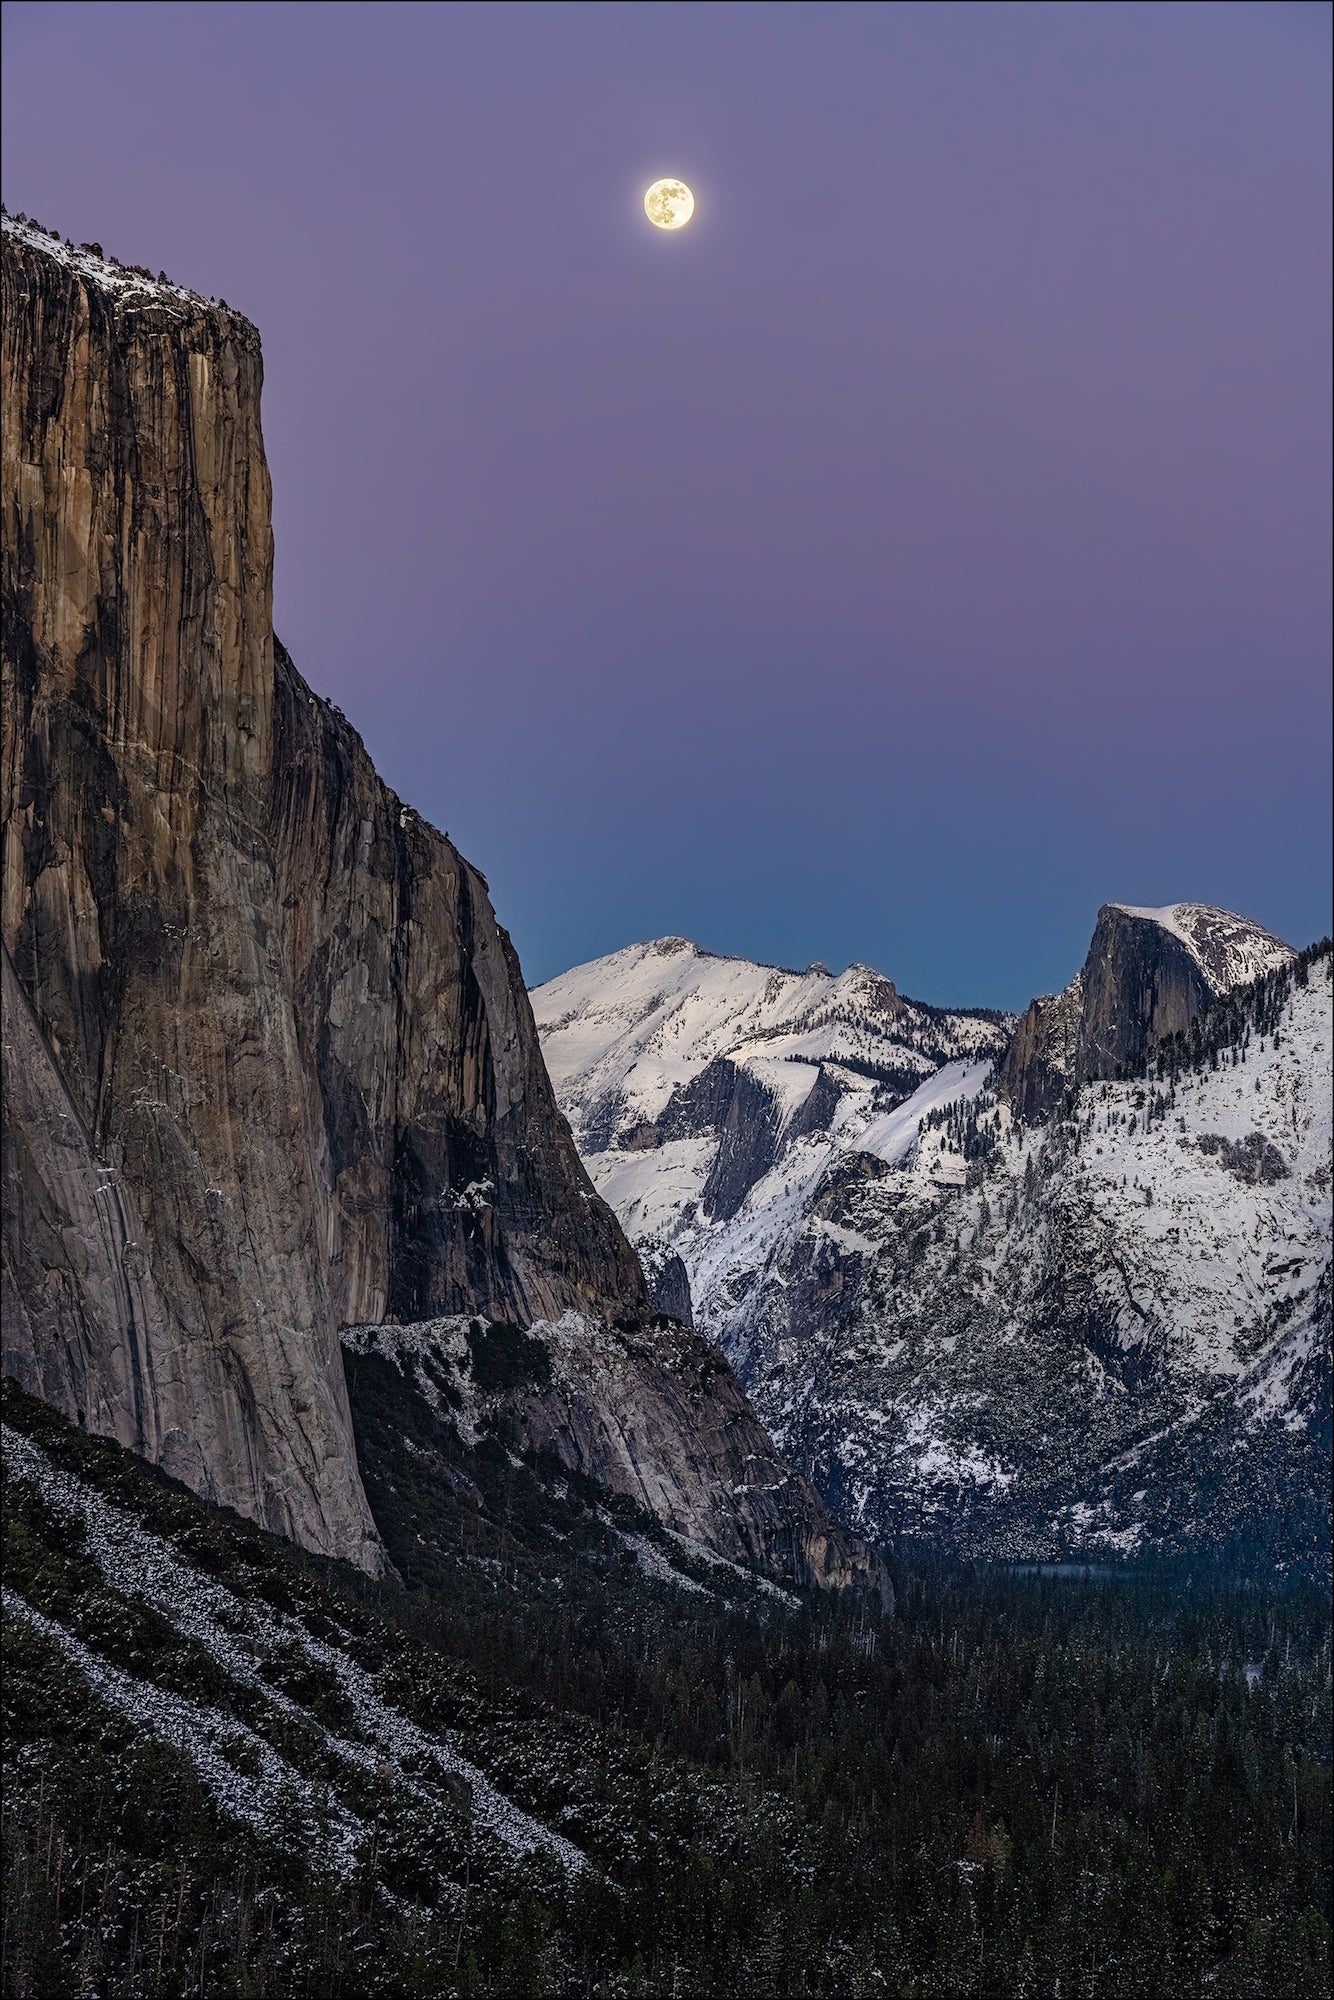
Note the size of the moon in these two images from that night. While it would be spectacular to have the huge moon in the wider scene that includes both El Capitan and Half Dome, that would be impossible from any earthbound vantage point. From Tunnel View, magnifying the moon with 1200mm is too long to fit anything but a small fraction of El Capitan. And widening the scene enough to include both of Yosemite’s granite icons shrinks the moon to small disk.
When I captured the 1200mm image, the foreground hadn’t darkened enough to create dynamic range concerns. And at f/16, the hyperfocal distance was about 2 miles—since El Capitan was 2.5 miles away, I knew I could focus anywhere from El Capitan to the moon confident that entire scene would be sharp.
My primary concern for the 1200mm image was avoiding even the slightest camera shake that would of course be magnified by such an extreme focal length. To minimize that risk, I used my sturdiest tripod, with no center post, and increased my ISO to 4oo, resulting in a 1/80 shutter speed. For reasons I won’t go into here, I rarely trigger my shutter with a remote, instead relying mostly on my Alpha 7R IV’s 2-second timer. In this case, out of an abundance of caution, I switched to the 5-second timer.
The wider image was one of the evening’s last. Using my 24-105mm exclusively by this time, I’d been recomposing after nearly every click, varying between wider and tighter, horizontal and vertical, and some combination of the moon with El Capitan, Half Dome, and/or Bridalveil Fall. Captured 25 minutes after the telephoto image, when the contrast between the daylight-bright moon and dark landscape left a paper thin margin for error.

Photo by Gary Hart. Sony Alpha 7R IV. Sony 24-105mm f/4 G. 1/25-sec., f/8, ISO 100
This wider image used 101mm—technically a “telephoto,” but wide enough to include much of El Capitan and all of Half Dome in a vertical frame. Composing vertical enabled me to extend the frame far enough into the sky to include the rich pinks and blues of the advancing earth-shadow and the belt of Venus, while maintaining a focal length that made the moon large enough that lunar detail is clearly visible.
Being a wider image, depth of field and camera shake were of little concern, but the scene’s extreme dynamic range required great care to capture everything with one click (always my goal). Since I want detail in the landscape and the moon, these post-sunset moonrise shots are where the a7RIV’s ridiculous dynamic range really shines.
To get the most detail from the shadows, I need to find the brightest moon exposure that doesn’t blow the highlights beyond recovery. While I’m huge fan of the histogram and don’t usually use the zebras to make exposure decisions, I make an exception for moon photography because the moon is usually too small to reliably register on the histogram.
To make the zebras most accurately convey the available highlight detail in my uncompressed raw files, I go deep into the zebra custom settings and increase the maximum to +109. This enables me to make my exposure as bright as possible before the zebras appear.
With my Alpha 7R IV set this way, I push my exposure a full stop beyond the point where the zebra alerts appear, confident that I can recover the highlights in post processing. Because the moon’s brightness remains constant as the world around it darkens, once I’ve reached the moon’s maximum exposure point, I don’t add any more light, no matter how dark the foreground becomes.
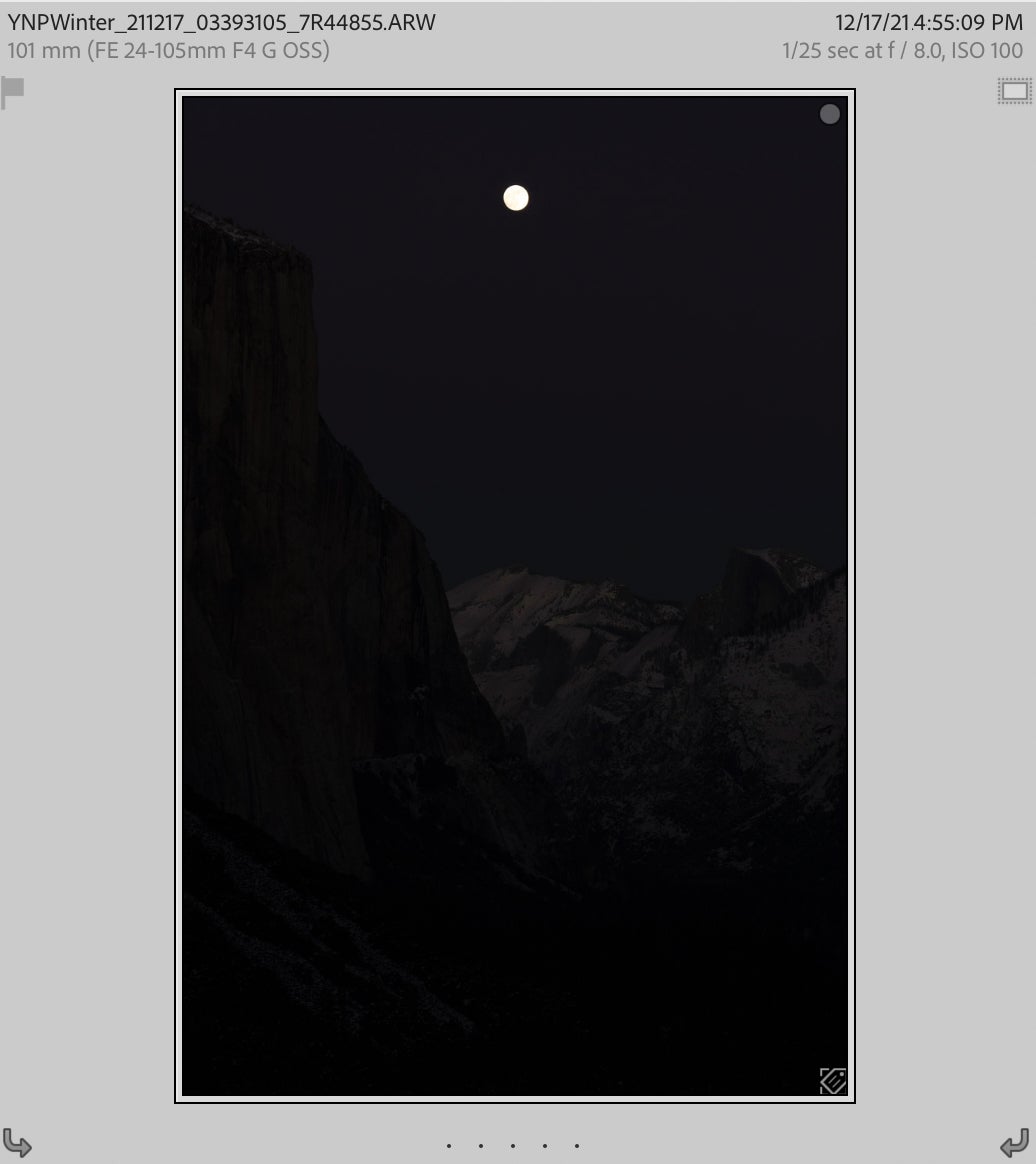
As the foreground darkens, the picture on my LCD starts to approach black with a white dot of moon. Eventually I reach the point where I’m just shooting on faith, relying on the magic invisible shadow detail in the Alpha 7R IV's files.
Don’t believe in magic? Below is a screenshot of the unedited Lightroom preview for this image. You’ll need to take my word for it that my finished image is a single click (it looked slightly brighter on my Alpha 7R IV’s LCD), captured nearly 20 minutes after sunset and processed once, but I swear it’s true.

Of course even magic has its limits, and shortly after this image was clicked the scene became too dark for anything but gawking. But maybe that should be the final lesson—don’t get so wrapped up in the photography that you forget to marvel at the beauty before you.

