Jaime Ollero (@jollero_photography) is a computer science engineer based in Madrid. For the past 20 years, he has helped deploy Air Traffic Management Systems all over the world, but his passion for photography is what really makes him tick, especially when it comes to night photography. We saw his Alpha Universe Profile and connected with Jaime to learn more about how he captured this Milky Way shot with his Sony α7R III and Sony 24-70mm f/2.8 G Master. See his story behind the shot below and create your own Alpha Universe Profile HERE for your chance to be featured on AlphaUniverse.com.
Avid astro-photographer Jaime Ollero takes us through his camera setup & post-processing for The Milky Way with the Sony α7R III & Sony 24-70mm f/2.8 G Master.

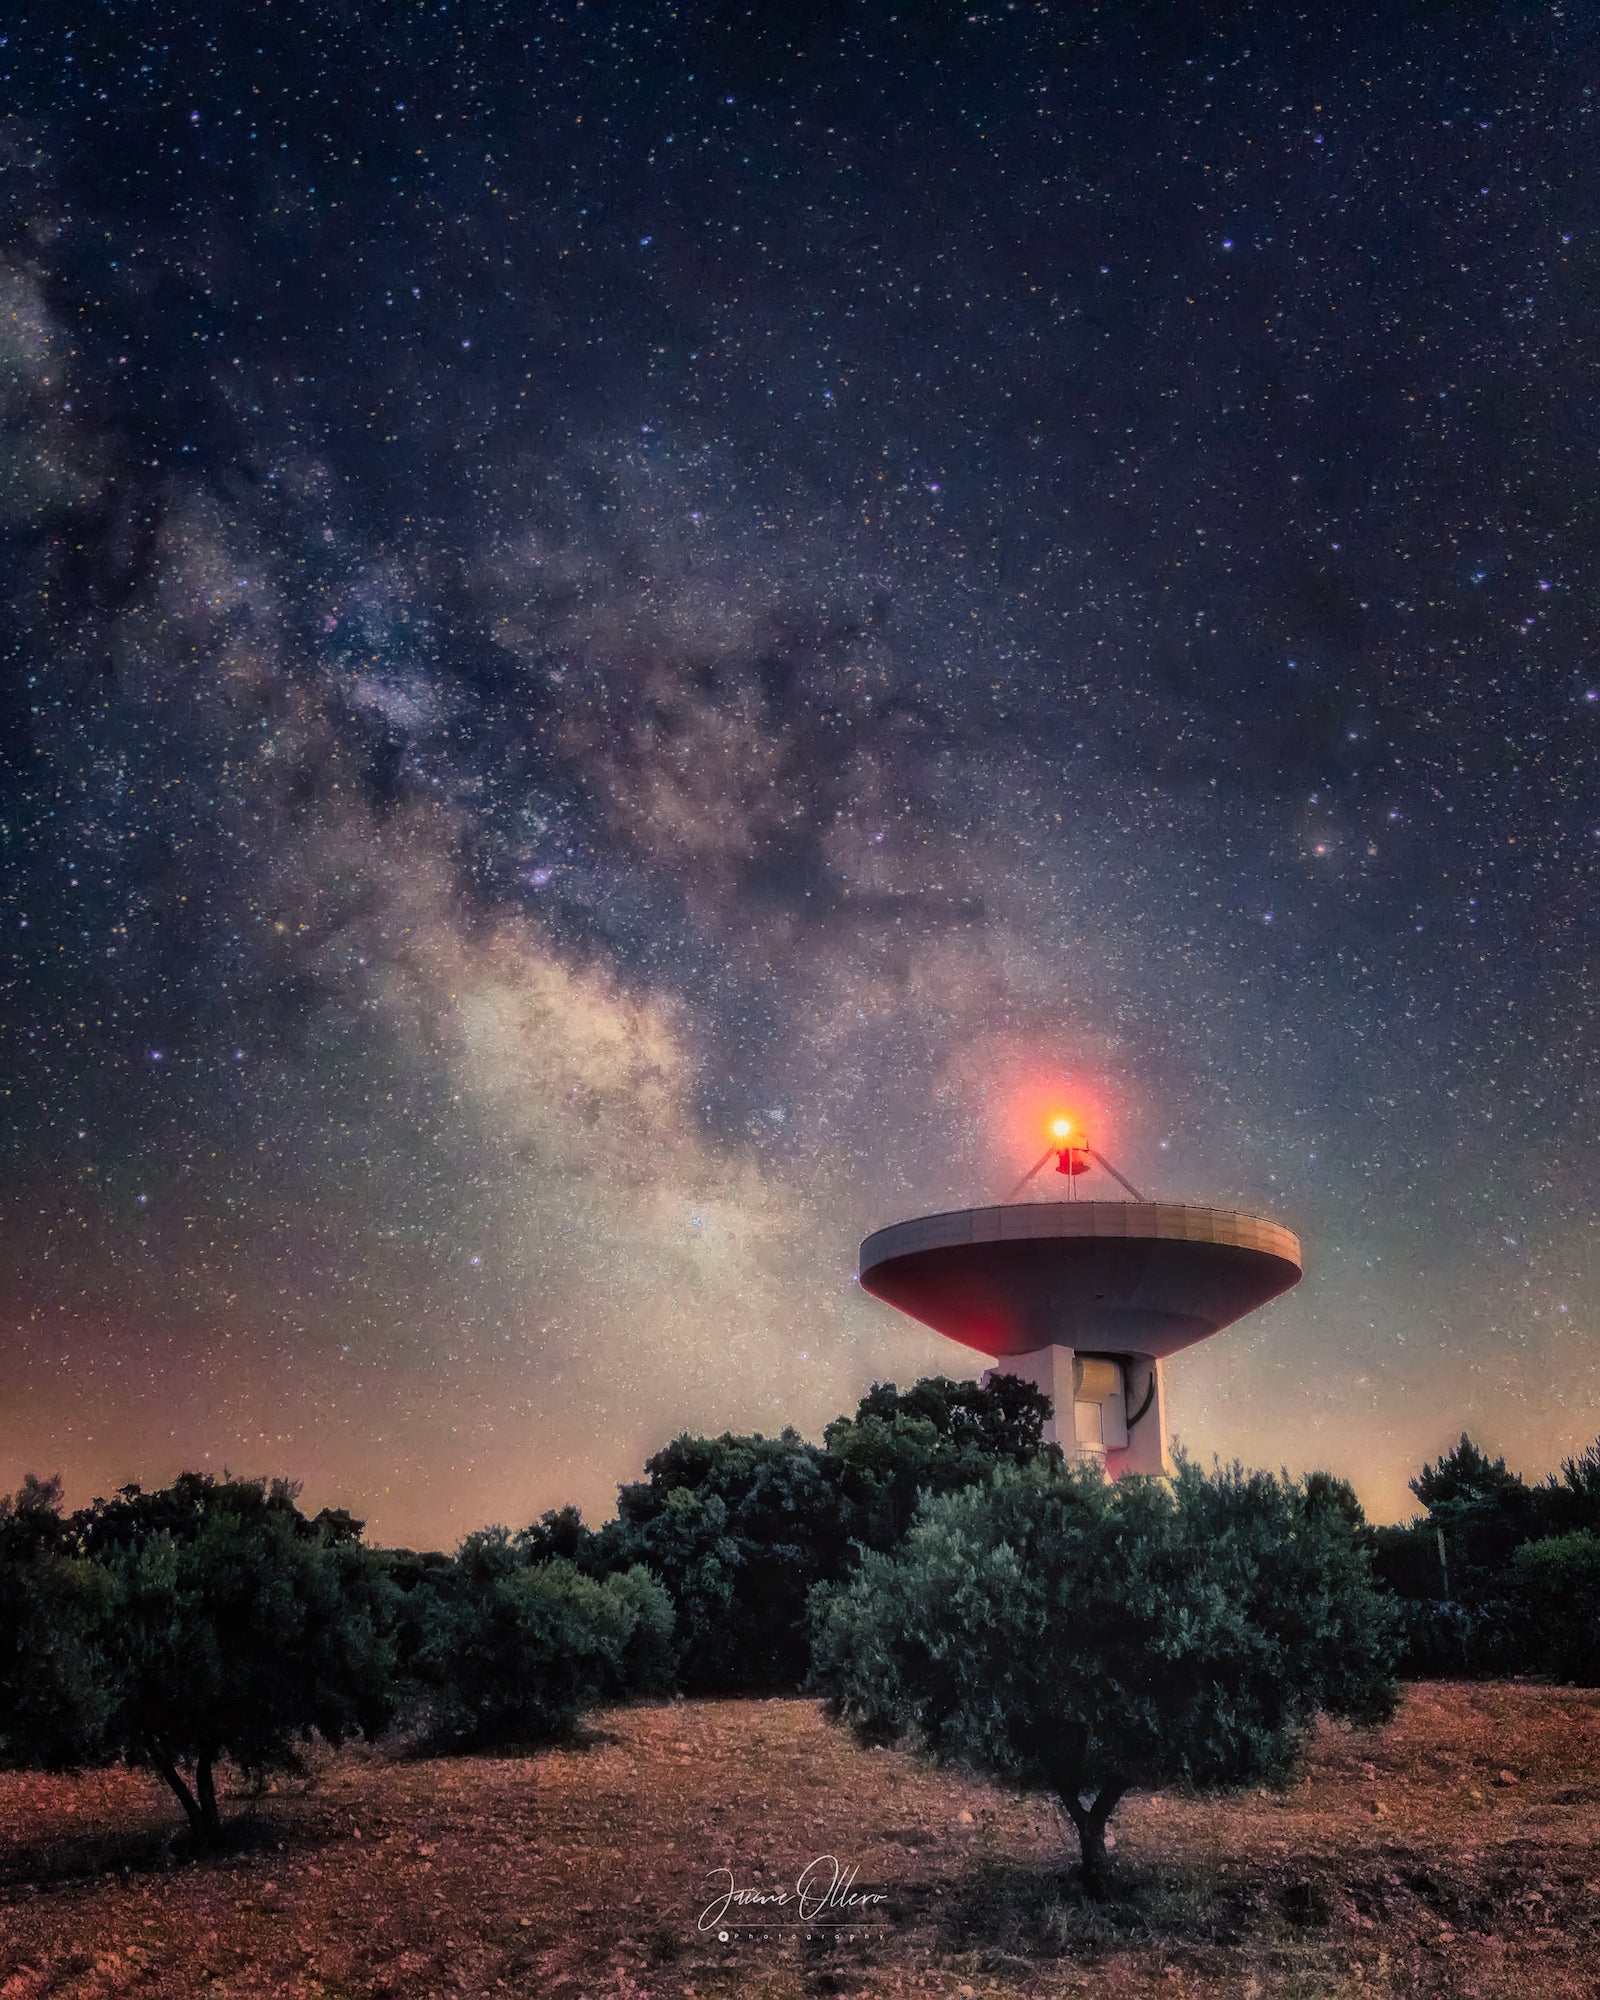
Photo by Jaime Ollero. Sony α7R III. Sony 24-70mm f/2.8 G Master. 10-secs., f/2.8, ISO 3200
The Scene
This shot was taken 50km southeast of Madrid where I can shoot the Milky Way without too much light pollution, yet still not really far away from the city. It was June of 2020 and I chose this Radio Antenna of Yebes Observatory RT40m in the foreground because somehow there is a strong link between the stars and what is done in this particular place, searching for radio signals from deep space.
Astro With The Sony α7R III & Sony 24-70mm f/2.8 G Master
I used a Sony α7R III camera with a Sony 24-70mm f/2.8 G Master on a carbon Peak Design tripod which supports the weight of all the equipment very well, including my tracking mount. Usually I set the focus manually using the hyperfocal for the lens, but that night I used my laptop to set up the focus when changing the depth of field, with the Sony application for remote control. Because I was also looking to take some shots of the Rho Ophiuchi constellation and I did a big gear setup. I even set up the tracking mount although I actually did not use it for this particular shot.
How I Got The Shot
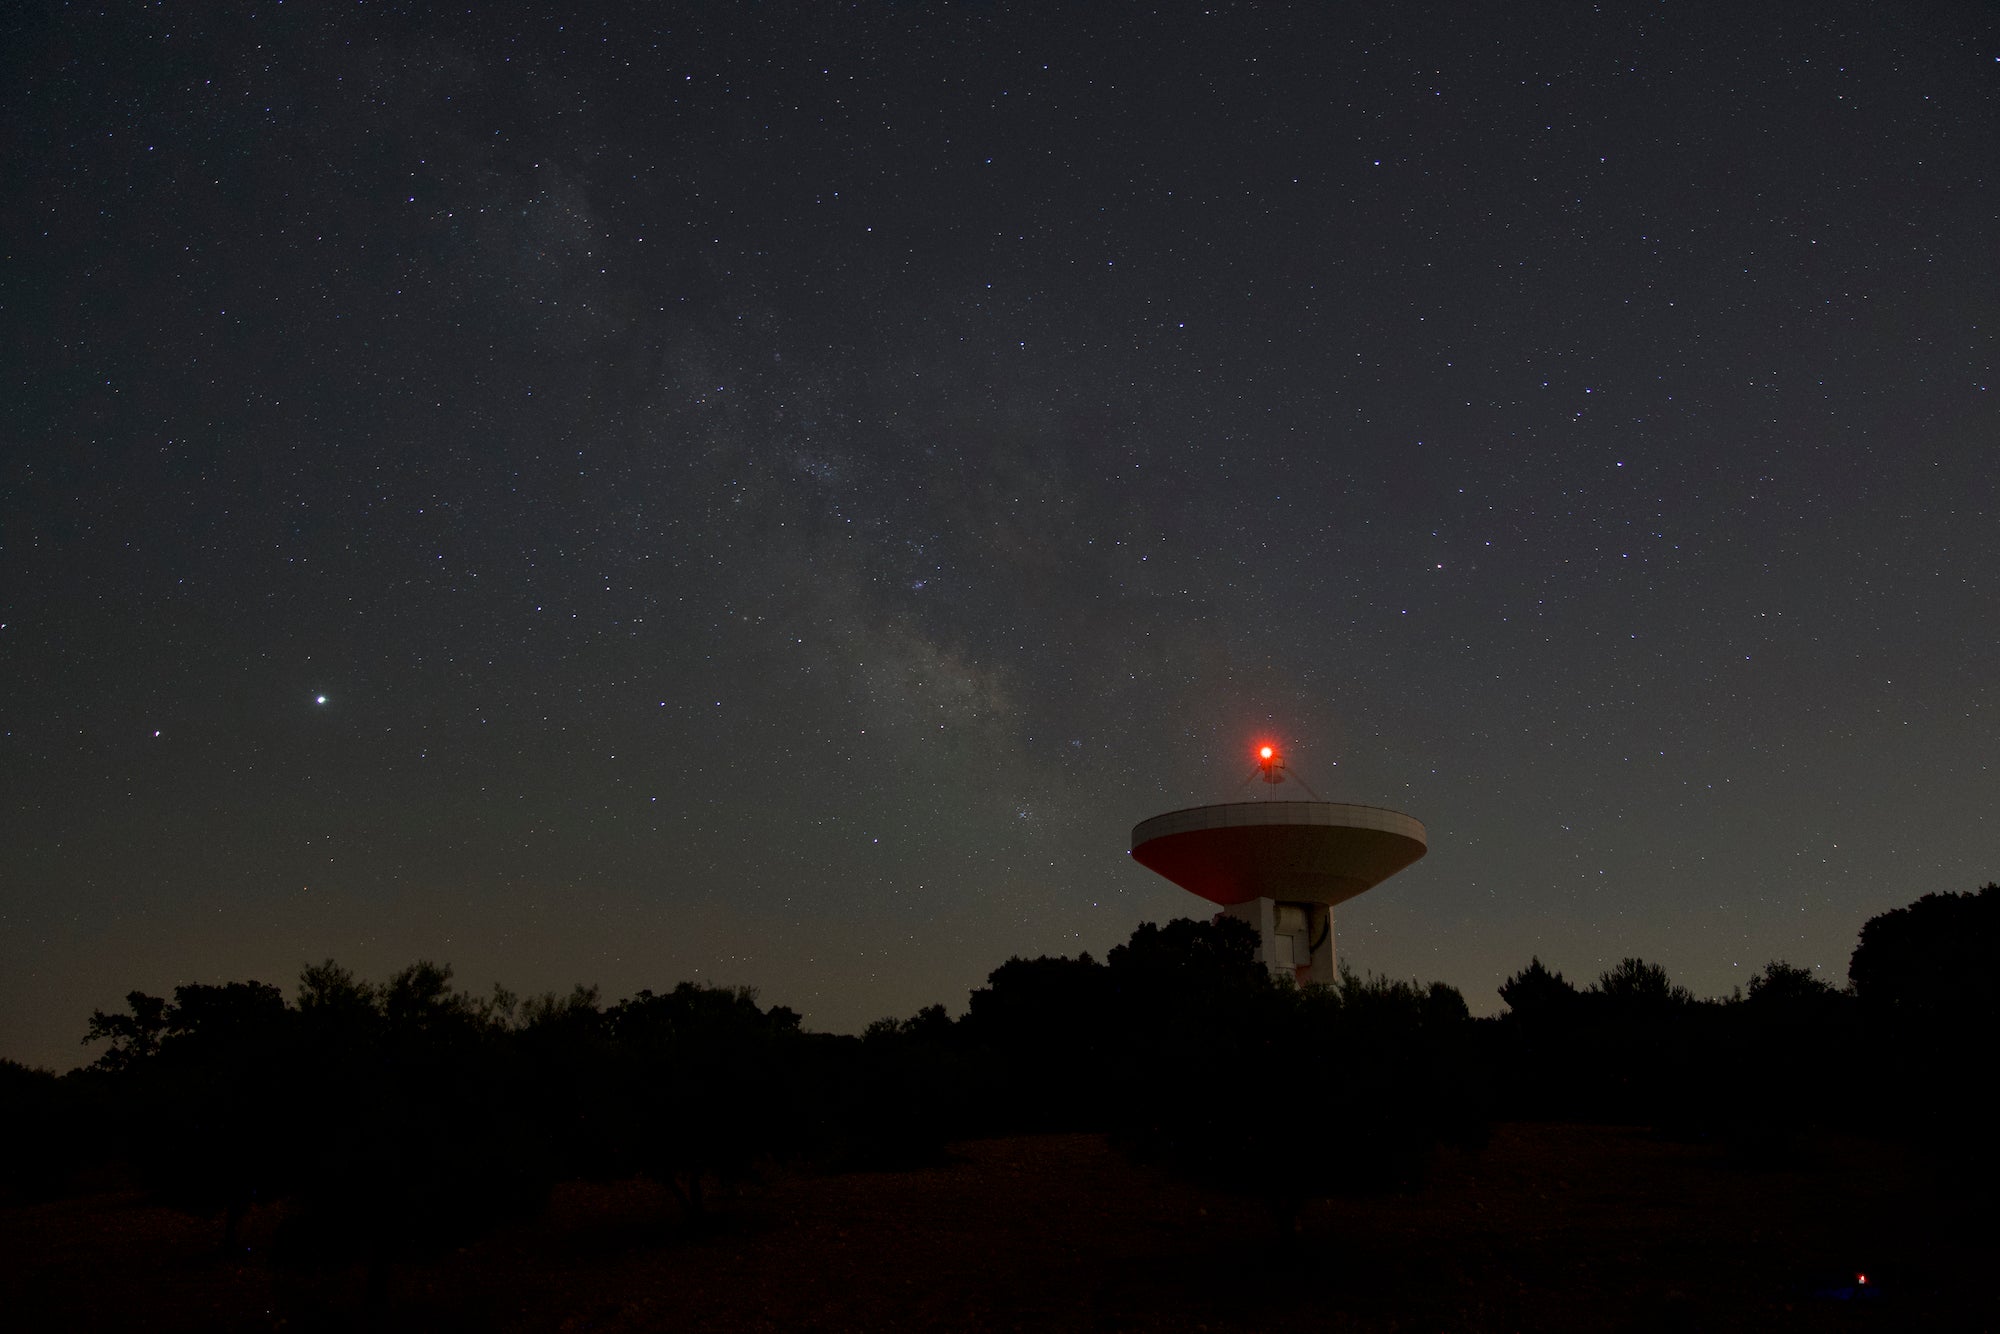
For night shoots I usually set the camera to manual and I choose every exposure parameter to ensure that I get what I want, which is very useful to simplify the post-processing of the pictures. I always shoot in RAW. Additionally I put the camera in silent mode and I used the remote control application from my laptop to take the shot reducing any vibration. This photo was taken in landscape mode but I cropped it later to 4x8 portrait to better fit the Instagram format.
The shot parameters were:
White Balance: 3800 (manually setup)
ISO: 3200
Focal length: 24mm
Aperture: f/2.8
Shutter speed: 10-seconds

Photo by Jaime Ollero. Raw version of image.
I chose those parameters as a trial for the focus, just before changing to 70mm, turn on the tracker and start taking photos of the Rho Ophiuchi constellation, but also knowing that the scene and the parameters were fine enough for my setup in order to get a nice night landscape that would be easy to develop within Lightroom or Photoshop later. I find the Sony 24-70mm f/2.8 G Master lens to be really sharp at f/2.8 for night shots and the α7R III camera at ISO 3200 produces an acceptable amount of noise for such pictures which can be later reduced using software. I didn't take any darks, flats nor bias frames for this shot.
Post-Processing
Post-processing was a matter of using Photoshop, Topaz DeNoise AI and old Nik Collection filters. Firstly I used the Adobe Camera RAW plugin within Photoshop to setup the profile, adobe neutral, the lights and shadows of the whole picture, fined tune the white balance to highlight the core of the milky way and I moved slightly the RGB curve to get an adequate tone of the deep sky, it's not deep blue, neither deep dark but like light blue-gray. Then I removed the noise as much as the Topaz DeNoise application allowed me without creating any artefact or removing details to get the base layer of the picture.

Photo by Jaime Ollero. Final version of image.
Then I created some layers to apply the Nik Collection filters (Tone Contrast, Detail extractor, Classic Soft Focus or Skylight are ones of my favourites), to highlight the dark areas of the milky way nebulas and to increase the color of the core of the milky way getting the final result.
Join Alpha Universe and complete your public profile. It’s free and you’ll have a chance to be featured on Alpha Universe! Click here to learn more.

