I'm Stuart Anderson (@stuart_anderson_ig), a Sacramento based product photographer, specializing in glassware, food and beverage. This shot was inspired by an interview that Joanie Simon from The Bite Shot did with an excellent product photographer, Teri Campbell from Teri Campbell Studios, about drink photography and fake ice. The image that Teri shared involved a drip from a Luxardo Cherry and it really inspired me to try the same thing. I had done plenty of splash shots and drip splashes but nothing quite like that. One of my glassware clients, Dragon Glassware, has a unique double walled martini glass that made a recent appearance on Season 3 of Westworld and I thought that it would be fun to do something fun with it.
Pro photographer Stuart Anderson walks us step-by-step through his camera, lens, lighting & techniques for a perfect Westworld-inspired drink shot.
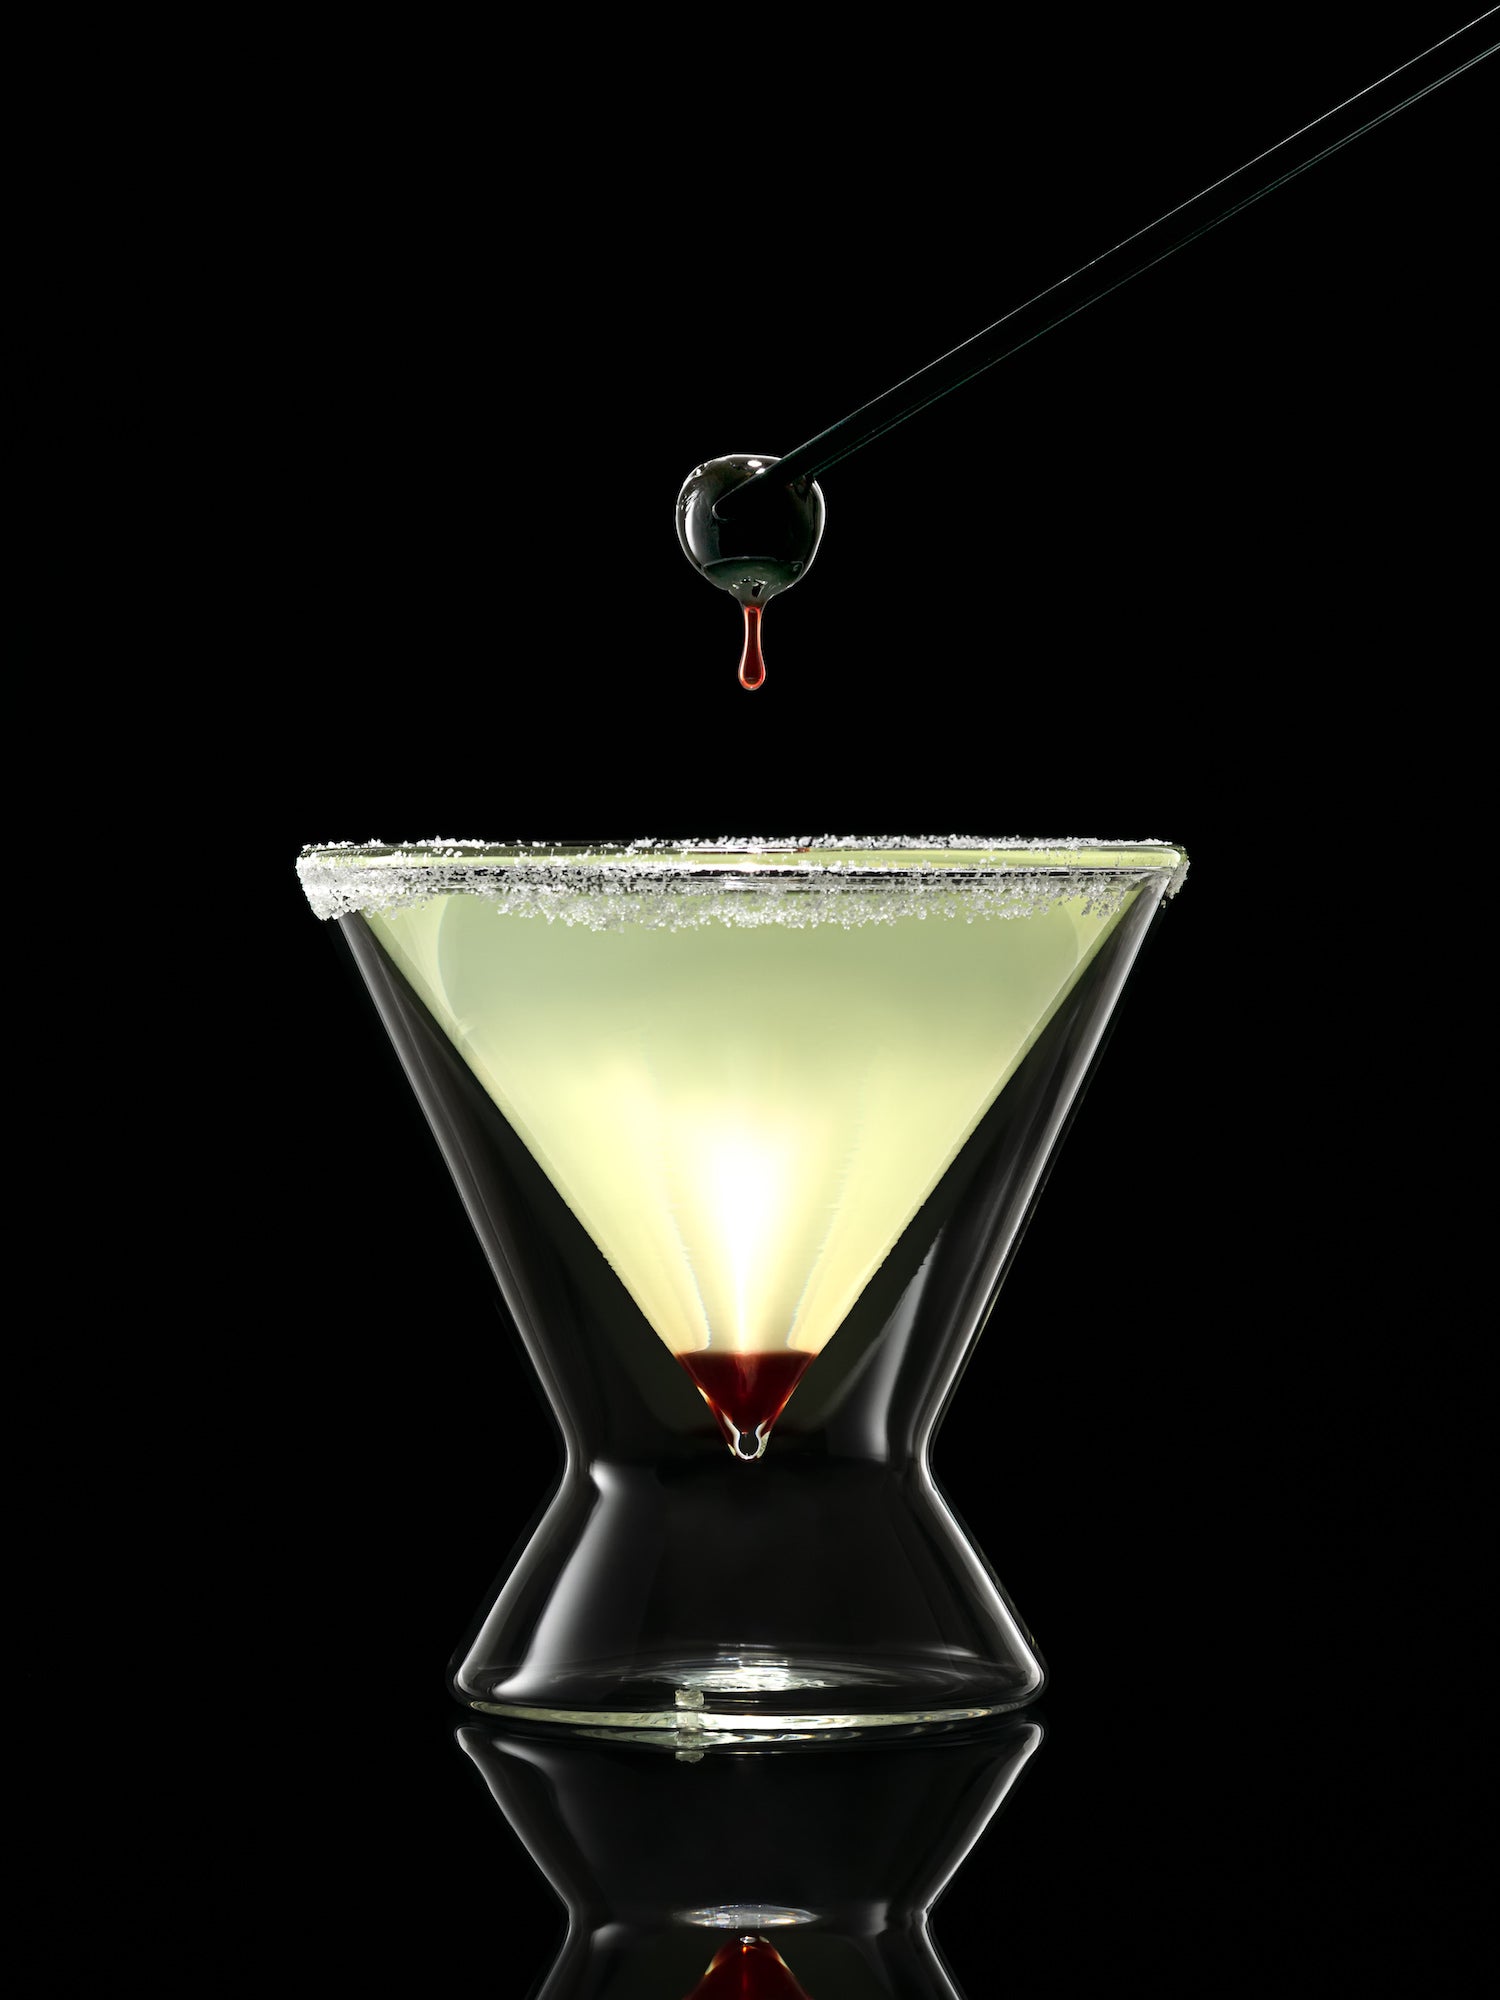
Photo by Stuart Anderson. Sony α6000. Sony 90mm f/2.8 Macro G. 1/160-sec., f/10, ISO 100
How I Did It: Camera Setup, The Perfect Lens & Some Studio Lighting Tricks
For this image I used the Sony α6000, paired with the Sony 90mm f/2.8 Macro G lens. The α6000 is an underrated workhorse and the 90mm Macro is incredibly sharp, making a nice combination for product photography on a budget.
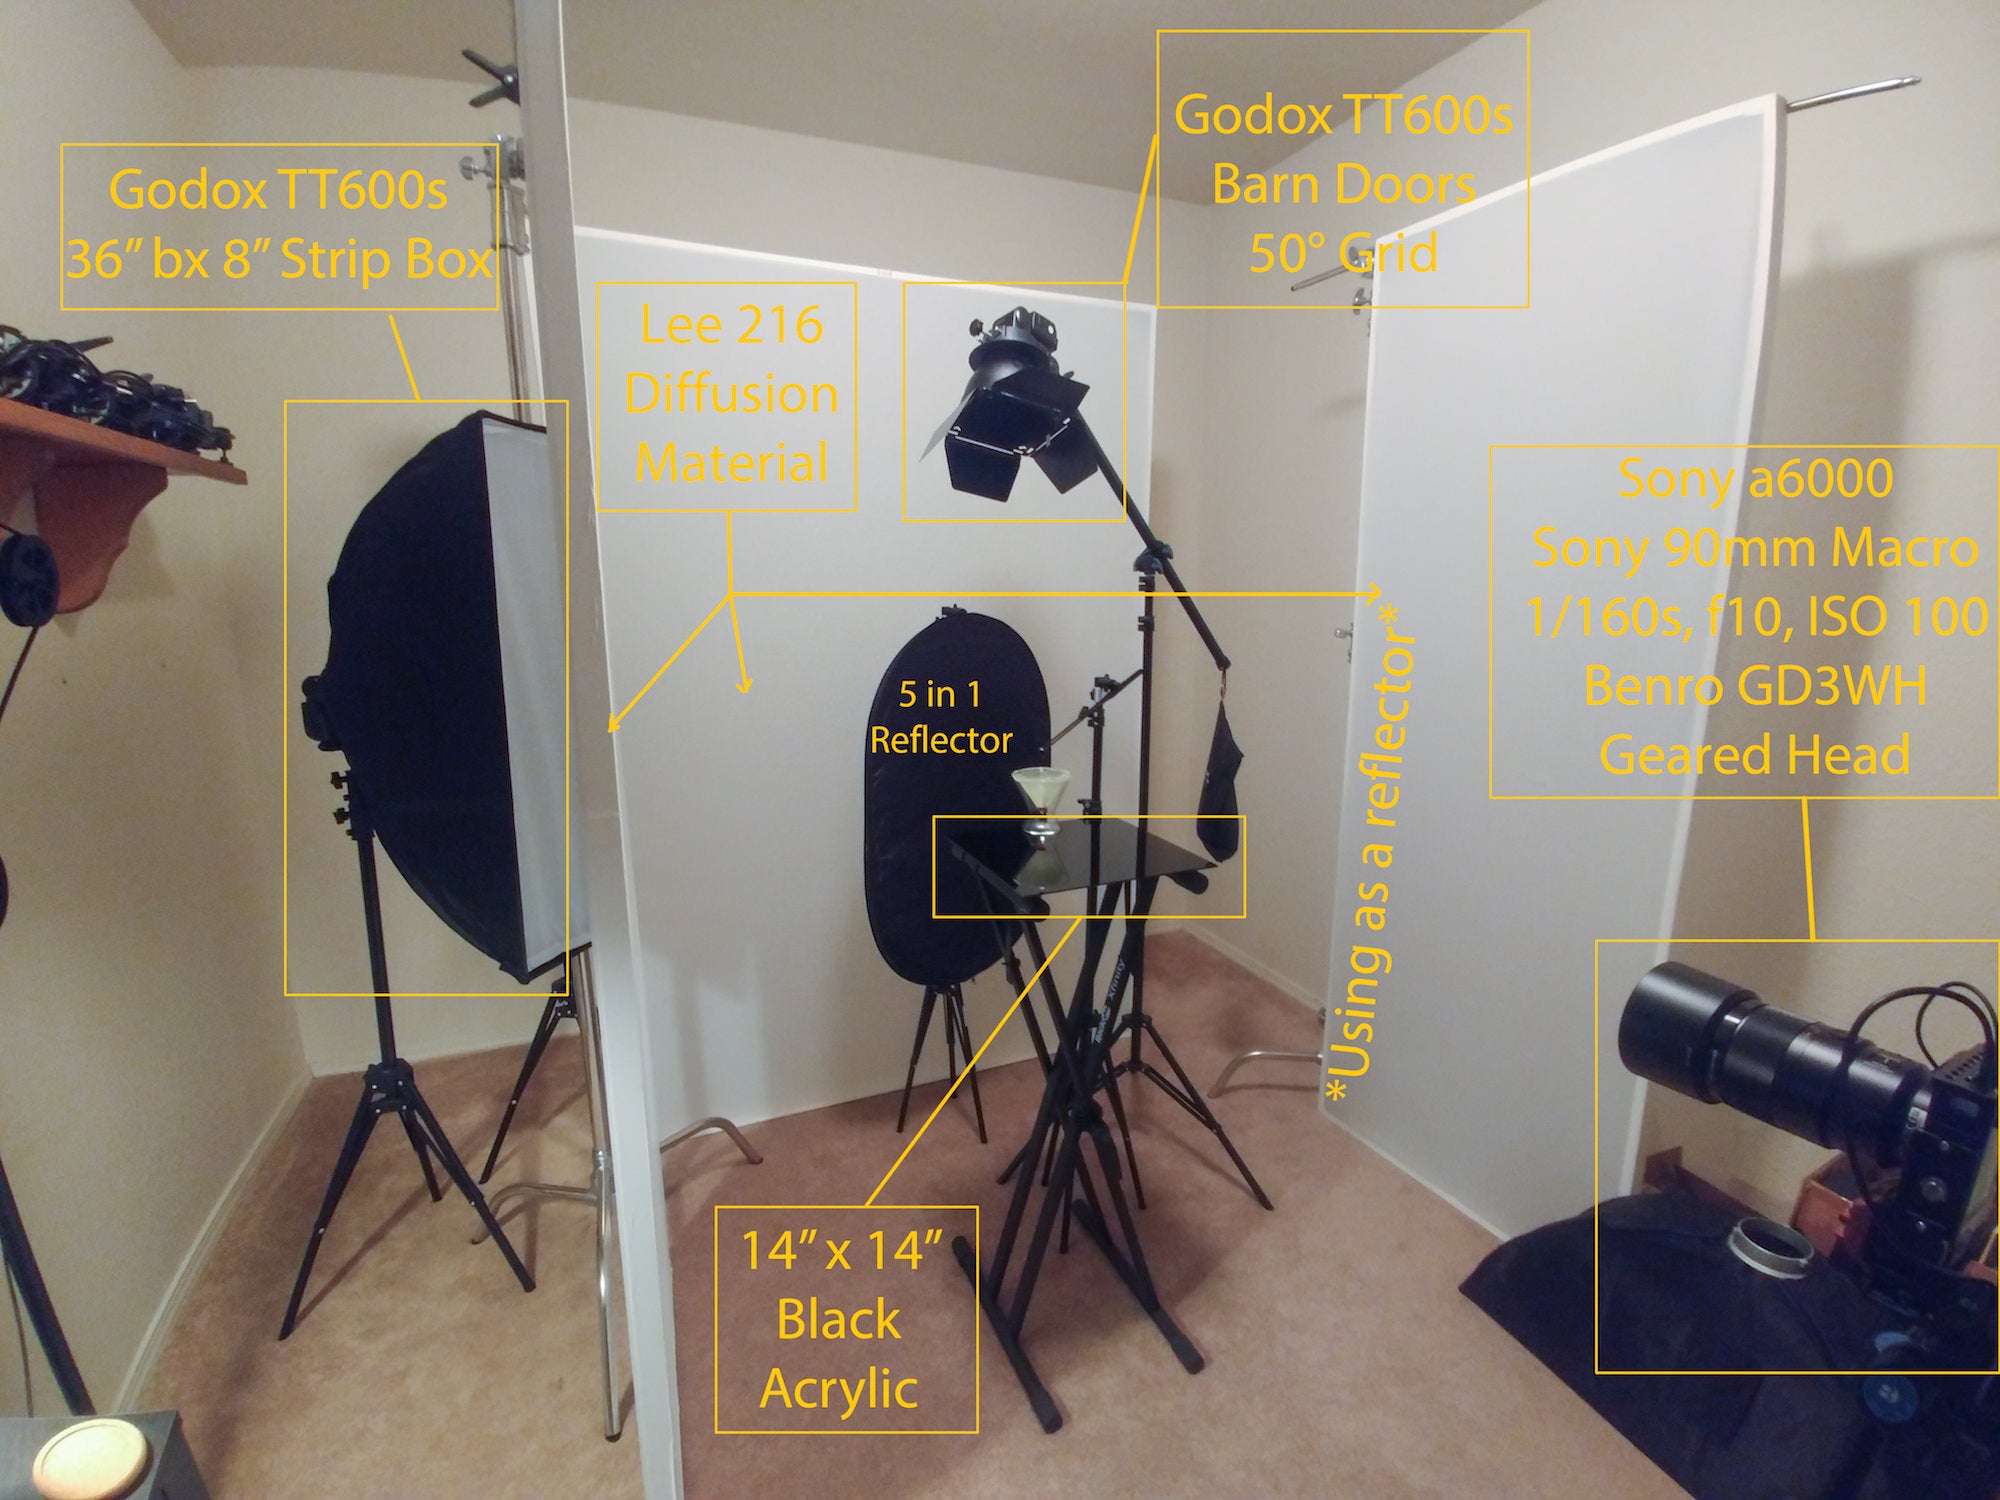
I love incorporating back lighting, or in this case putting a background between the backlight and the product to create rim lighting. I really like the effect and in some cases rim lighting or back lighting is all that I use. For this image I ended up using three speedlights, one for the back light effect, one to help illuminate the drink a bit more and one to create a bit of a gradient on the side of the glass.
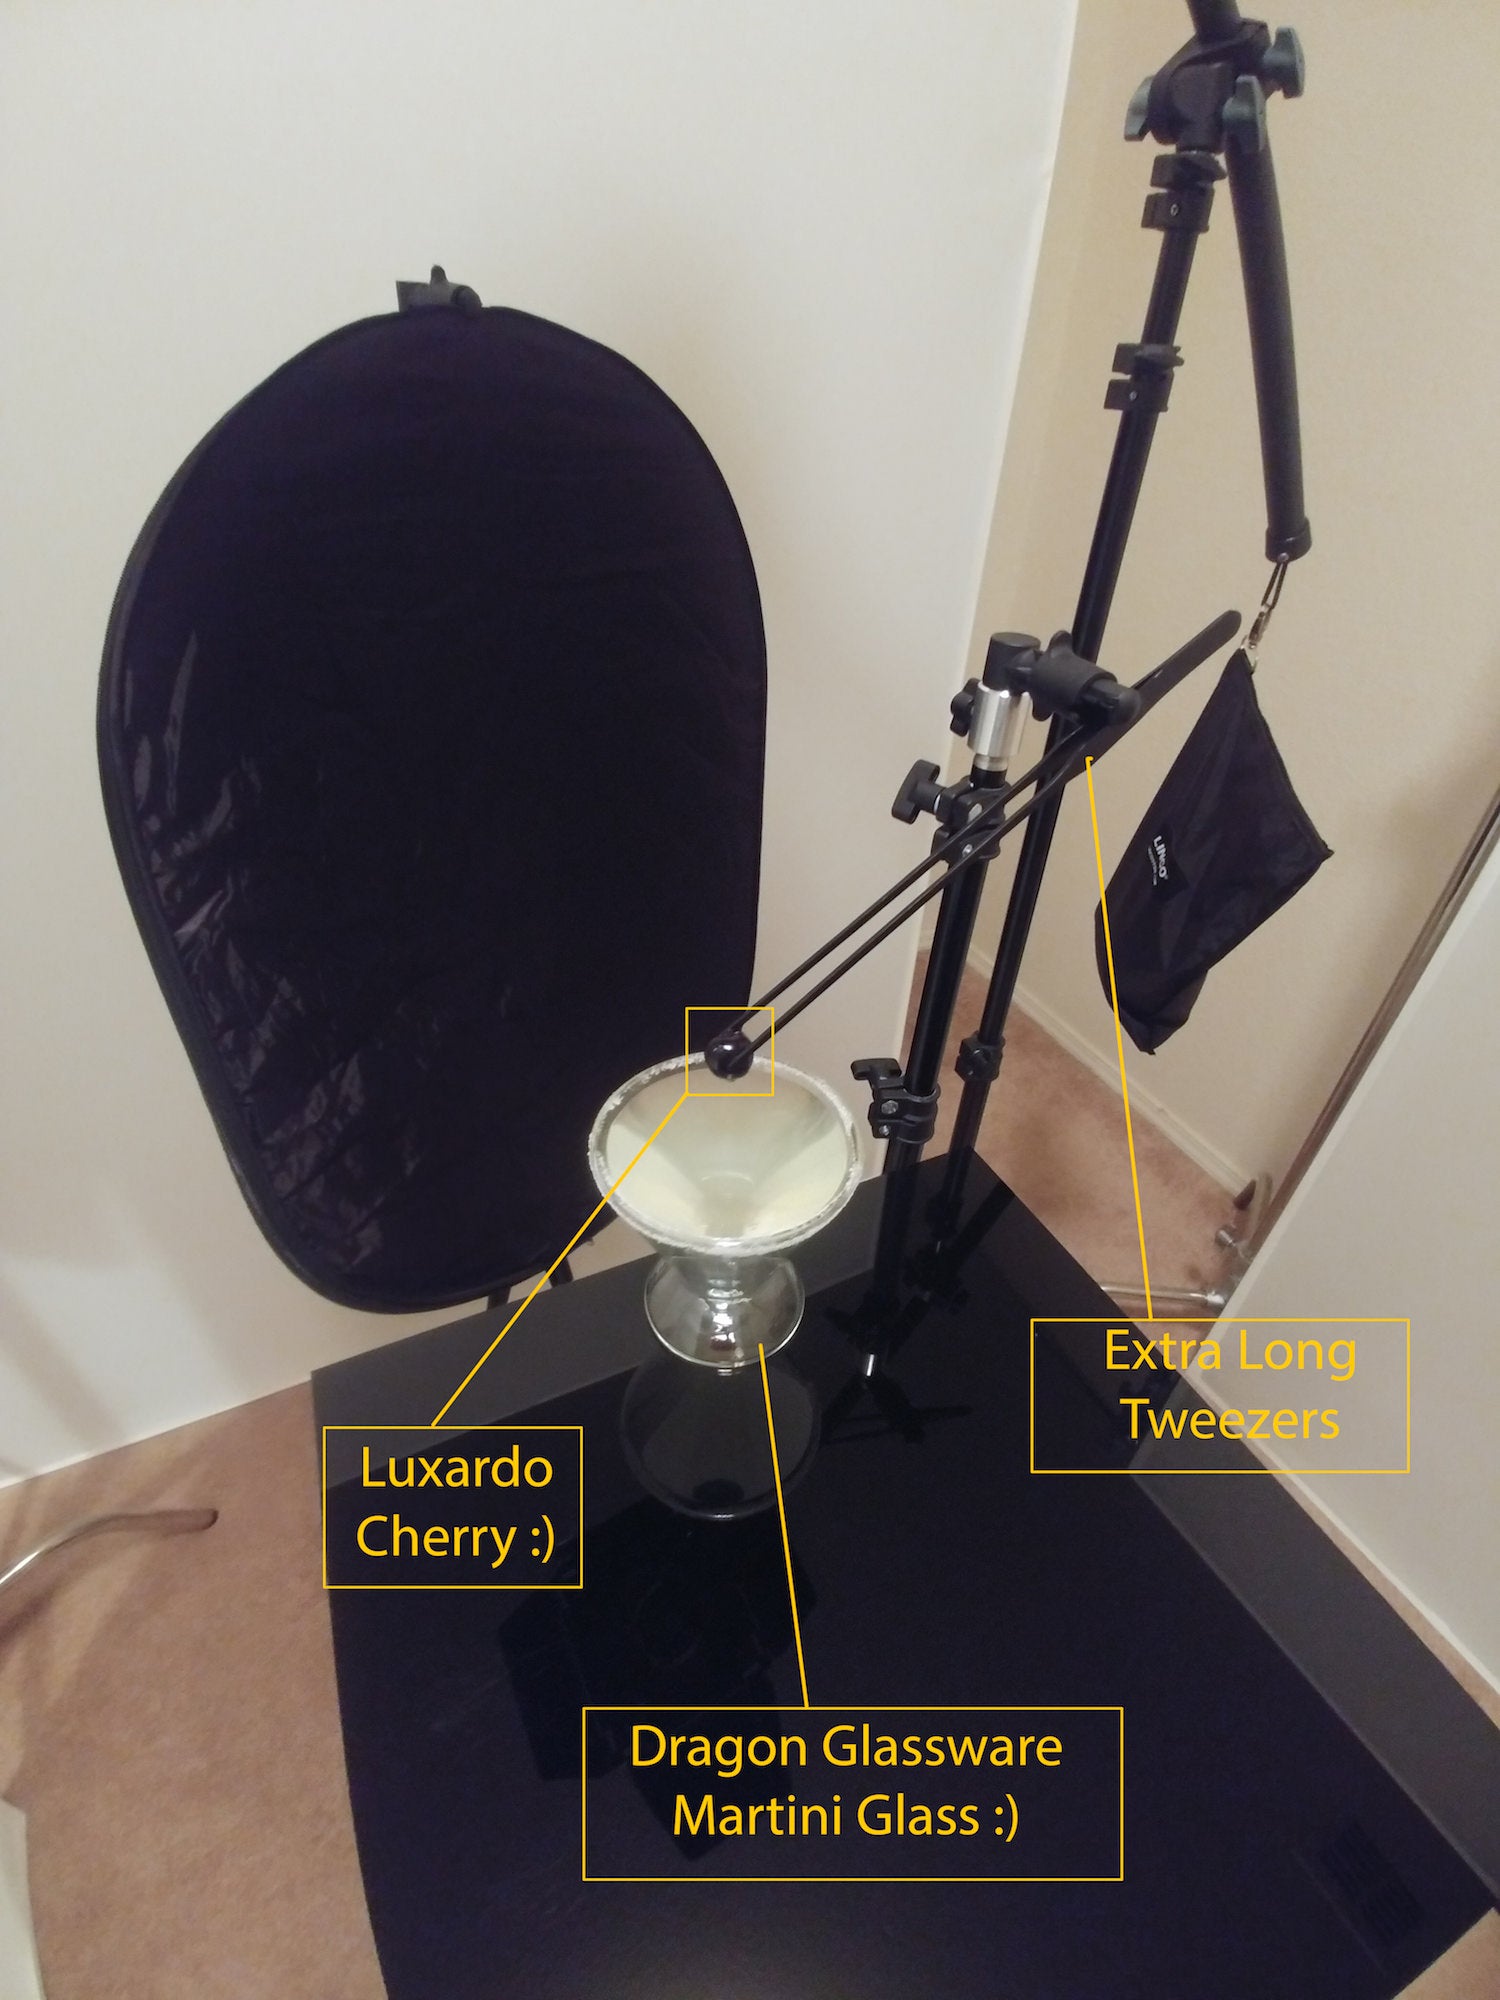
My camera was set to 1/160s (flash sync speed), f/10 (I would usually be at f/8 but needed a bit more depth of field for this shot) and ISO 100. I set my focus manually to the Luxardo cherry that I had suspended above the glass with a pair of long tweezers. The tweezers were being held by a little reflector clamp. The glass is sitting on a small piece of acrylic that's resting on a keyboard stand.
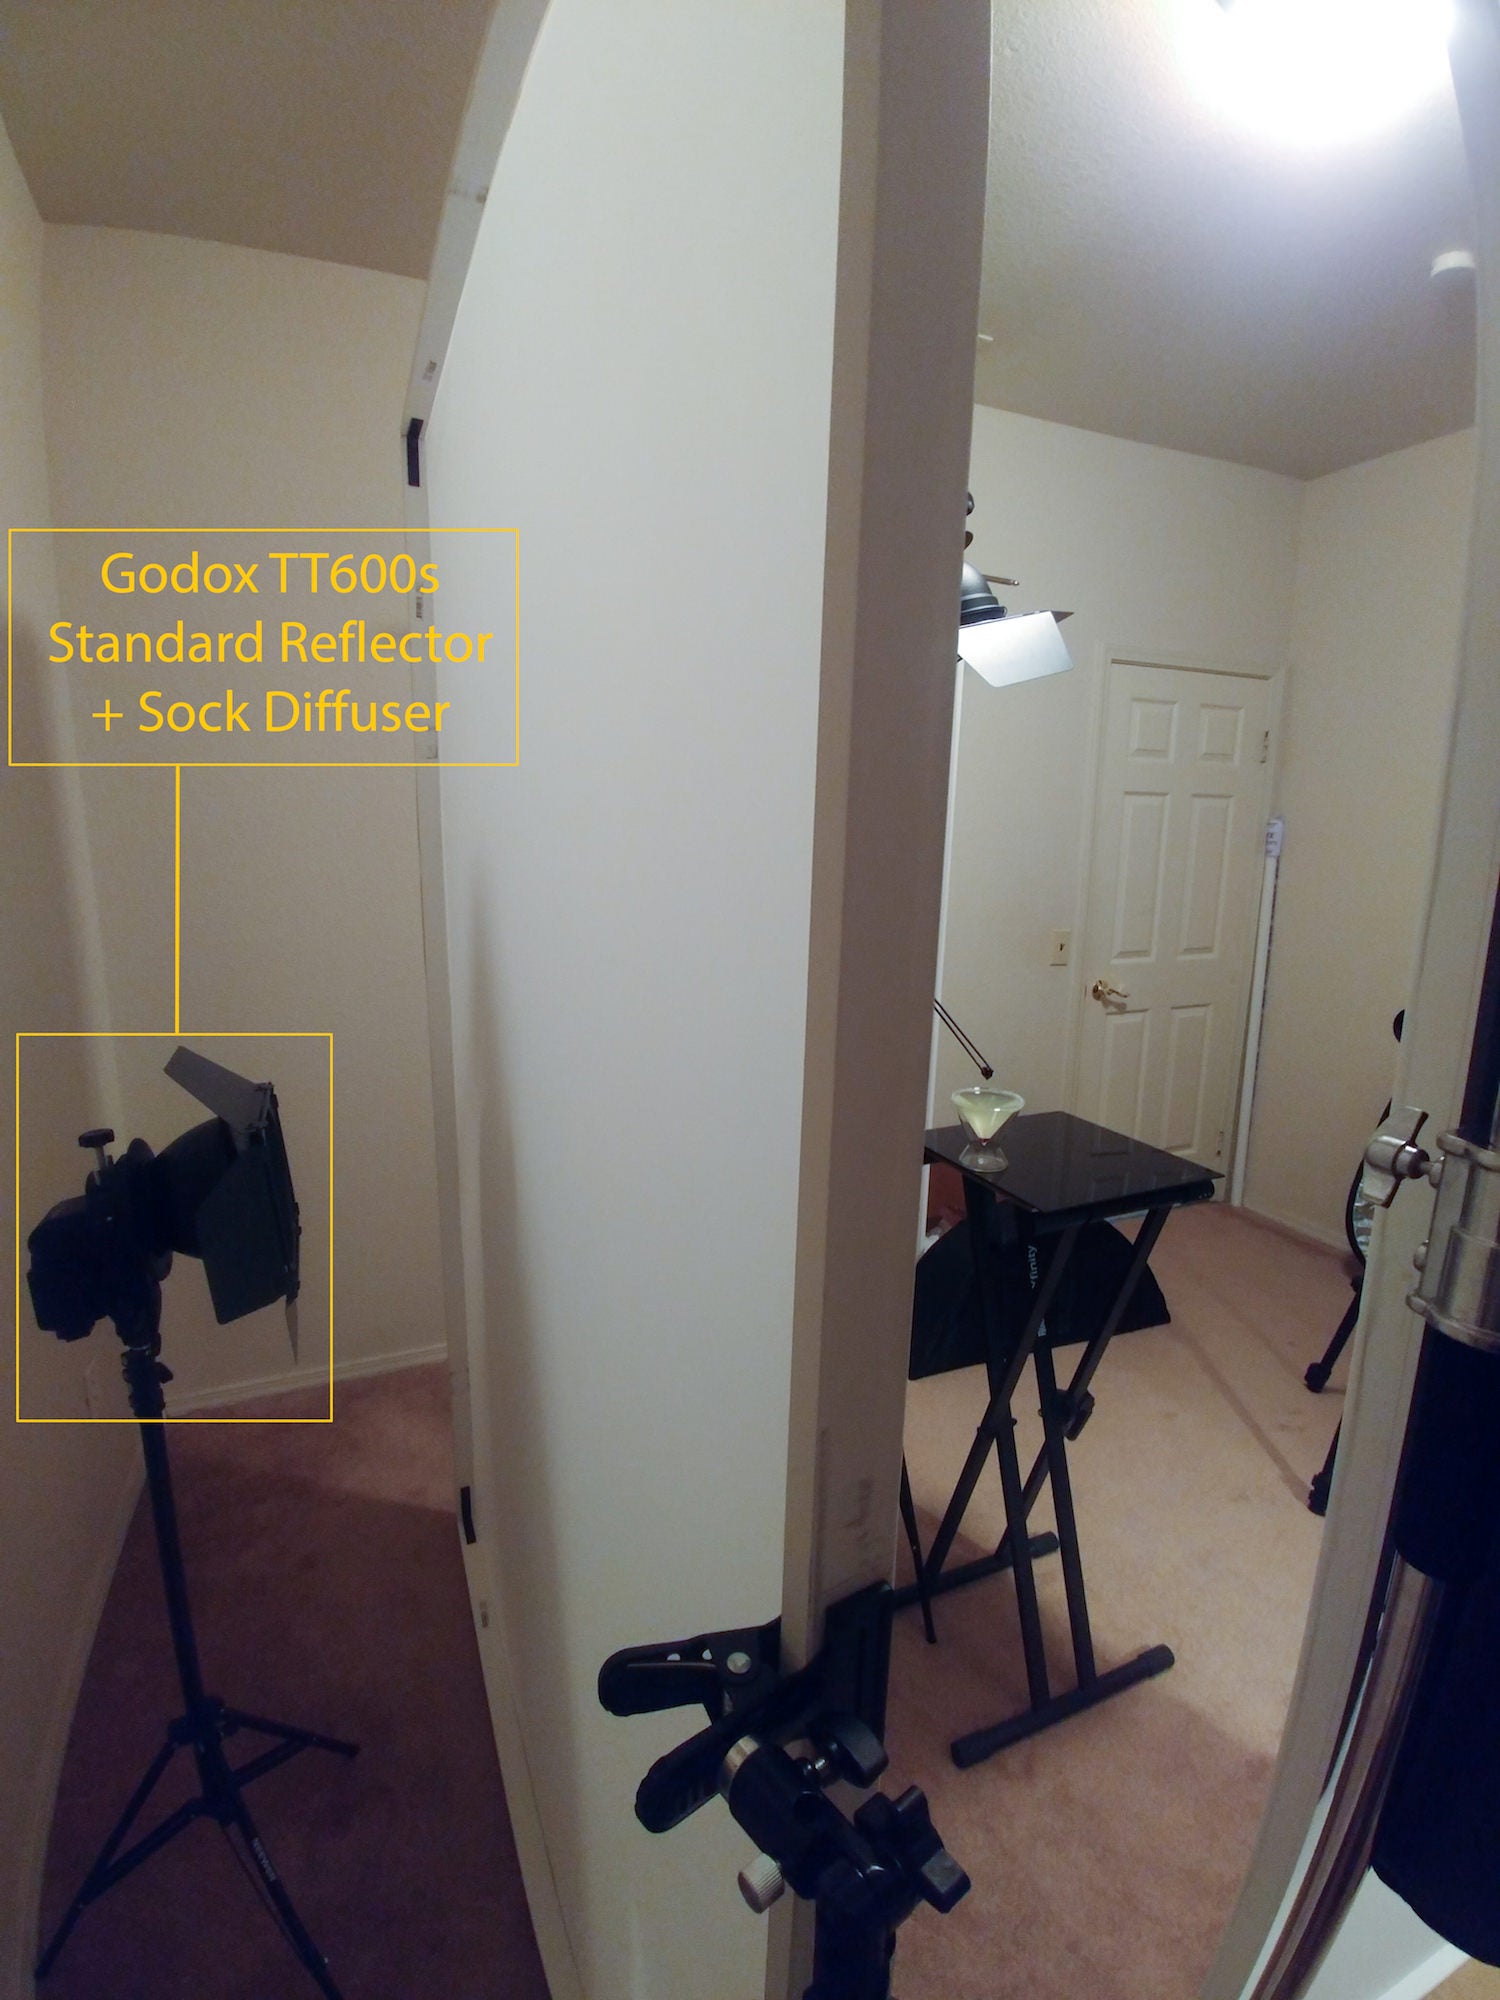
I like to figure out my lighting one light at a time, typically starting with the background light. Behind the glass is the black side of a 5 in 1 reflector, turned slightly to the right, to create the black background without getting light spill from the left. Behind the 5 in 1 reflector is a 7'h x 5'w diffusion panel, made with trim board, L brackets and Lee 216 diffusion material. Behind the diffusion panel is a Godox TT600s speedlight, set to 1/4 power, with a standard reflector that also has a diffusion sock on it, which creates a gradient back light. Above and angled slightly behind the glass is another Godox TT600s speedlight set to 1/8 power, with another standard reflector, barn doors and a 50° grid to direct the light only toward the glass. To the left of the glass is a 7'h x 2.5'w diffusion panel made from the same materials as the larger one. To the left of the diffusion panel is another Godox TT600s speedlight set to 1/4 power, in a strip box that's angled slightly toward the camera to create a side gradient on the glass. I always just adjust the power for each light based on how it looks. I don't use a light meter, just my eyes. Nothing against light meters, that's just how I learned.
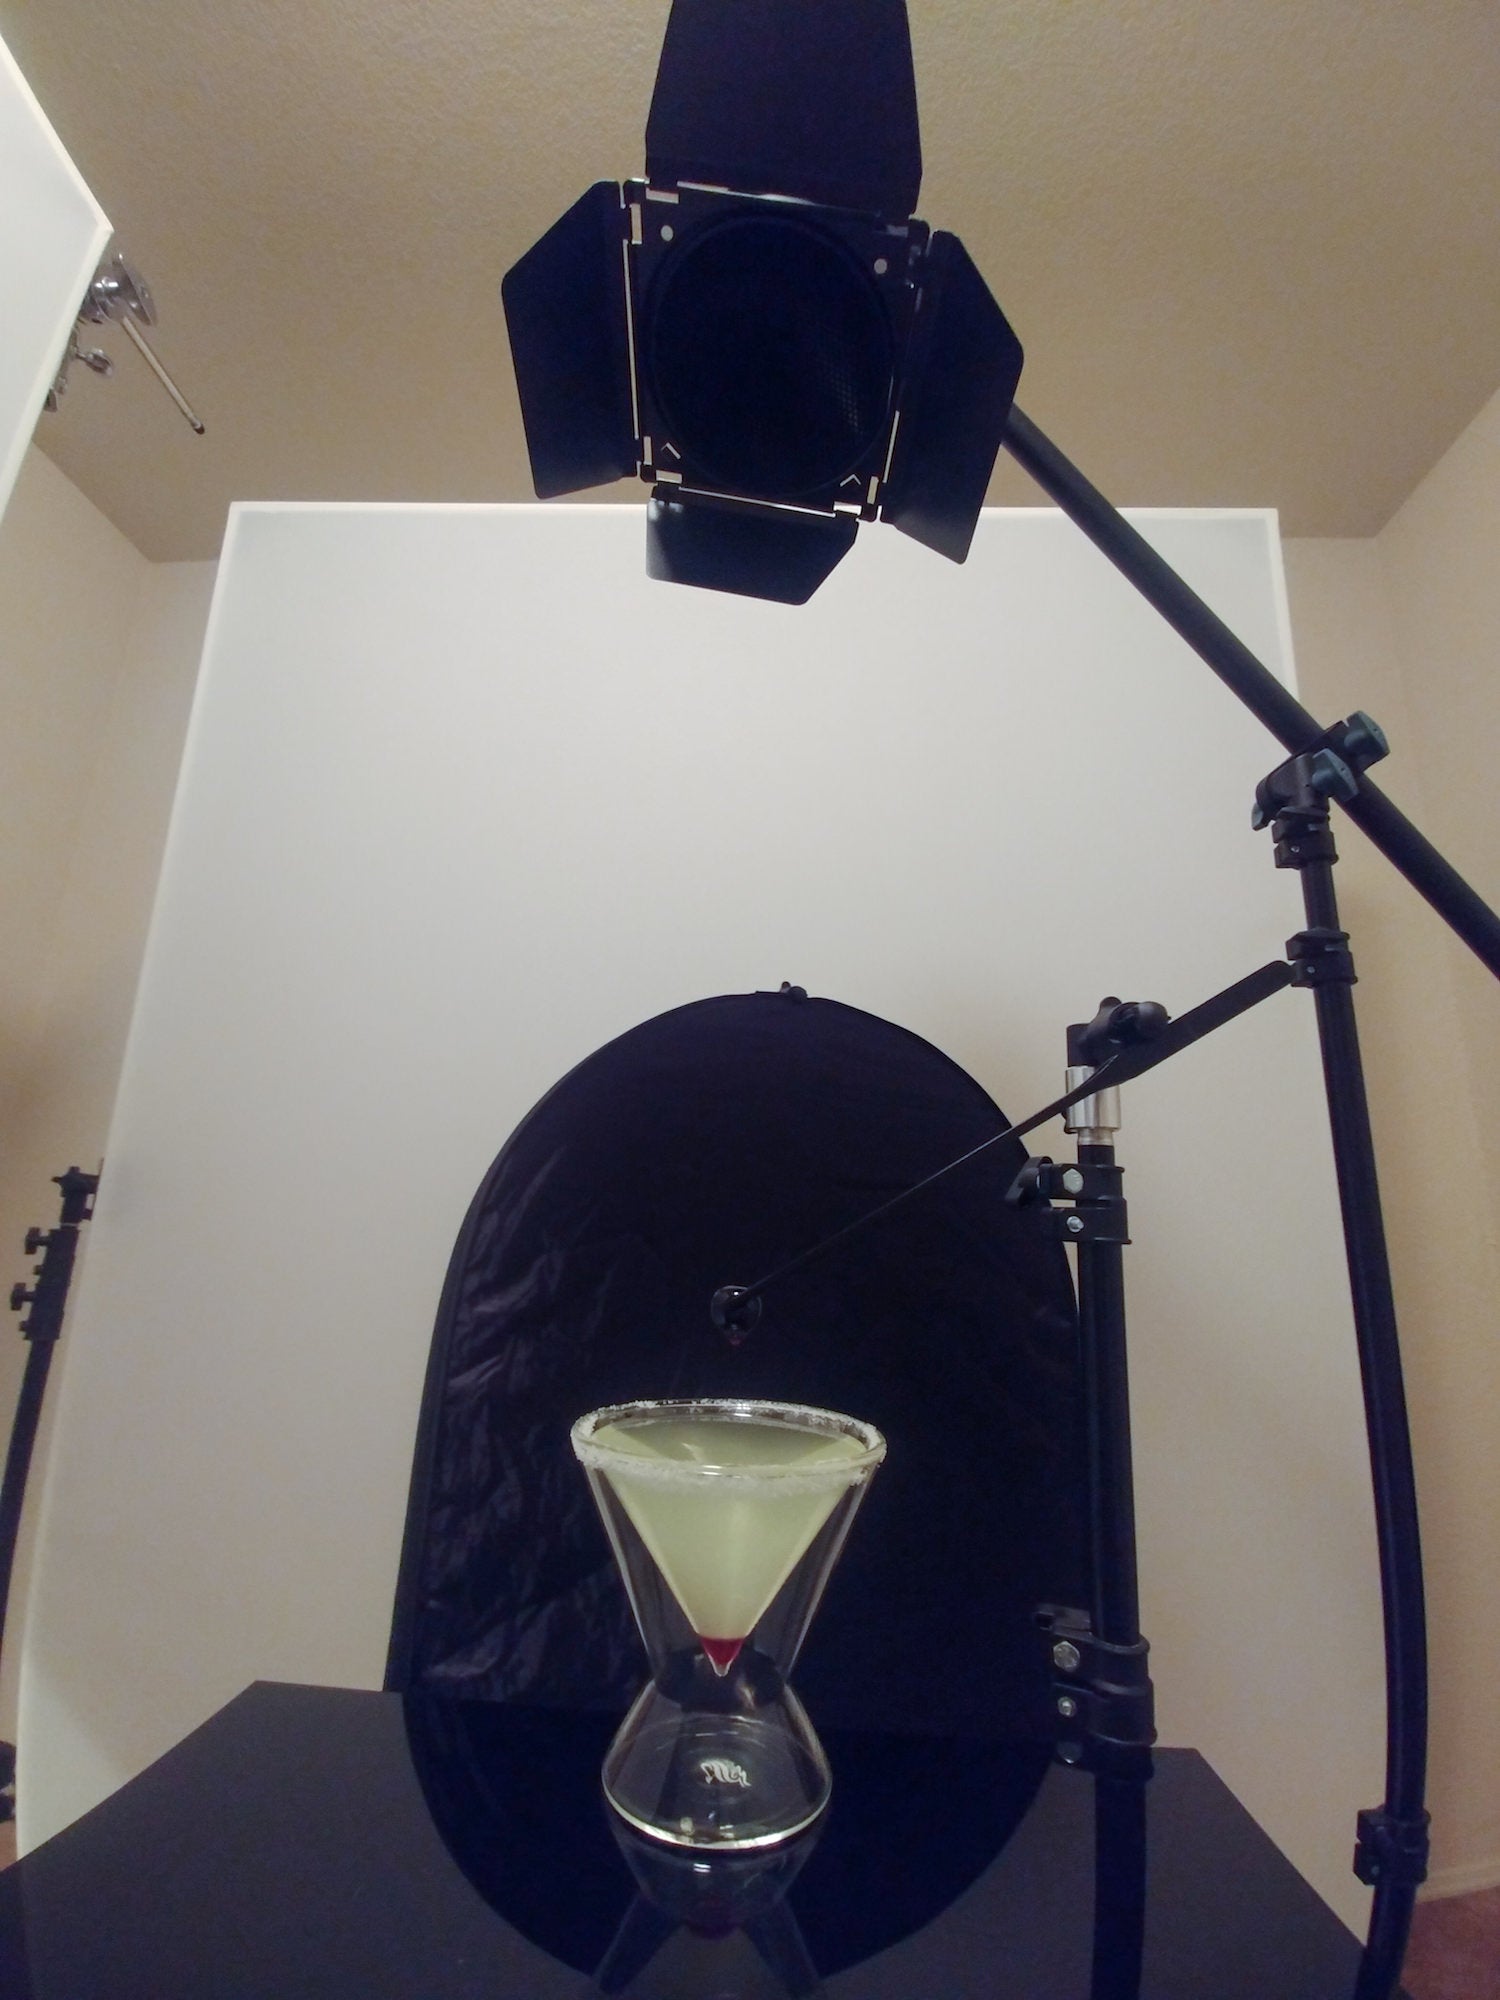
The trickiest part of this shot was really just anticipating the drip. I almost always use a remote shutter release so that I don't have to be stuck behind the camera and it frees up my hands. I used an eye dropper to get some of the syrup from the jar of Luxardo Cherries and dripped three or four drops on the cherry. The syrup is super thick, so I had to just wait and anticipate the drip and try to push the shutter release right as it was dripping. It was all about the timing.
Post-Processing
I always start my post-processing in Adobe Lightroom. In this case there really wasn't much needed other than bumping up the exposure just a bit and pulling down the highlights and the blacks a little. I always turn on lens corrections and I always mask the sharpening to 50%. I always do the finishing touches in Adobe Photoshop.
The very first thing that I like to do is clean up any little bits of dust and scratches/imperfections using the healing brush tool and the spot healing brush tool. Then I look for any selective adjustments that need to be made. In this case I needed to brighten up the tweezers and the cherry a little bit more to separate them from the black background a little better. I used the pen tool to make a selection around both of them and used some curves adjustment layers to selectively brighten them. Then I used some levels adjustment layers to fine tune the blacks and highlights of the entire image. My final two steps in Photoshop are almost always noise reduction and then sharpening. Finally, back in Lightroom (most of the time LR Mobile), I double check everything and adjust my crop for social media.
See more of Stuart's work on Instagram @stuart_anderson_ig
