Sony Artisan Thibault Roland specializes in long exposure black and white photography. In this article he shares how he sets up his camera to create images in this stunning style.
Thibault Roland (@thibaultrolandphoto) is a photographer and Sony Artisan of Imagery with a background in scientific research. Roland is fascinated by photography and how scientific concepts such as time and space can be integrated into this art. He explores this through long exposure photography, specifically long exposure black and white photography, and he’s mastered the camera setup for creating successful images in this style. Below he shares his top camera setup tips for shooting compelling long exposure black and white photos.
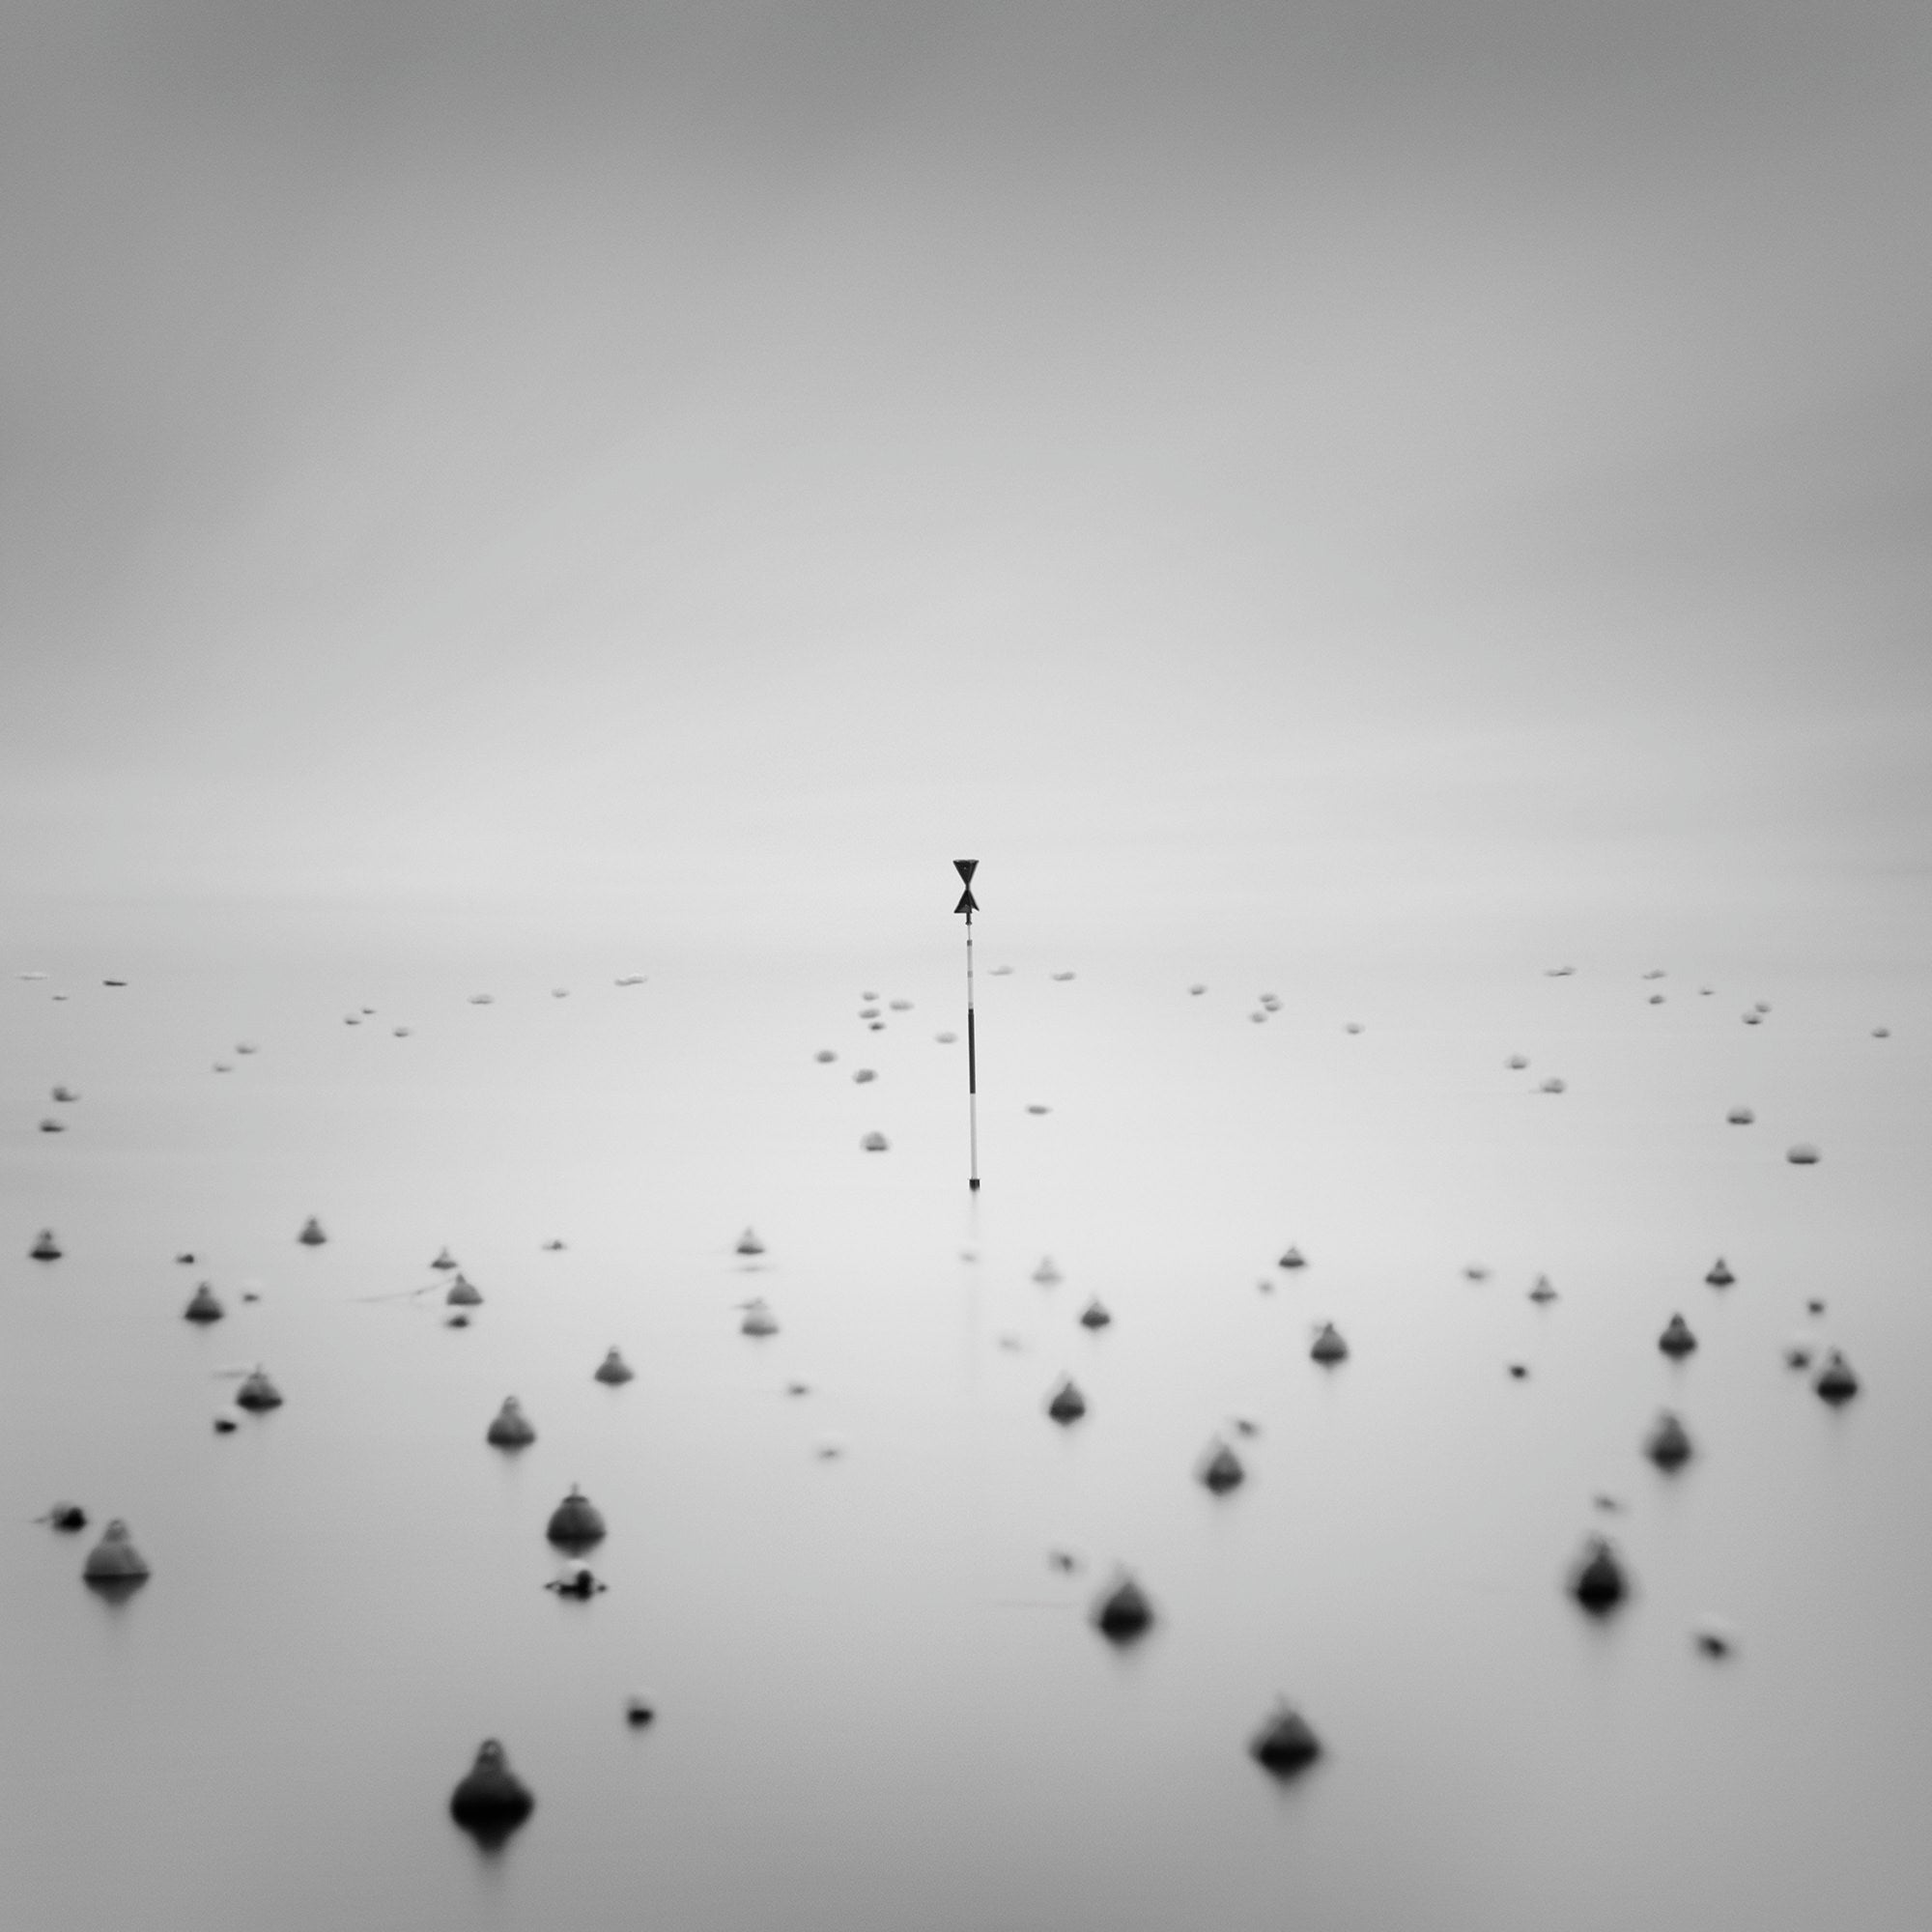
Photo by Thibault Roland. Sony Alpha 7R II. Sony 70-200m f/2.8 G Master.
Sony Artisan Thibault Roland specializes in long exposure black and white photography. See his top camera setup tips for creating your own successful images in this style.
Shoot Uncompressed RAW
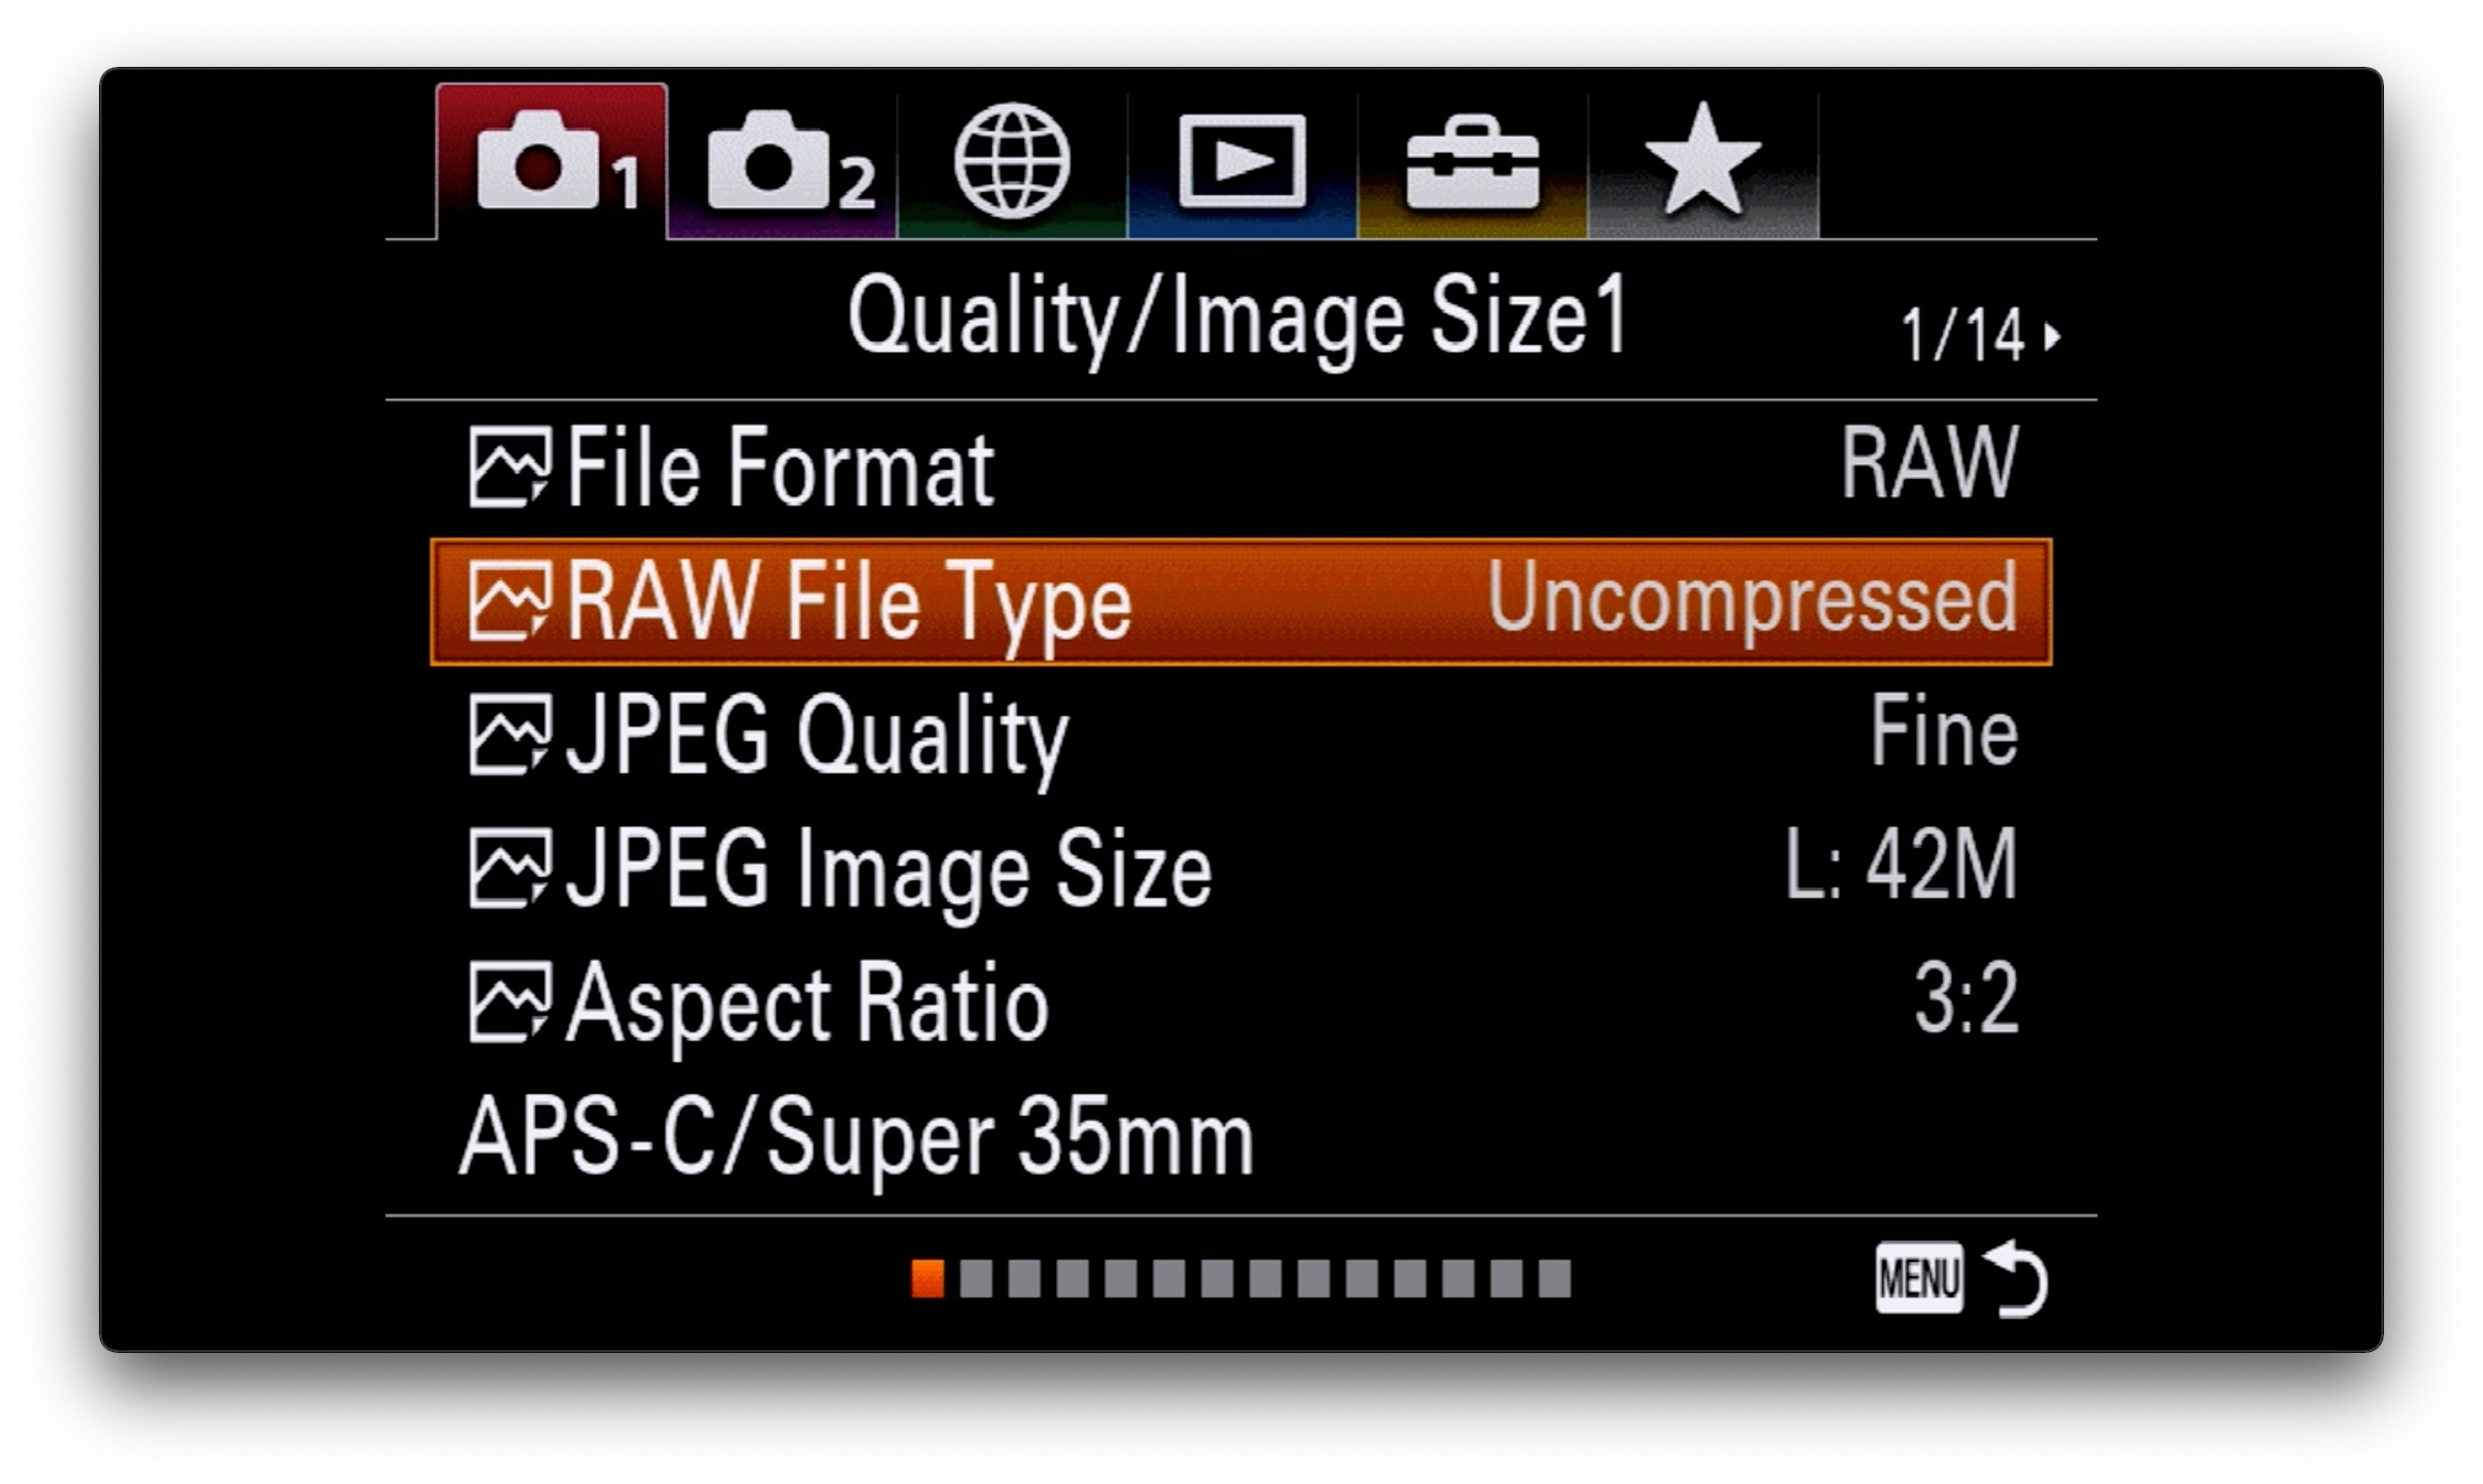
The very first thing to check is that your camera is set to capturing images in Uncompressed RAW. This is the only way to benefit from the amazingly wide dynamic range of your camera, and this allows you to retain details in the shadows and the highlights while minimizing the amount of noise. Shooting in Uncompressed RAW will also enable the creation of the typical long exposure cloud and water streaks in a very soft and gradual manner. This will be helpful when editing your images in post and avoids the creation banding artifacts that jpeg will typically introduce.
Add Histograms
Before shooting the long exposure picture, I strongly recommend to shoot a normal exposure, and to use histograms in order to make sure that your image is properly exposed. The histogram is a visual representation of the amount of light captured by the camera: the left side indicates the shadows while the right-hand side represents the highlights. The darker (brighter) the picture, the more to the left (right, respectively) the distribution of the histogram. The most common desirable outcome is to have a distribution mostly centered, with little to the left (shadows) or the right (highlights).
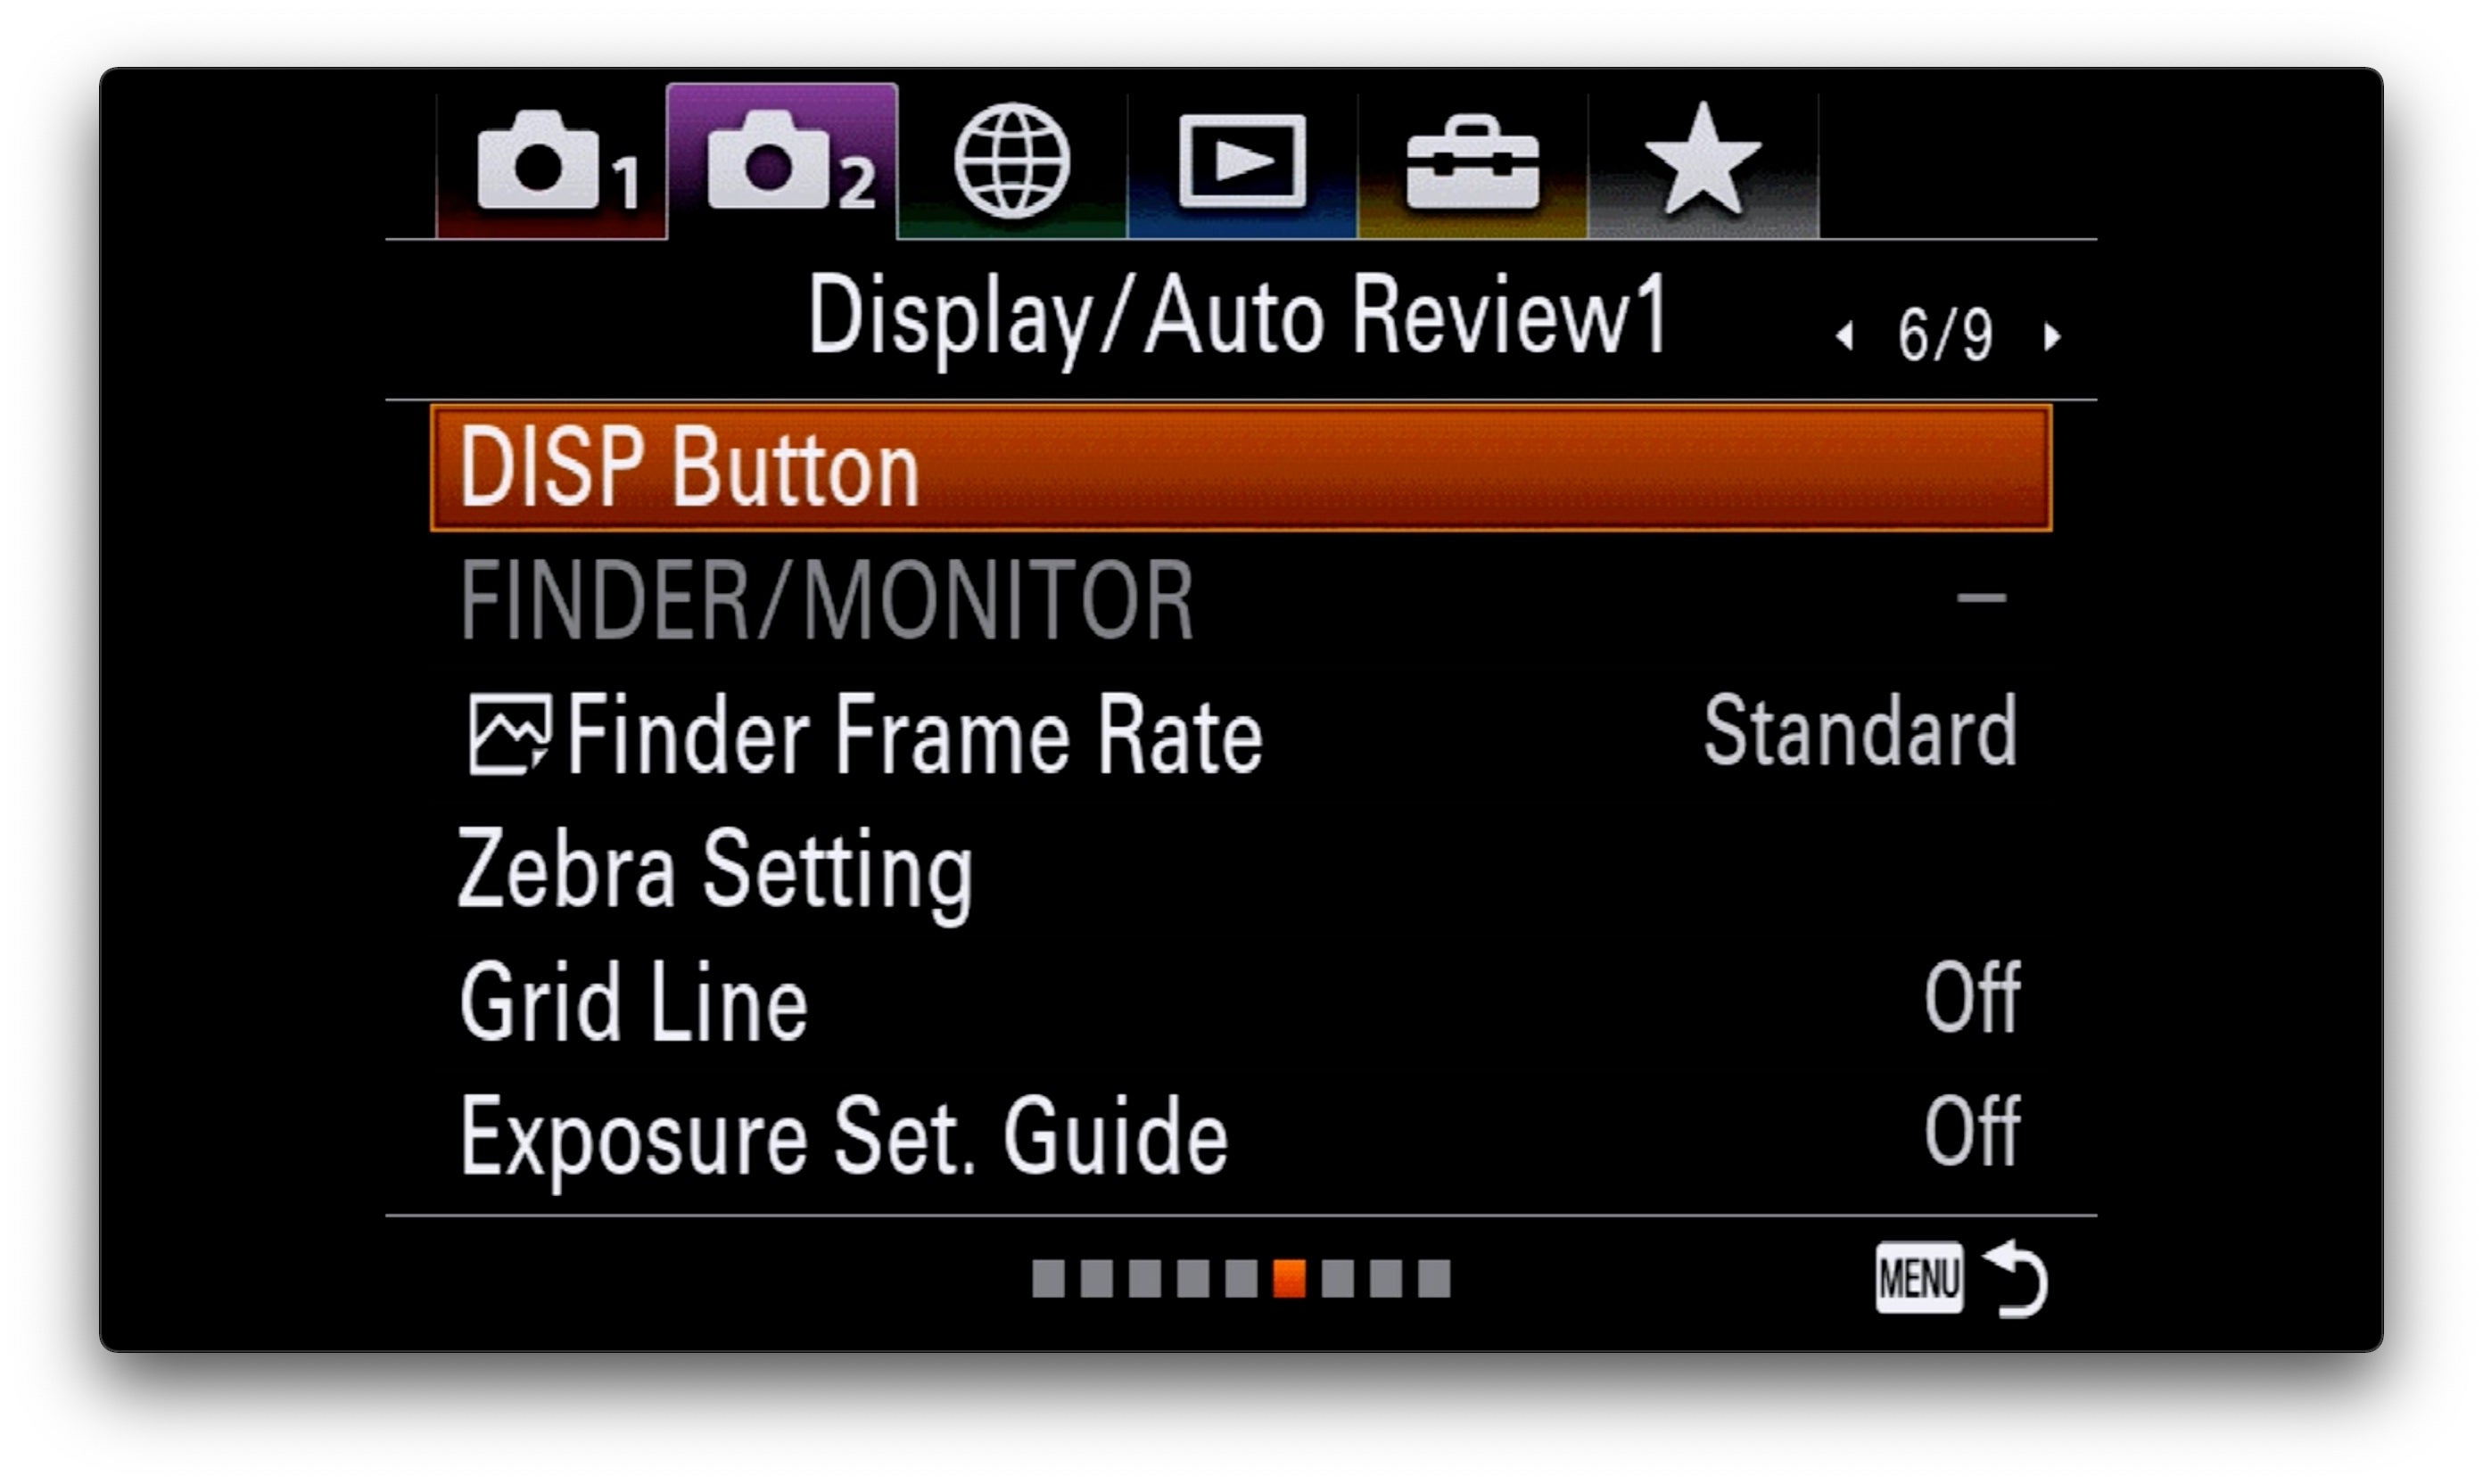
There are two locations to set up the histograms. First of all, on the live screen at the back of the camera and through the viewfinder. This essentially allows you to quickly and visually meter the scene and make sure you are getting the results you are looking for while retaining information in the highlights and shadows. The second location to turn the histograms on is in the memory call back menu. This will allow you to check the exposure for both the regular and the long exposure shots after shooting them, and you’ll know if you need to shoot another image in order to adjust your exposure slightly one way or the other.
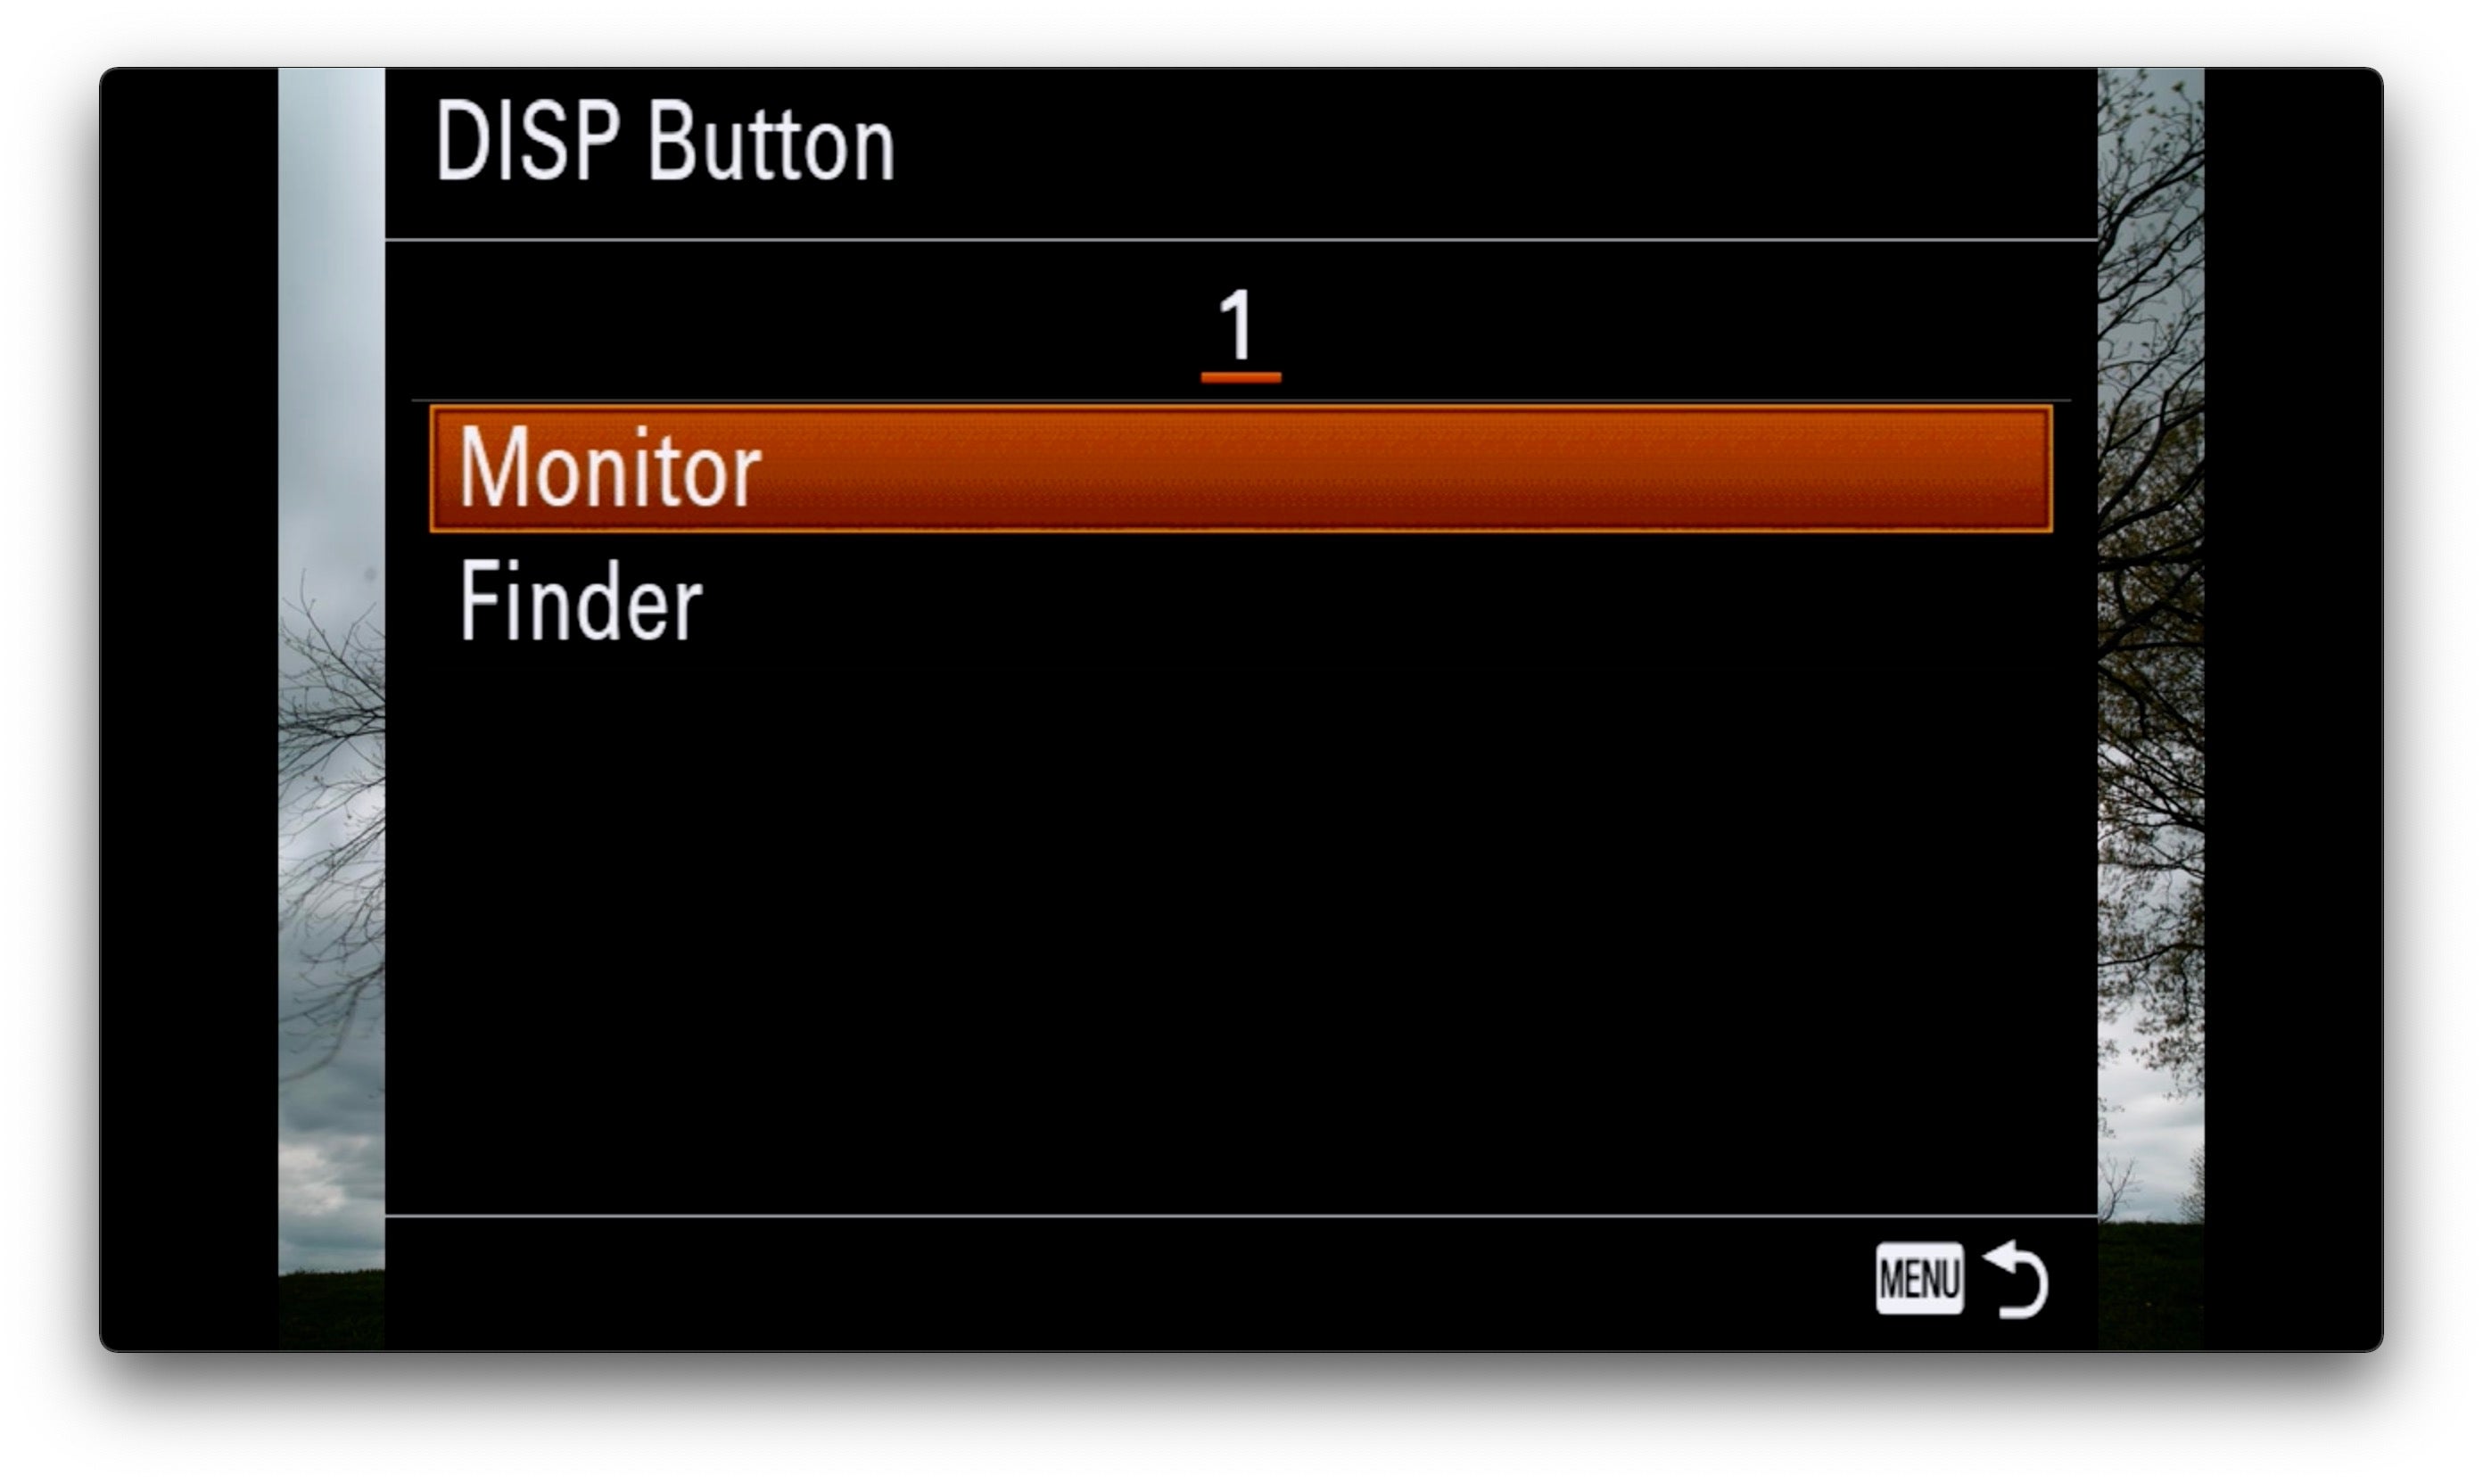
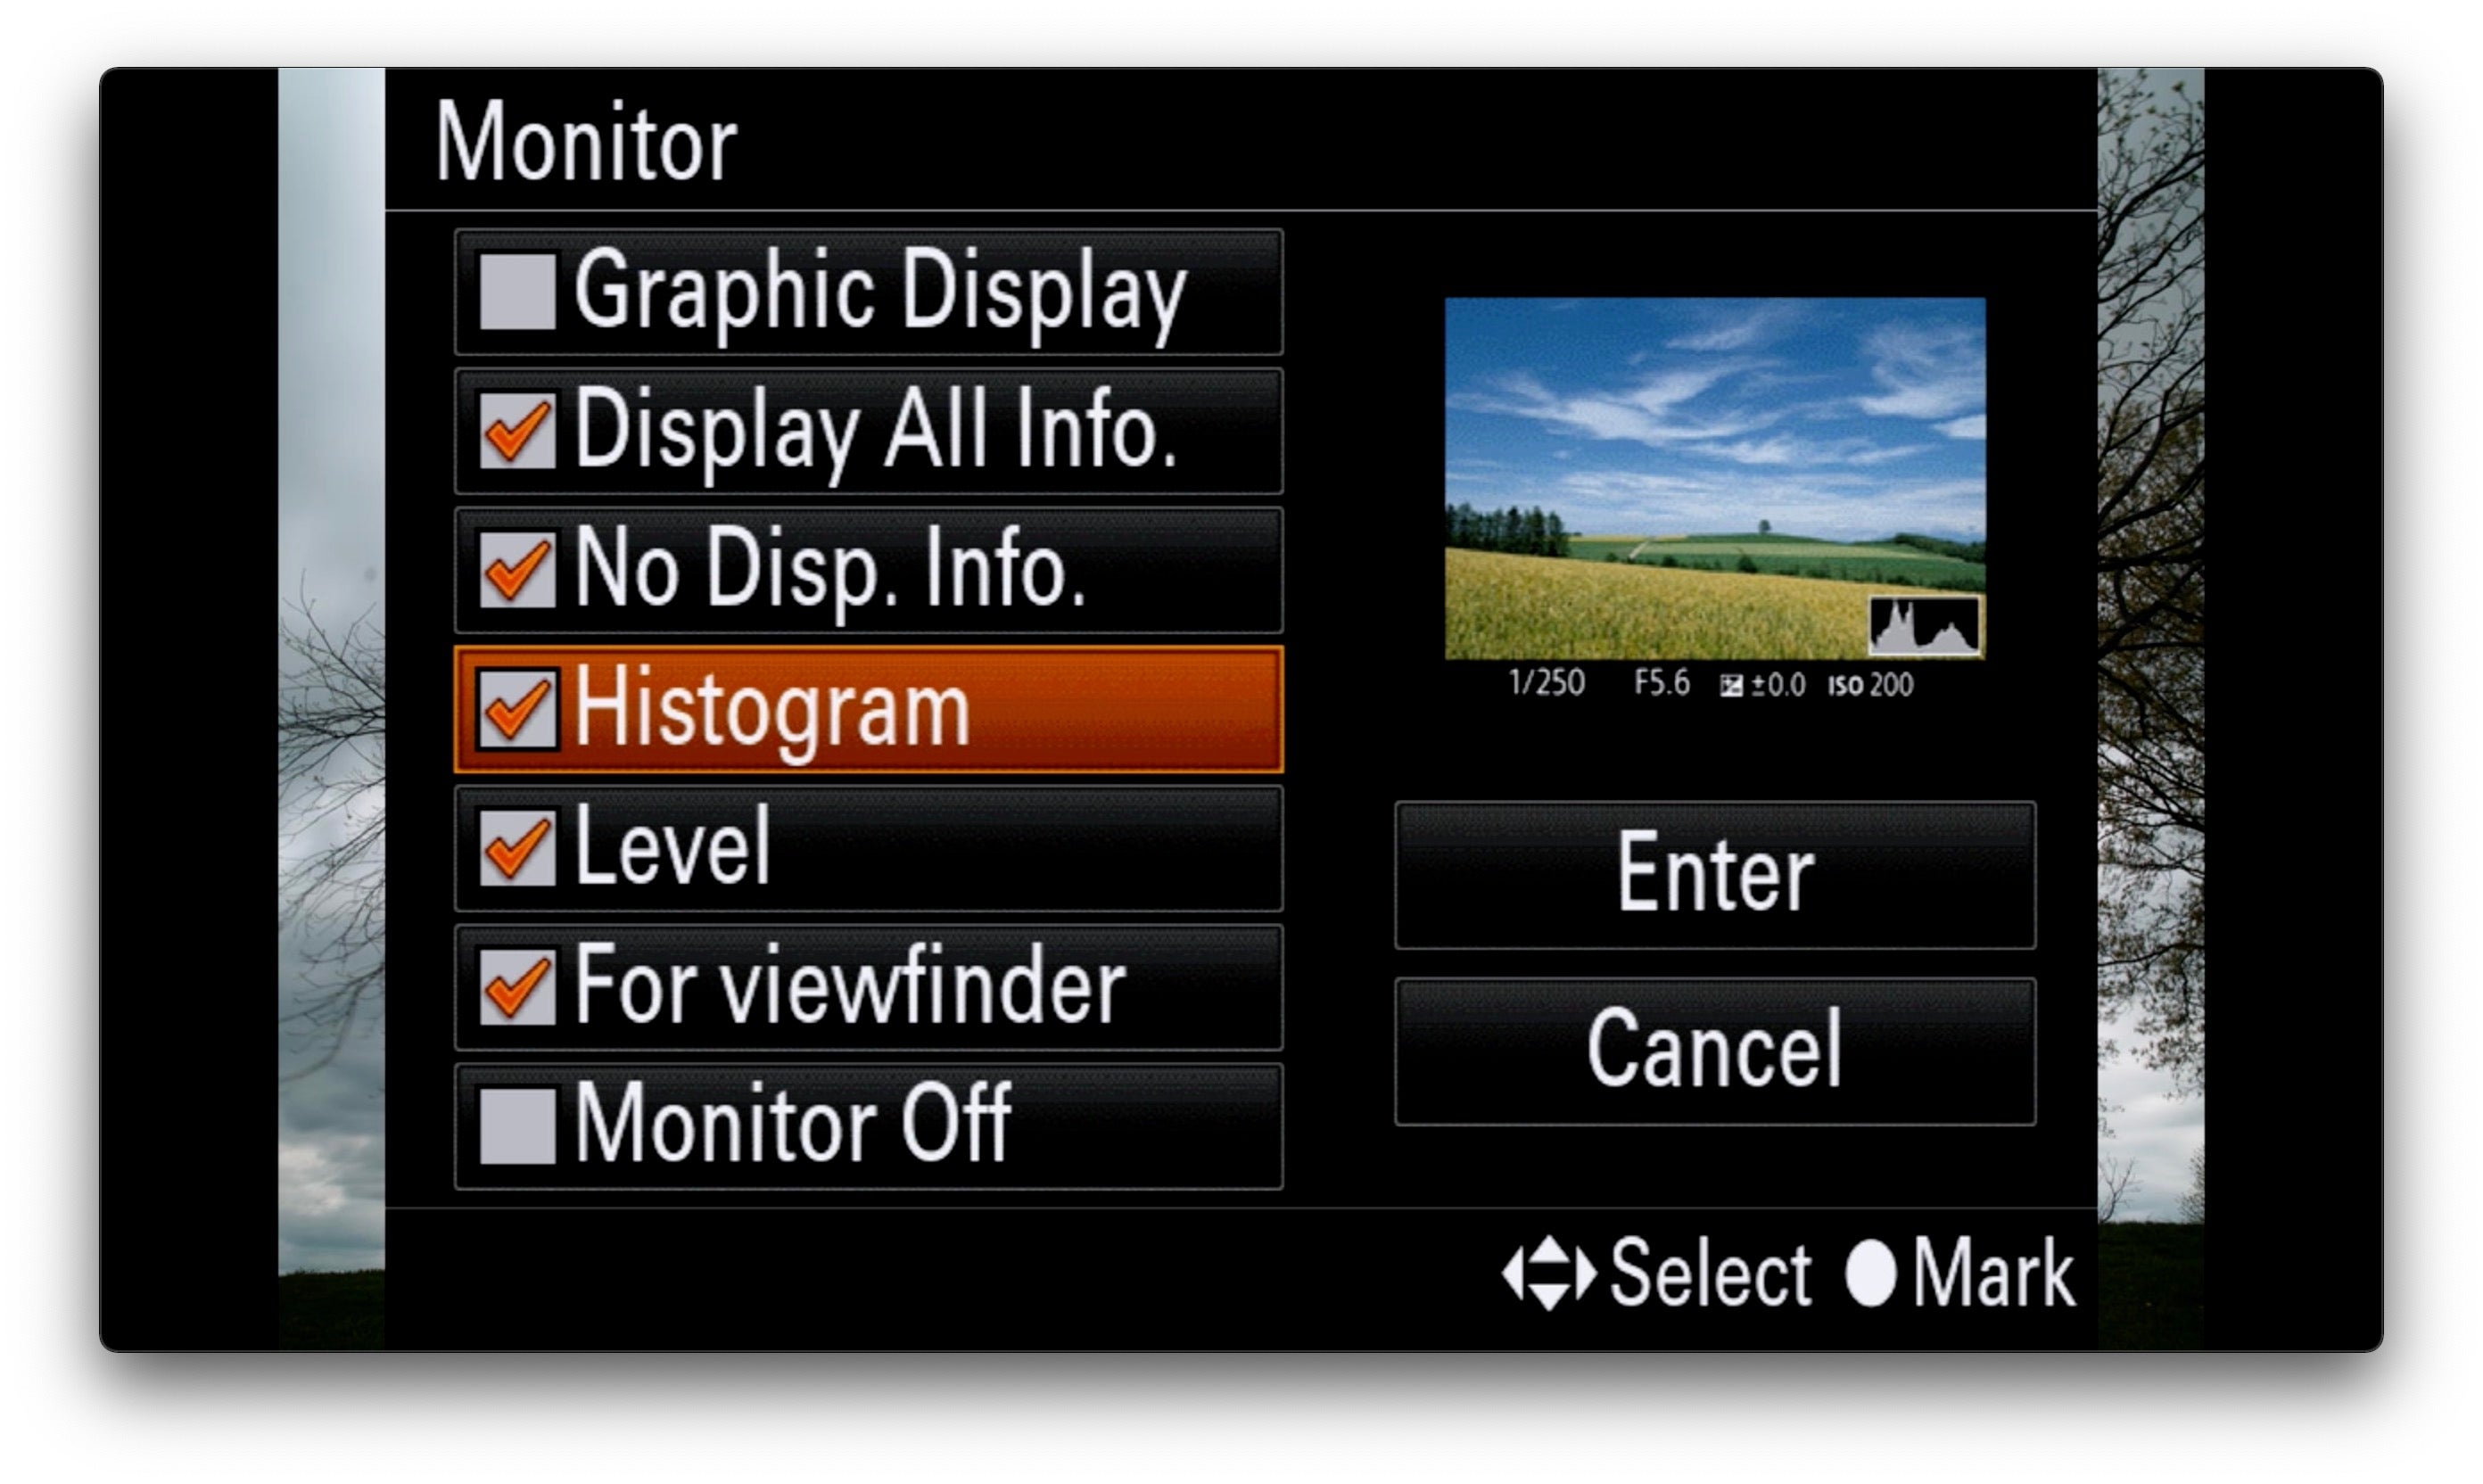
For more on setting up your camera to display the histogram, see This Is How To Get Perfect Exposure In Camera by Gary Hart HERE.
Long Exposure Noise Reduction
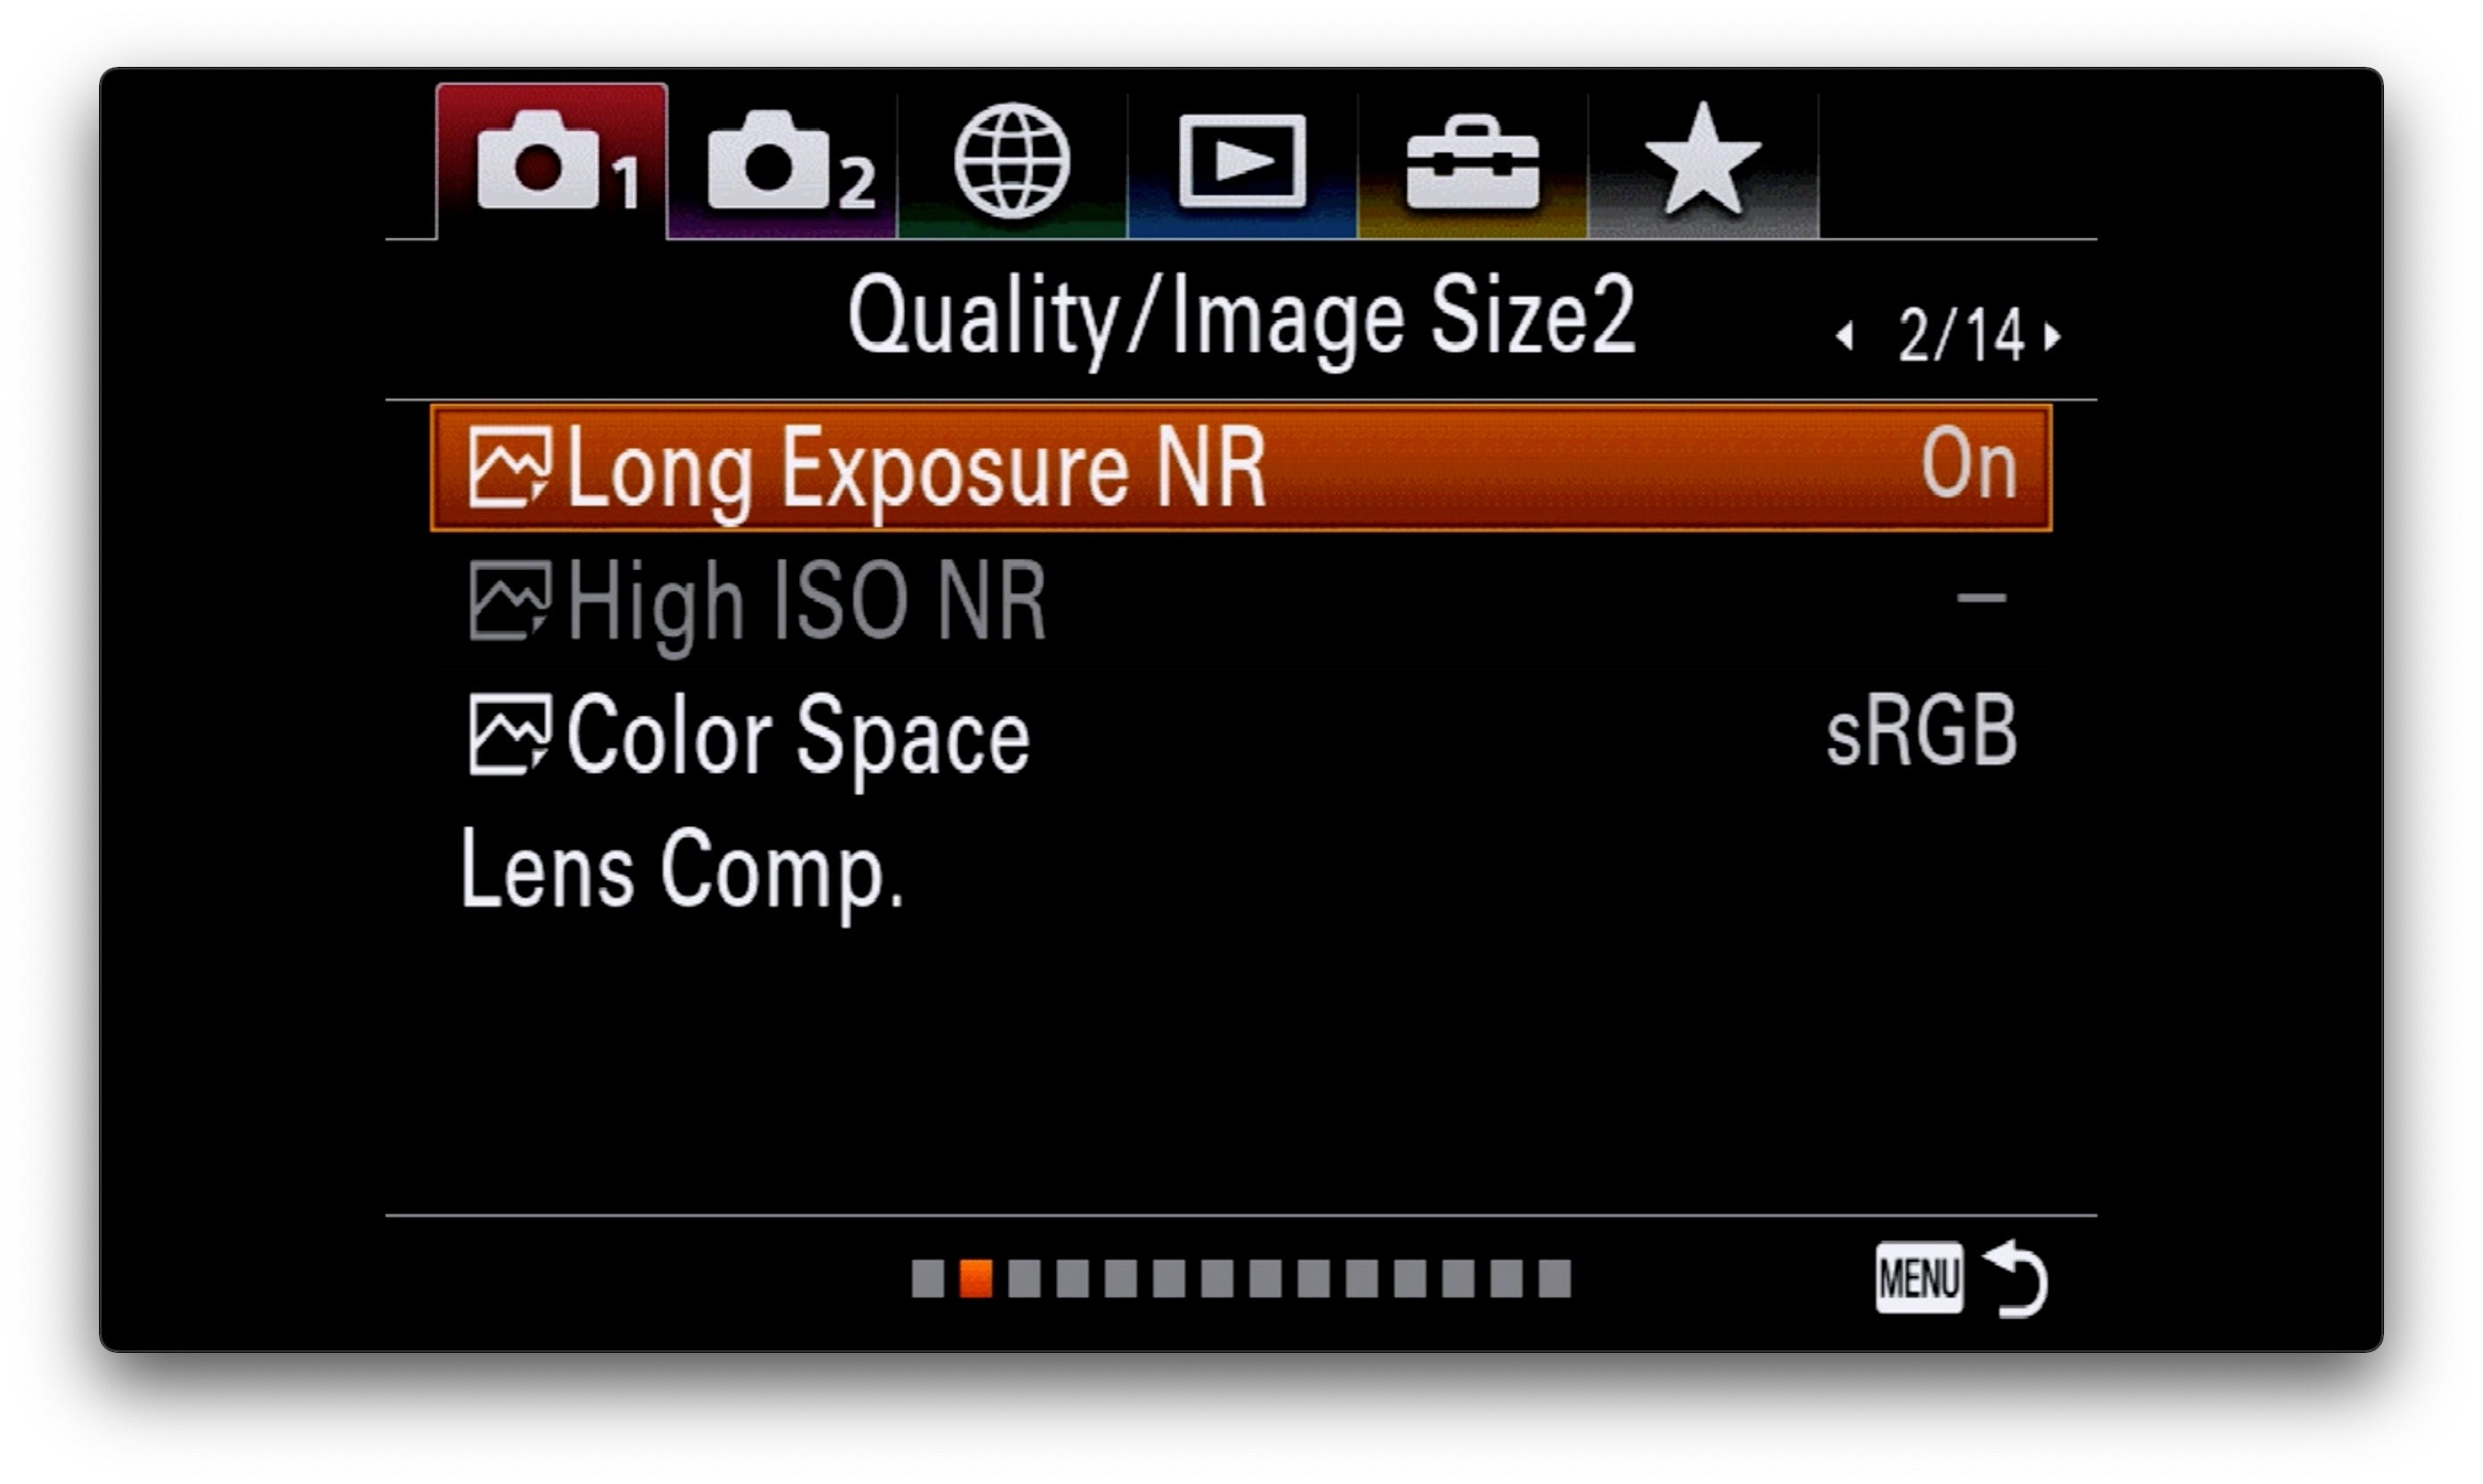
The LE Noise Reduction setting is highly desirable because it removes most hot pixels and noise from a slow shutter speed picture. Unfortunately it comes with a significant drawback because it does it by capturing a second image (with the aperture closed) for the same duration as the initial long exposure. My recommendation is therefore to only use it when you have time to wait for the camera to process this second image, or when absolutely needed, for instance in the heat or when the sun is hitting the camera directly.
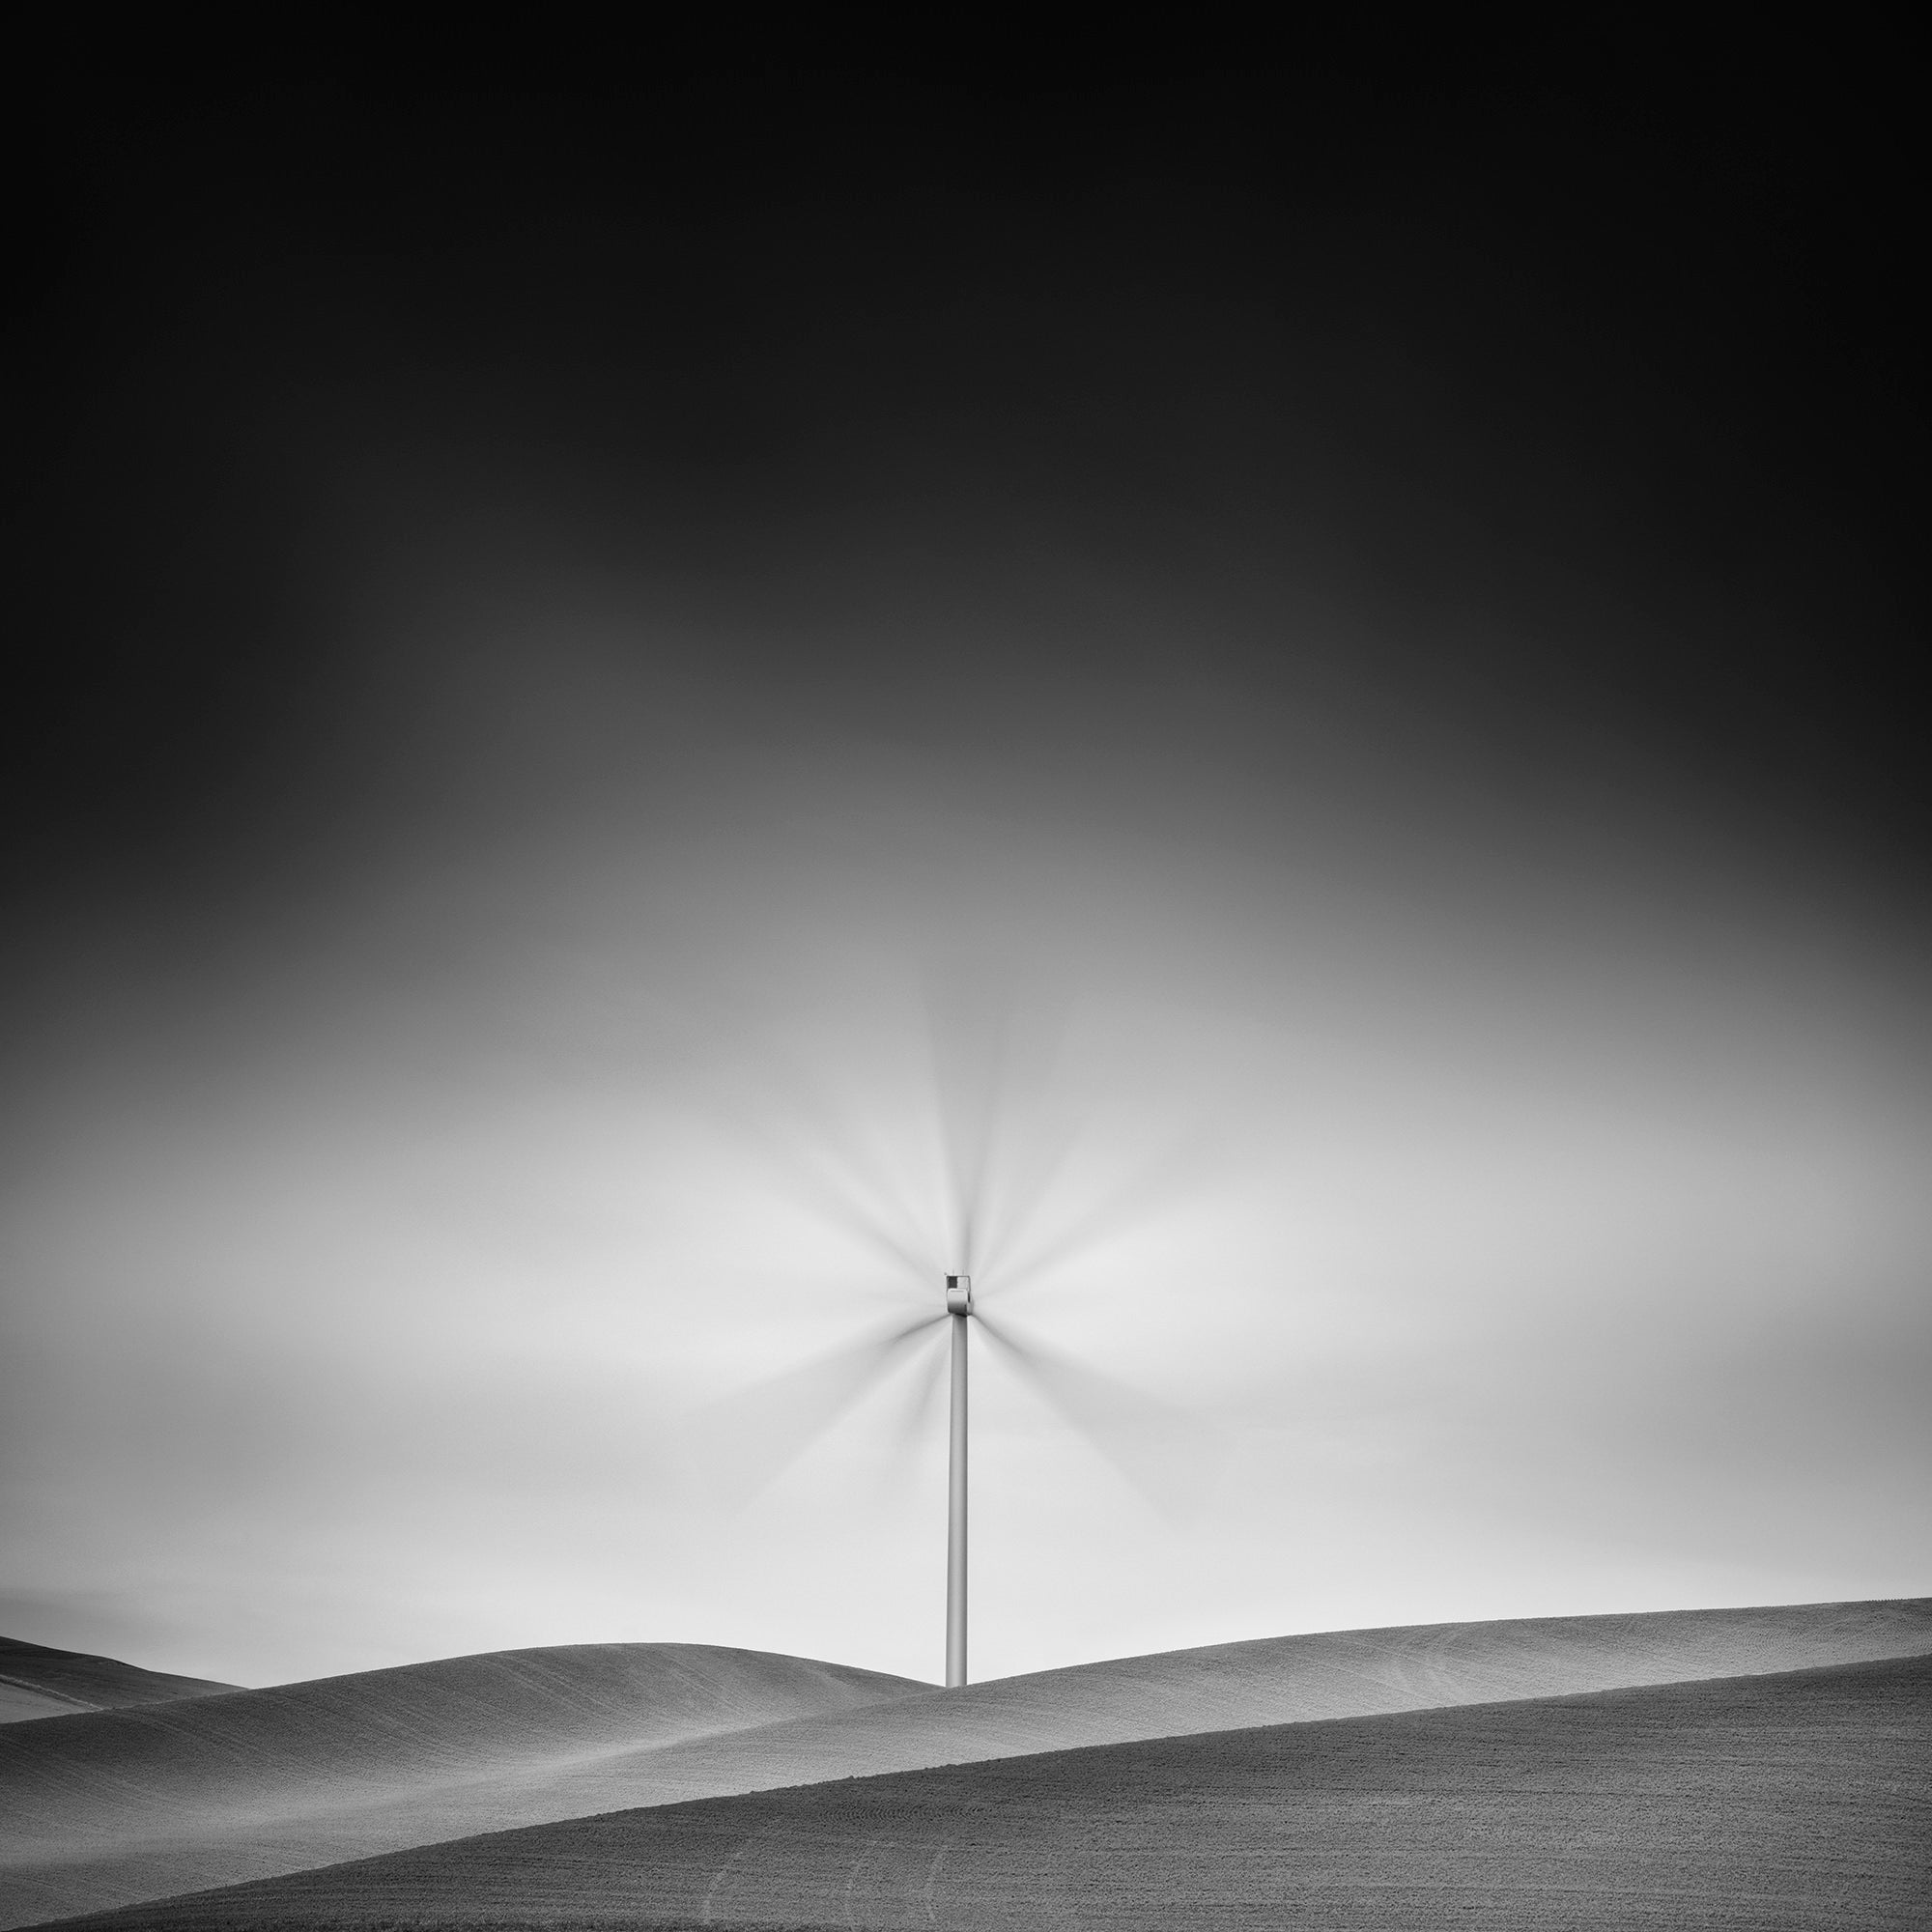
Photo by Thibault Roland. Sony Alpha 7R III. Sony 100-400mm f/4.5-5.6 G Master. 1/4-sec., f/8, ISO 200
Shoot Fully Manual
When it comes to capturing long exposures of landscapes, there is usually no need to shoot fast, so my default is to set your camera and lens to be in manual mode right from the start. Being in manual focus from the beginning will ensure that you don’t forget to switch from AF to MF when putting the filter on, therefore avoiding the capture of blurred images. Using manual ISO and locking it down will prevent the camera from overexposing your slow shutter speed image. And keeping your aperture in manual mode will ensure that the depth of field remains true to your intent and that you can for instance keep infinity focus.
Auto White Balance, Black & White, & Cropping Presets
Because we are shooting RAW, the one setting that doesn’t matter is White Balance. It is possible to adjust it very easily and quickly with your favorite editing software.
Similarly, I never use the B&W or cropping presets of the camera, because it is very easy and quick to convert an image or crop it in post.
Turn Off Zebras And Focus Peaking; Set Focus Magnification To A Custom Button
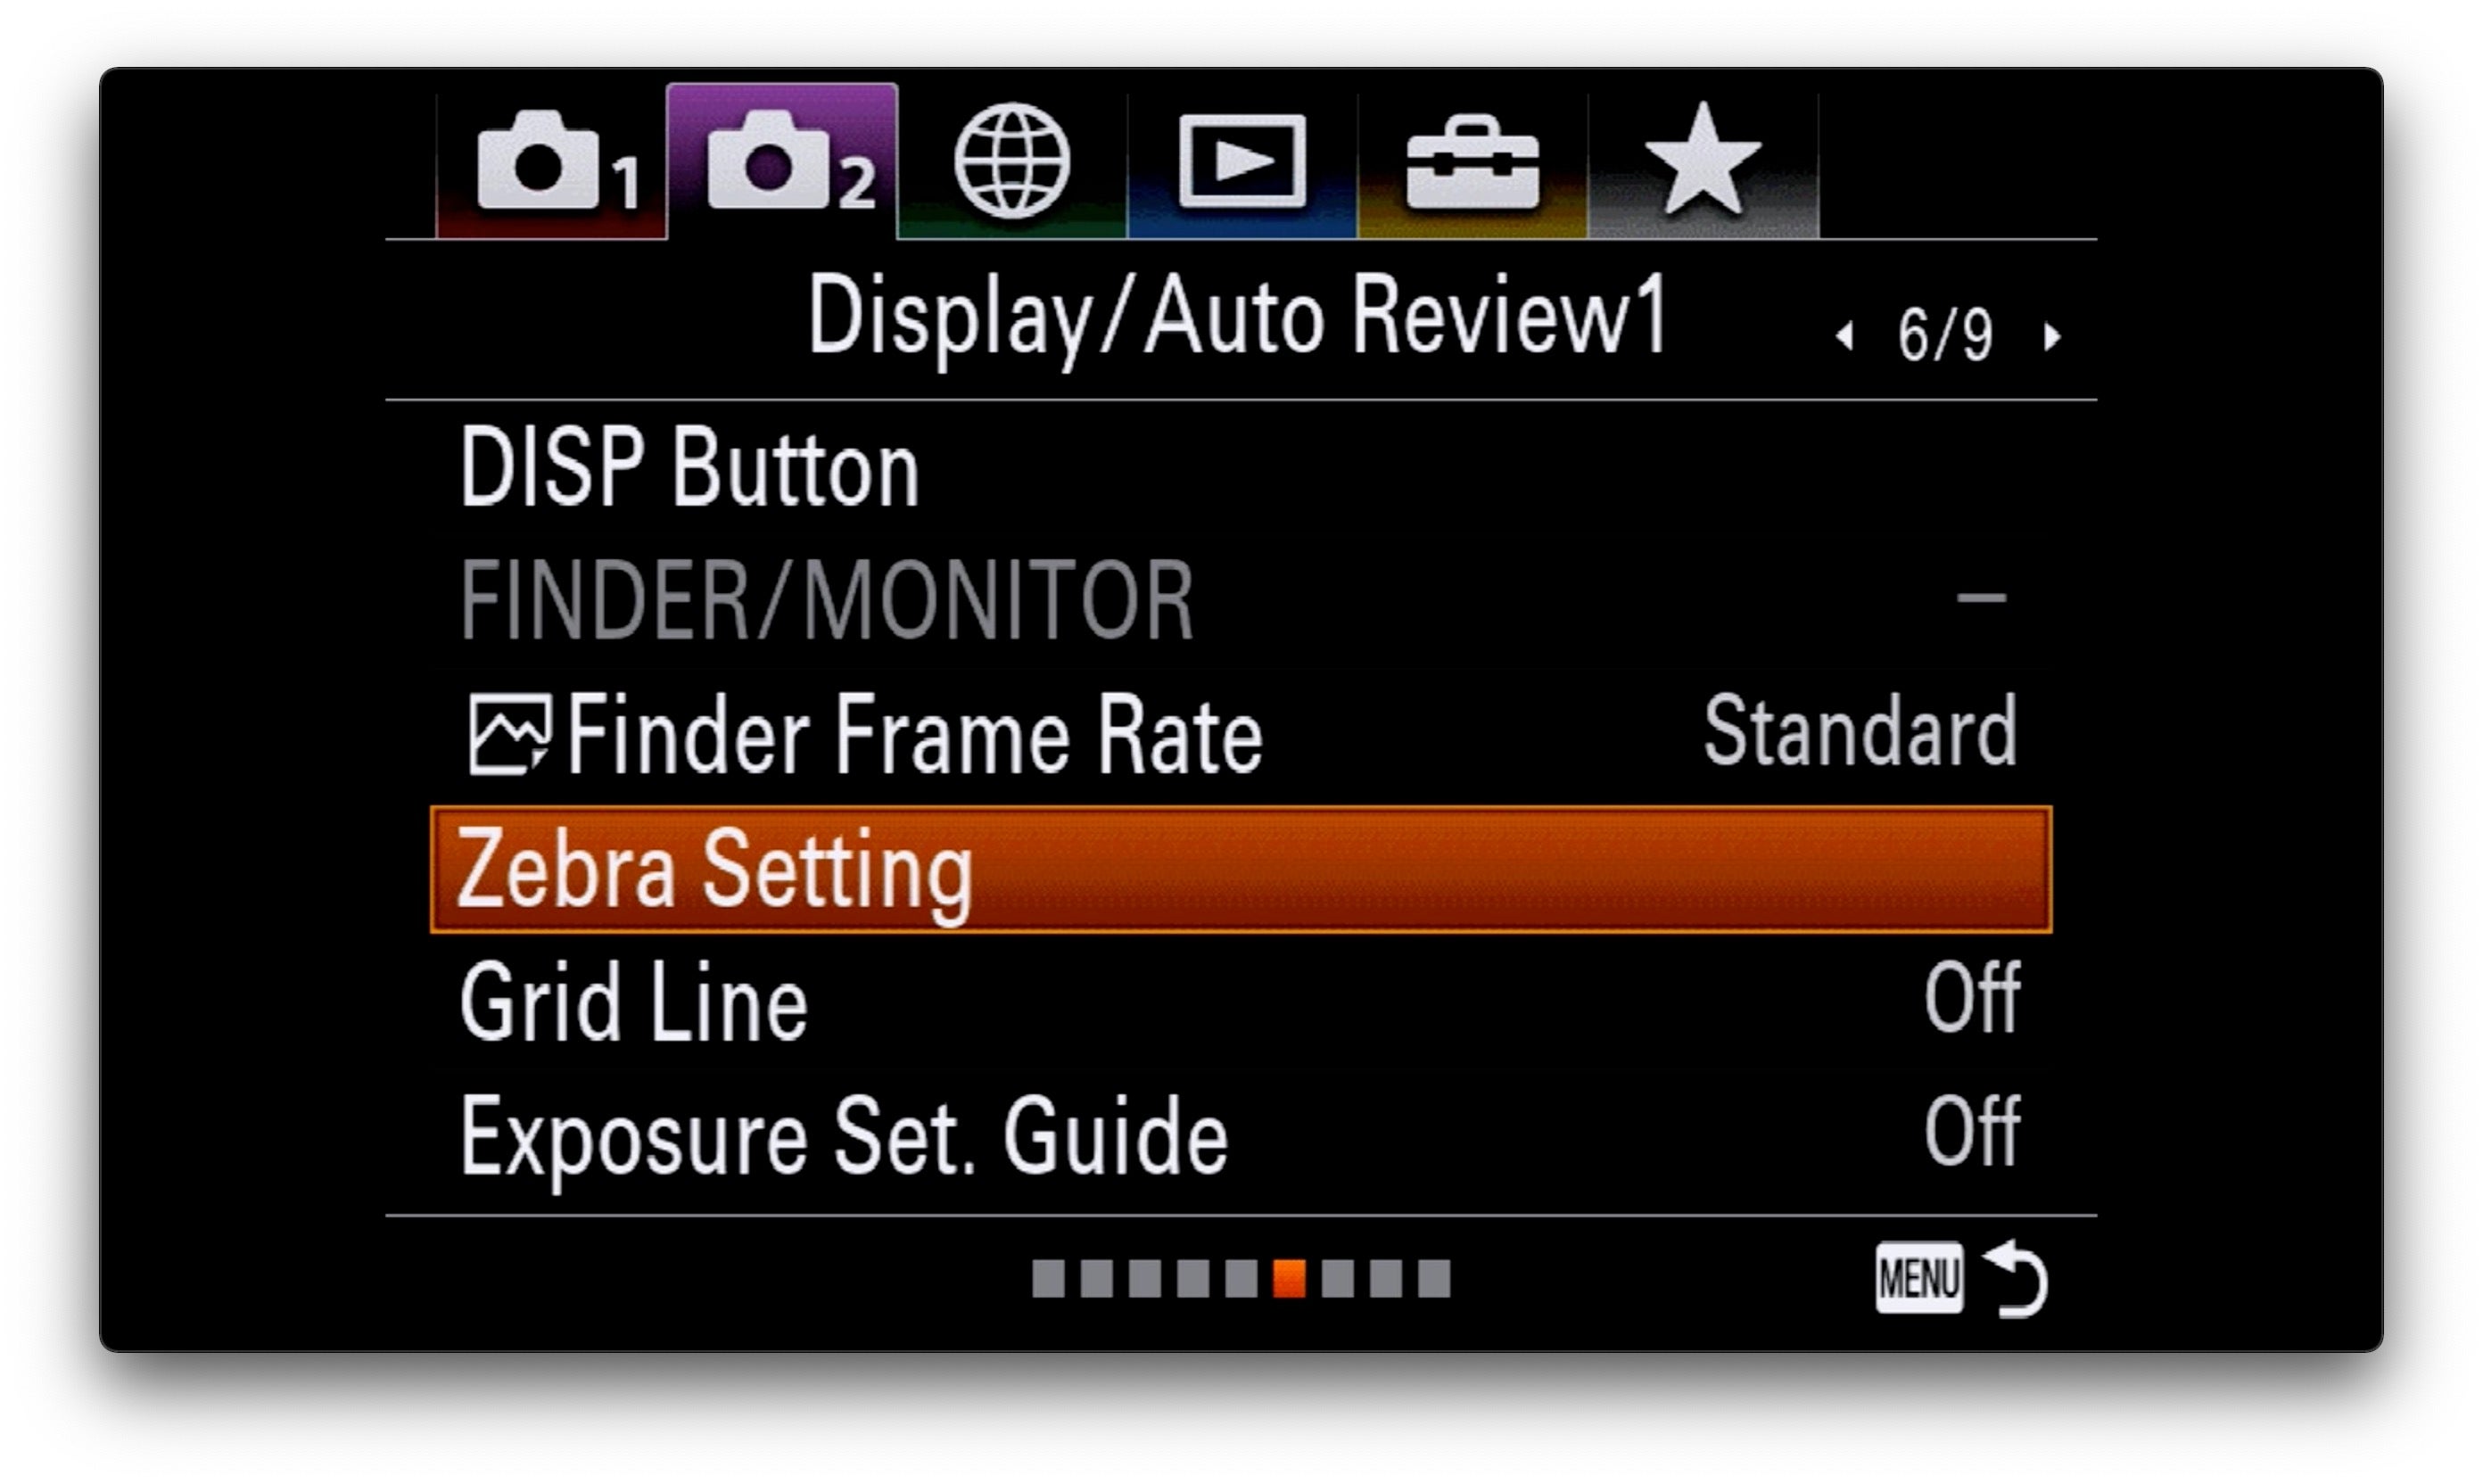
In my experience, Zebras and Focus Peaking tend to distract from focusing on framing and composing the best image possible. They introduce flashing elements in the image and will zoom in the frame when the camera gets in focus, thereby preventing me from seeing the entire scene clearly.
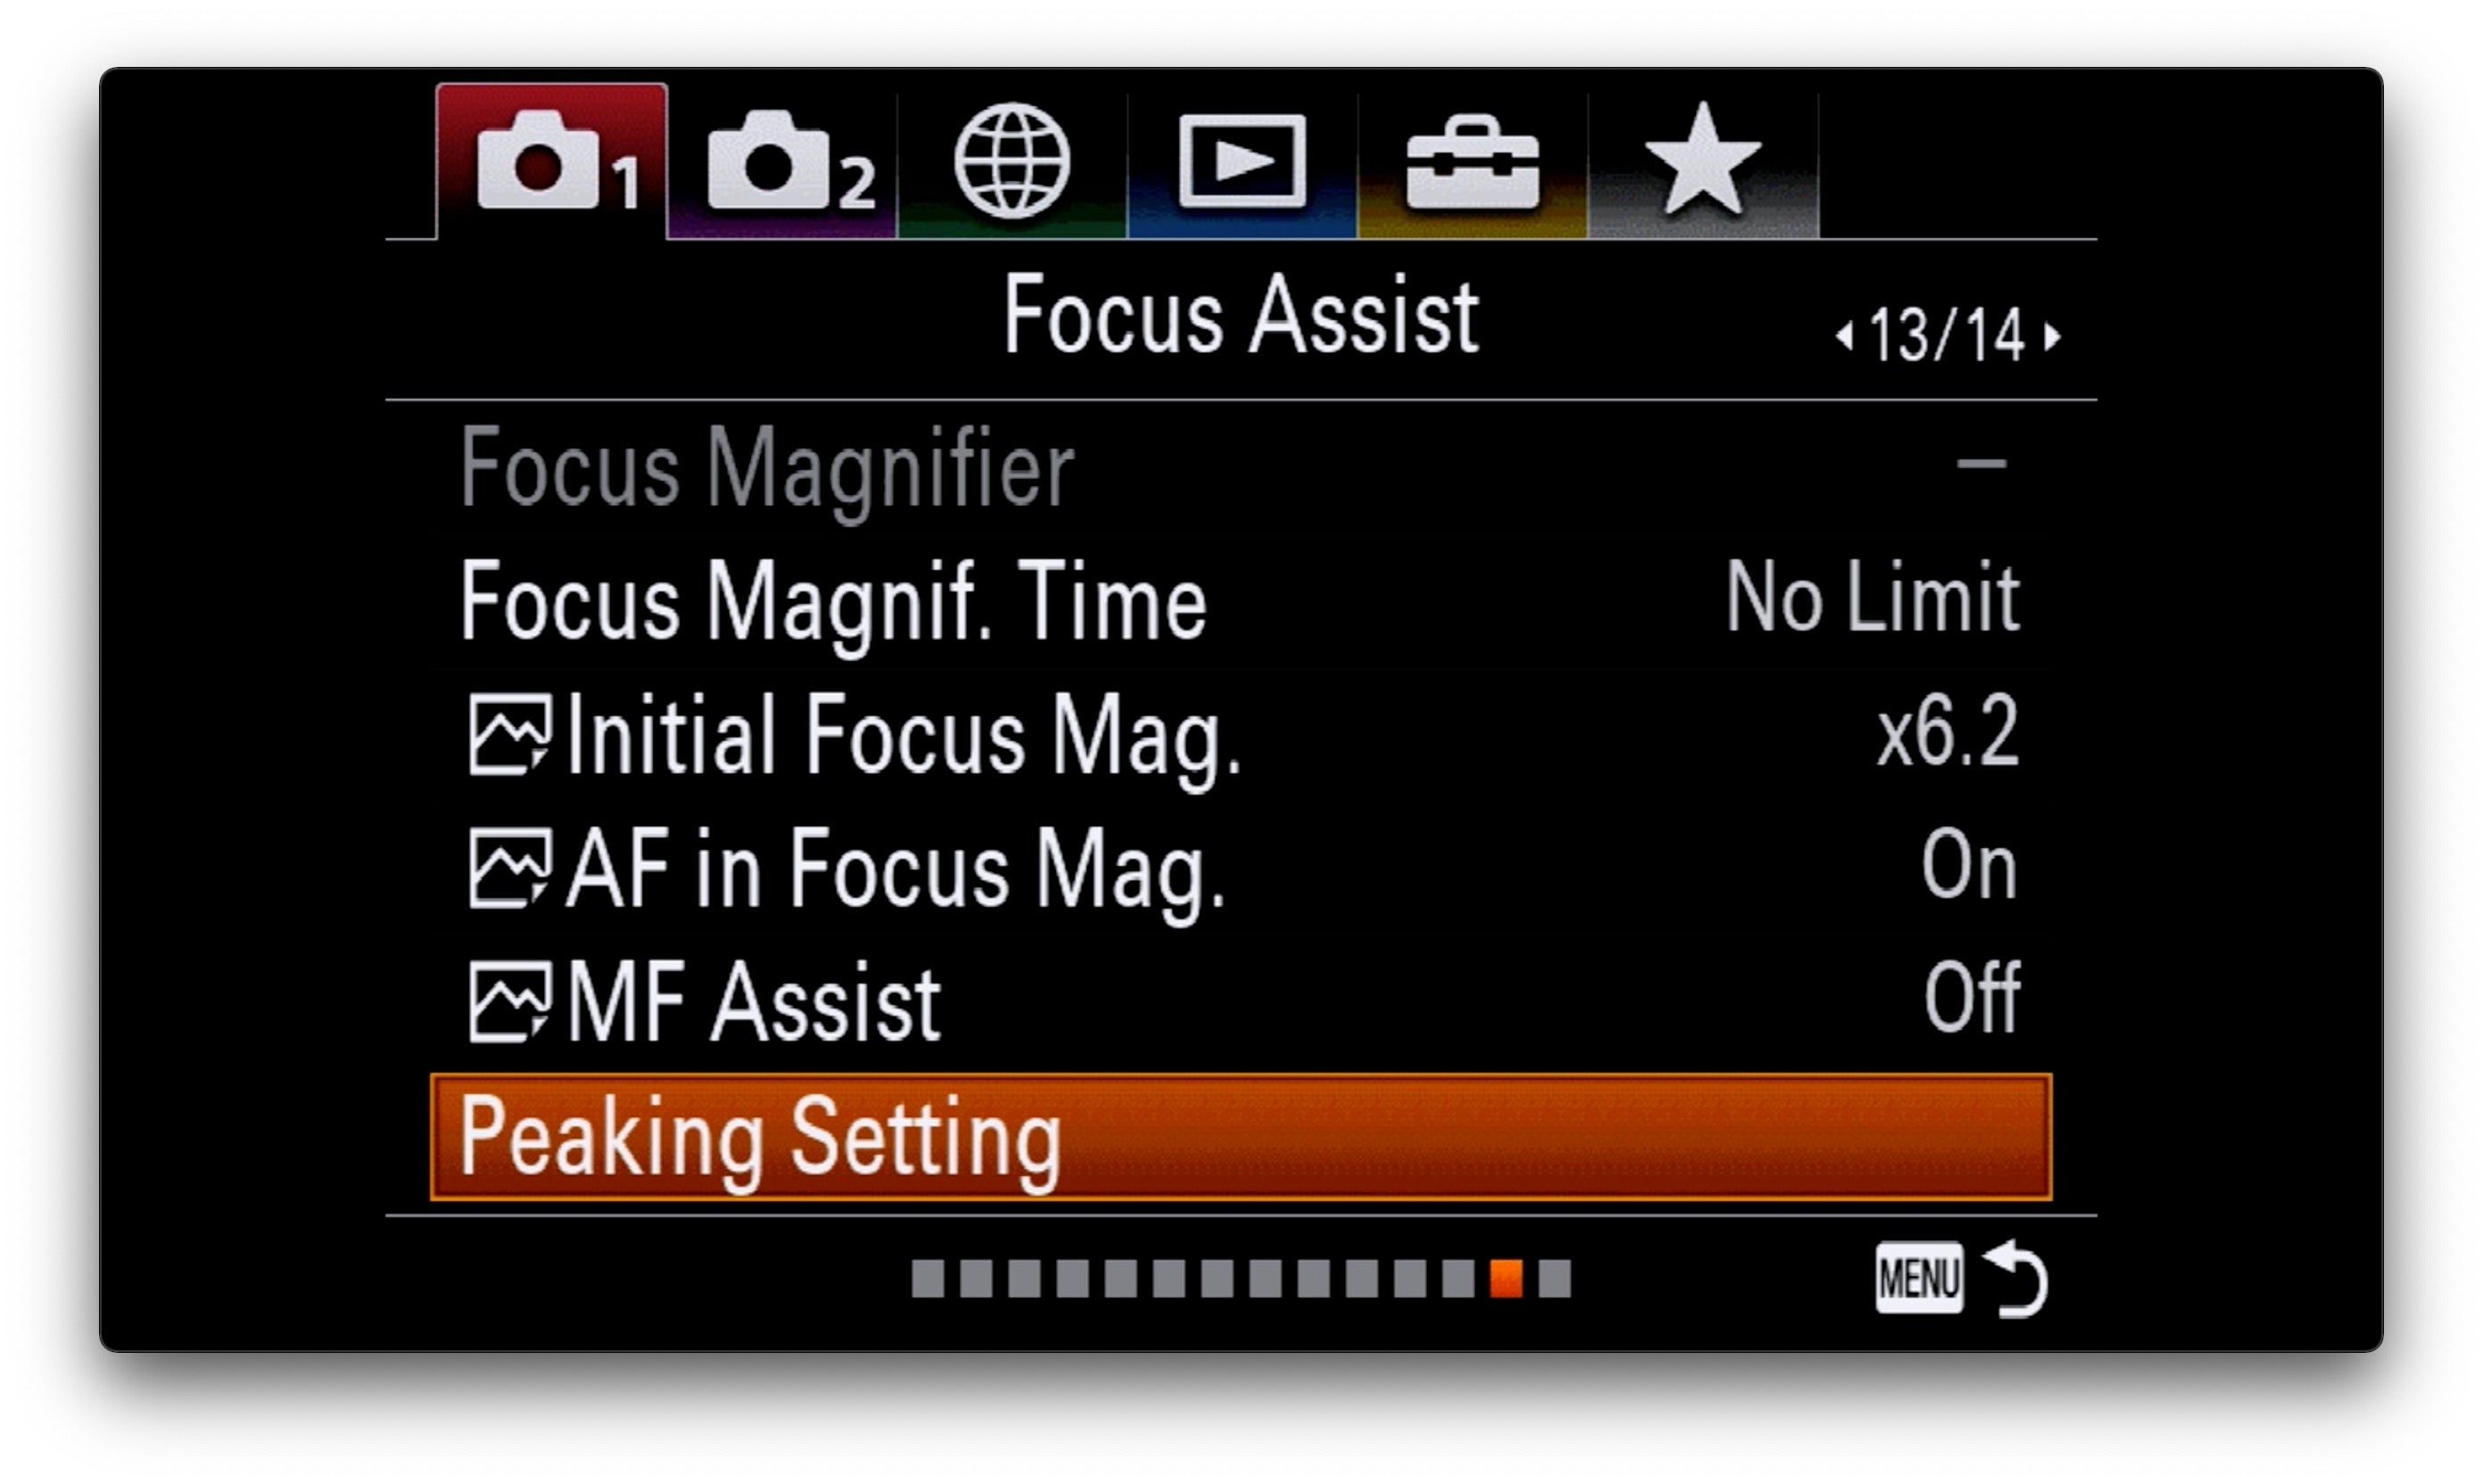
Since long exposure is not a game of speed, I find it more convenient – and accurate – to check my exposure with the histogram rather than the Zebras, and to make sure my focus is perfect by setting up the Focus Magnifier to a custom button (C2) so that I can use only when needed and on the main subject in my image.
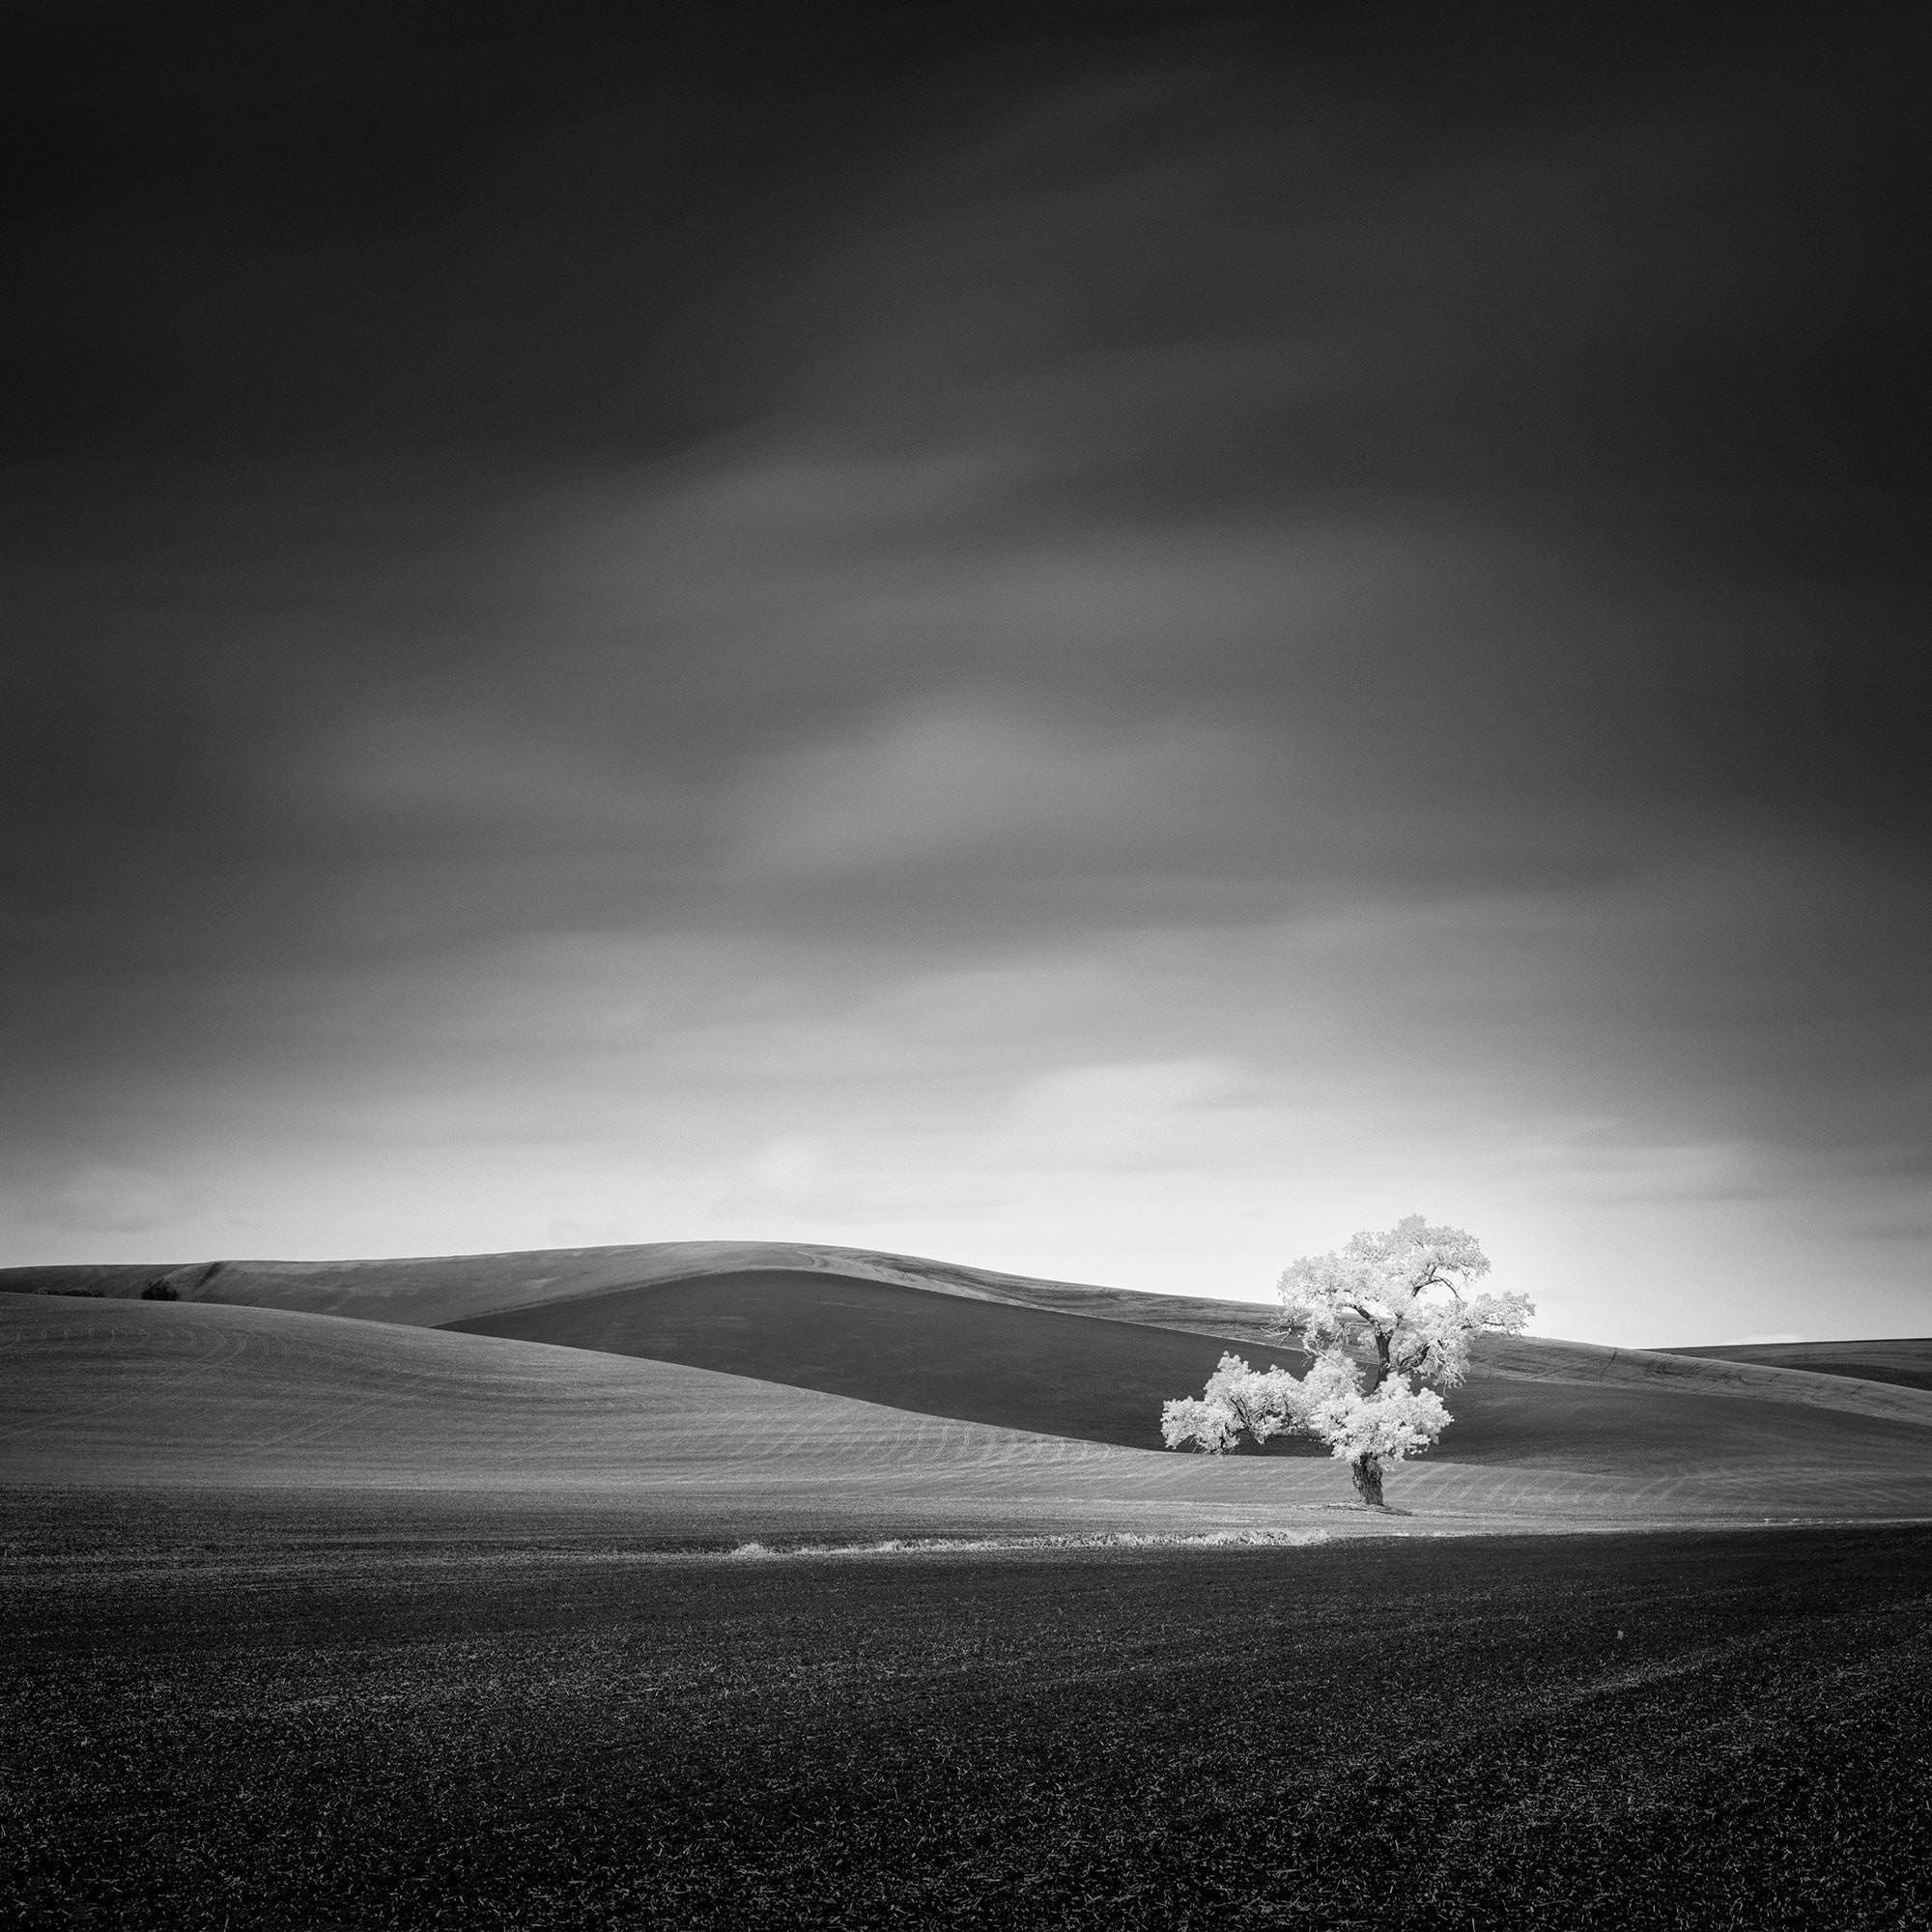
Photo by Thibault Roland. Sony Alpha 7R III. Sony 100-400mm f/4.5-5.6 G Master. 47-sec., f/11, ISO 100
Set And Lock Default ISO To 100
In my experience with the Sony Alpha cameras I use, the native ISO is 100. This means that the sensor operates with its largest dynamic range and lowest noise level at this setting. This is why I recommend sticking to ISO 100 as much as possible in the field.
Set Your Aperture between f/8 And f/11
Most lenses are sharpest between f/8 and f/11. So unless you are trying to obtain a specific effect such as shallow depth of field, setting your aperture in between these numbers should allow you to capture a landscape image in focus throughout the frame.
Shutter Speed And Bulb Mode
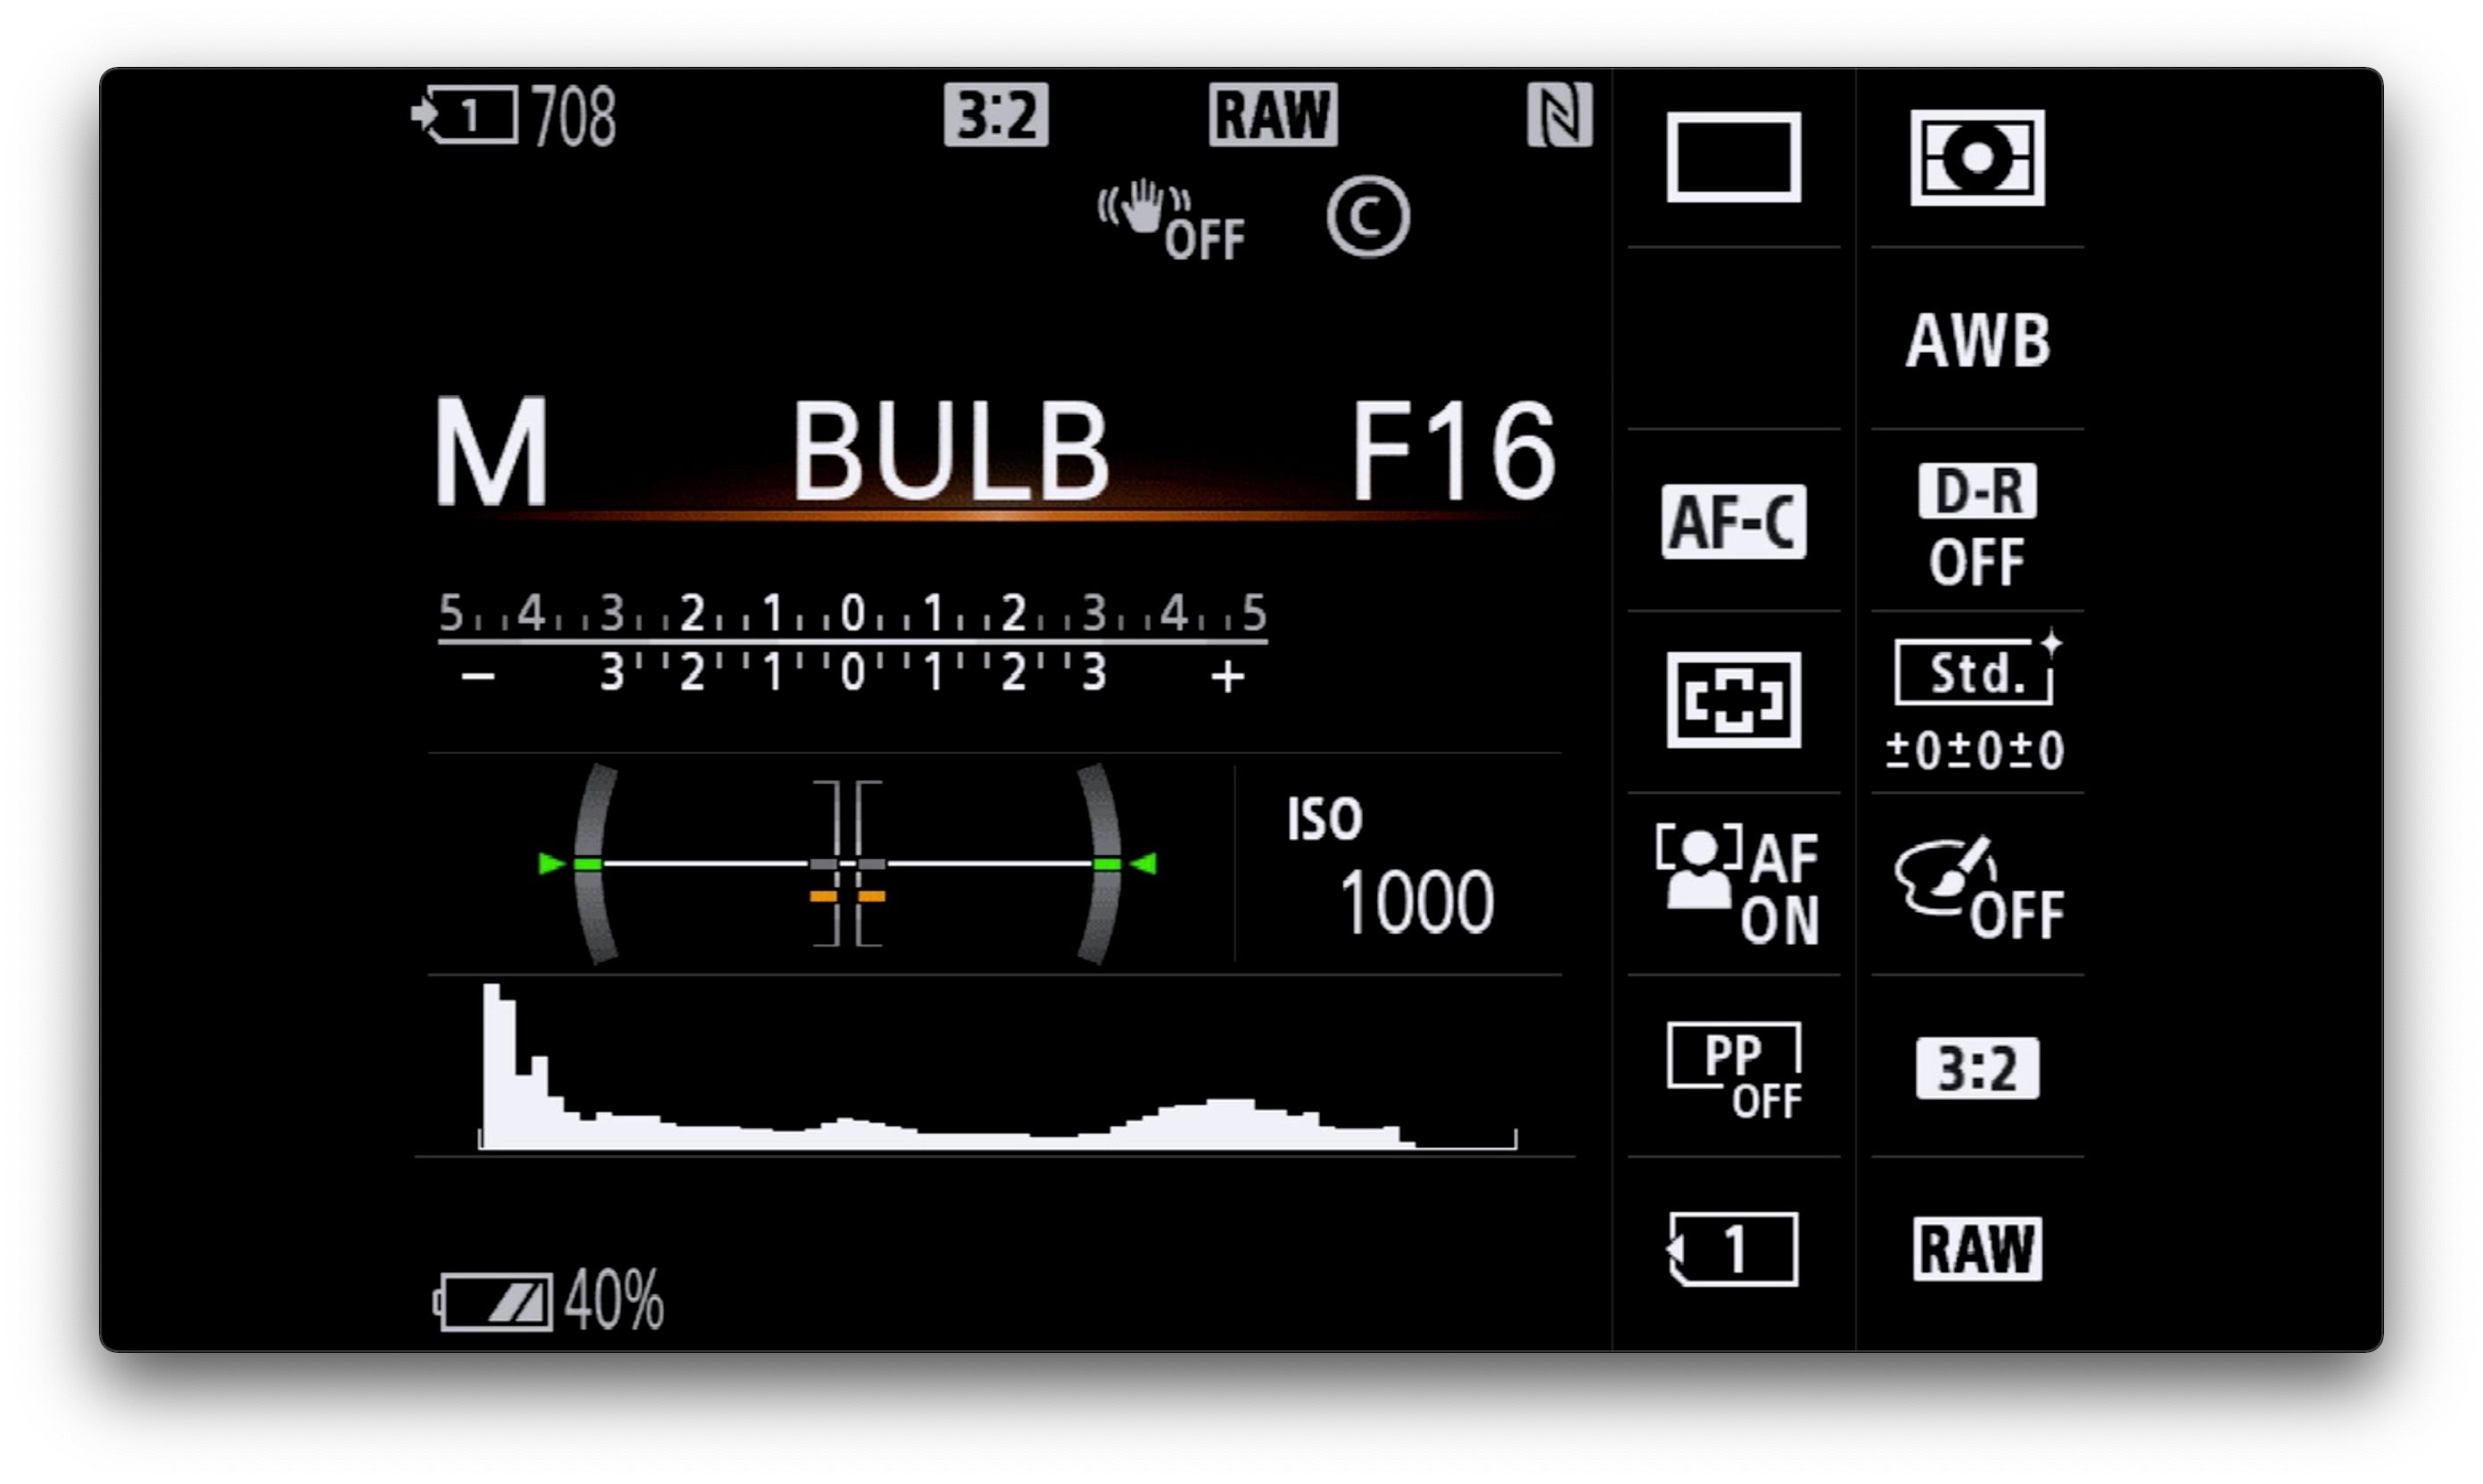
The very first picture you will capture is going to be short and will be used to frame and compose your image. For this part, I recommend that you set your exposure time manually and adjust it in order to obtain a properly exposed image (check the histogram!).
Once the base exposure is determined, place a very dark neutral density filter on the lens and switch your camera to Bulb Mode if the shutter speed required is longer than 30 seconds. To get to Bulb, keep cranking the exposure wheel until you go past 30s.
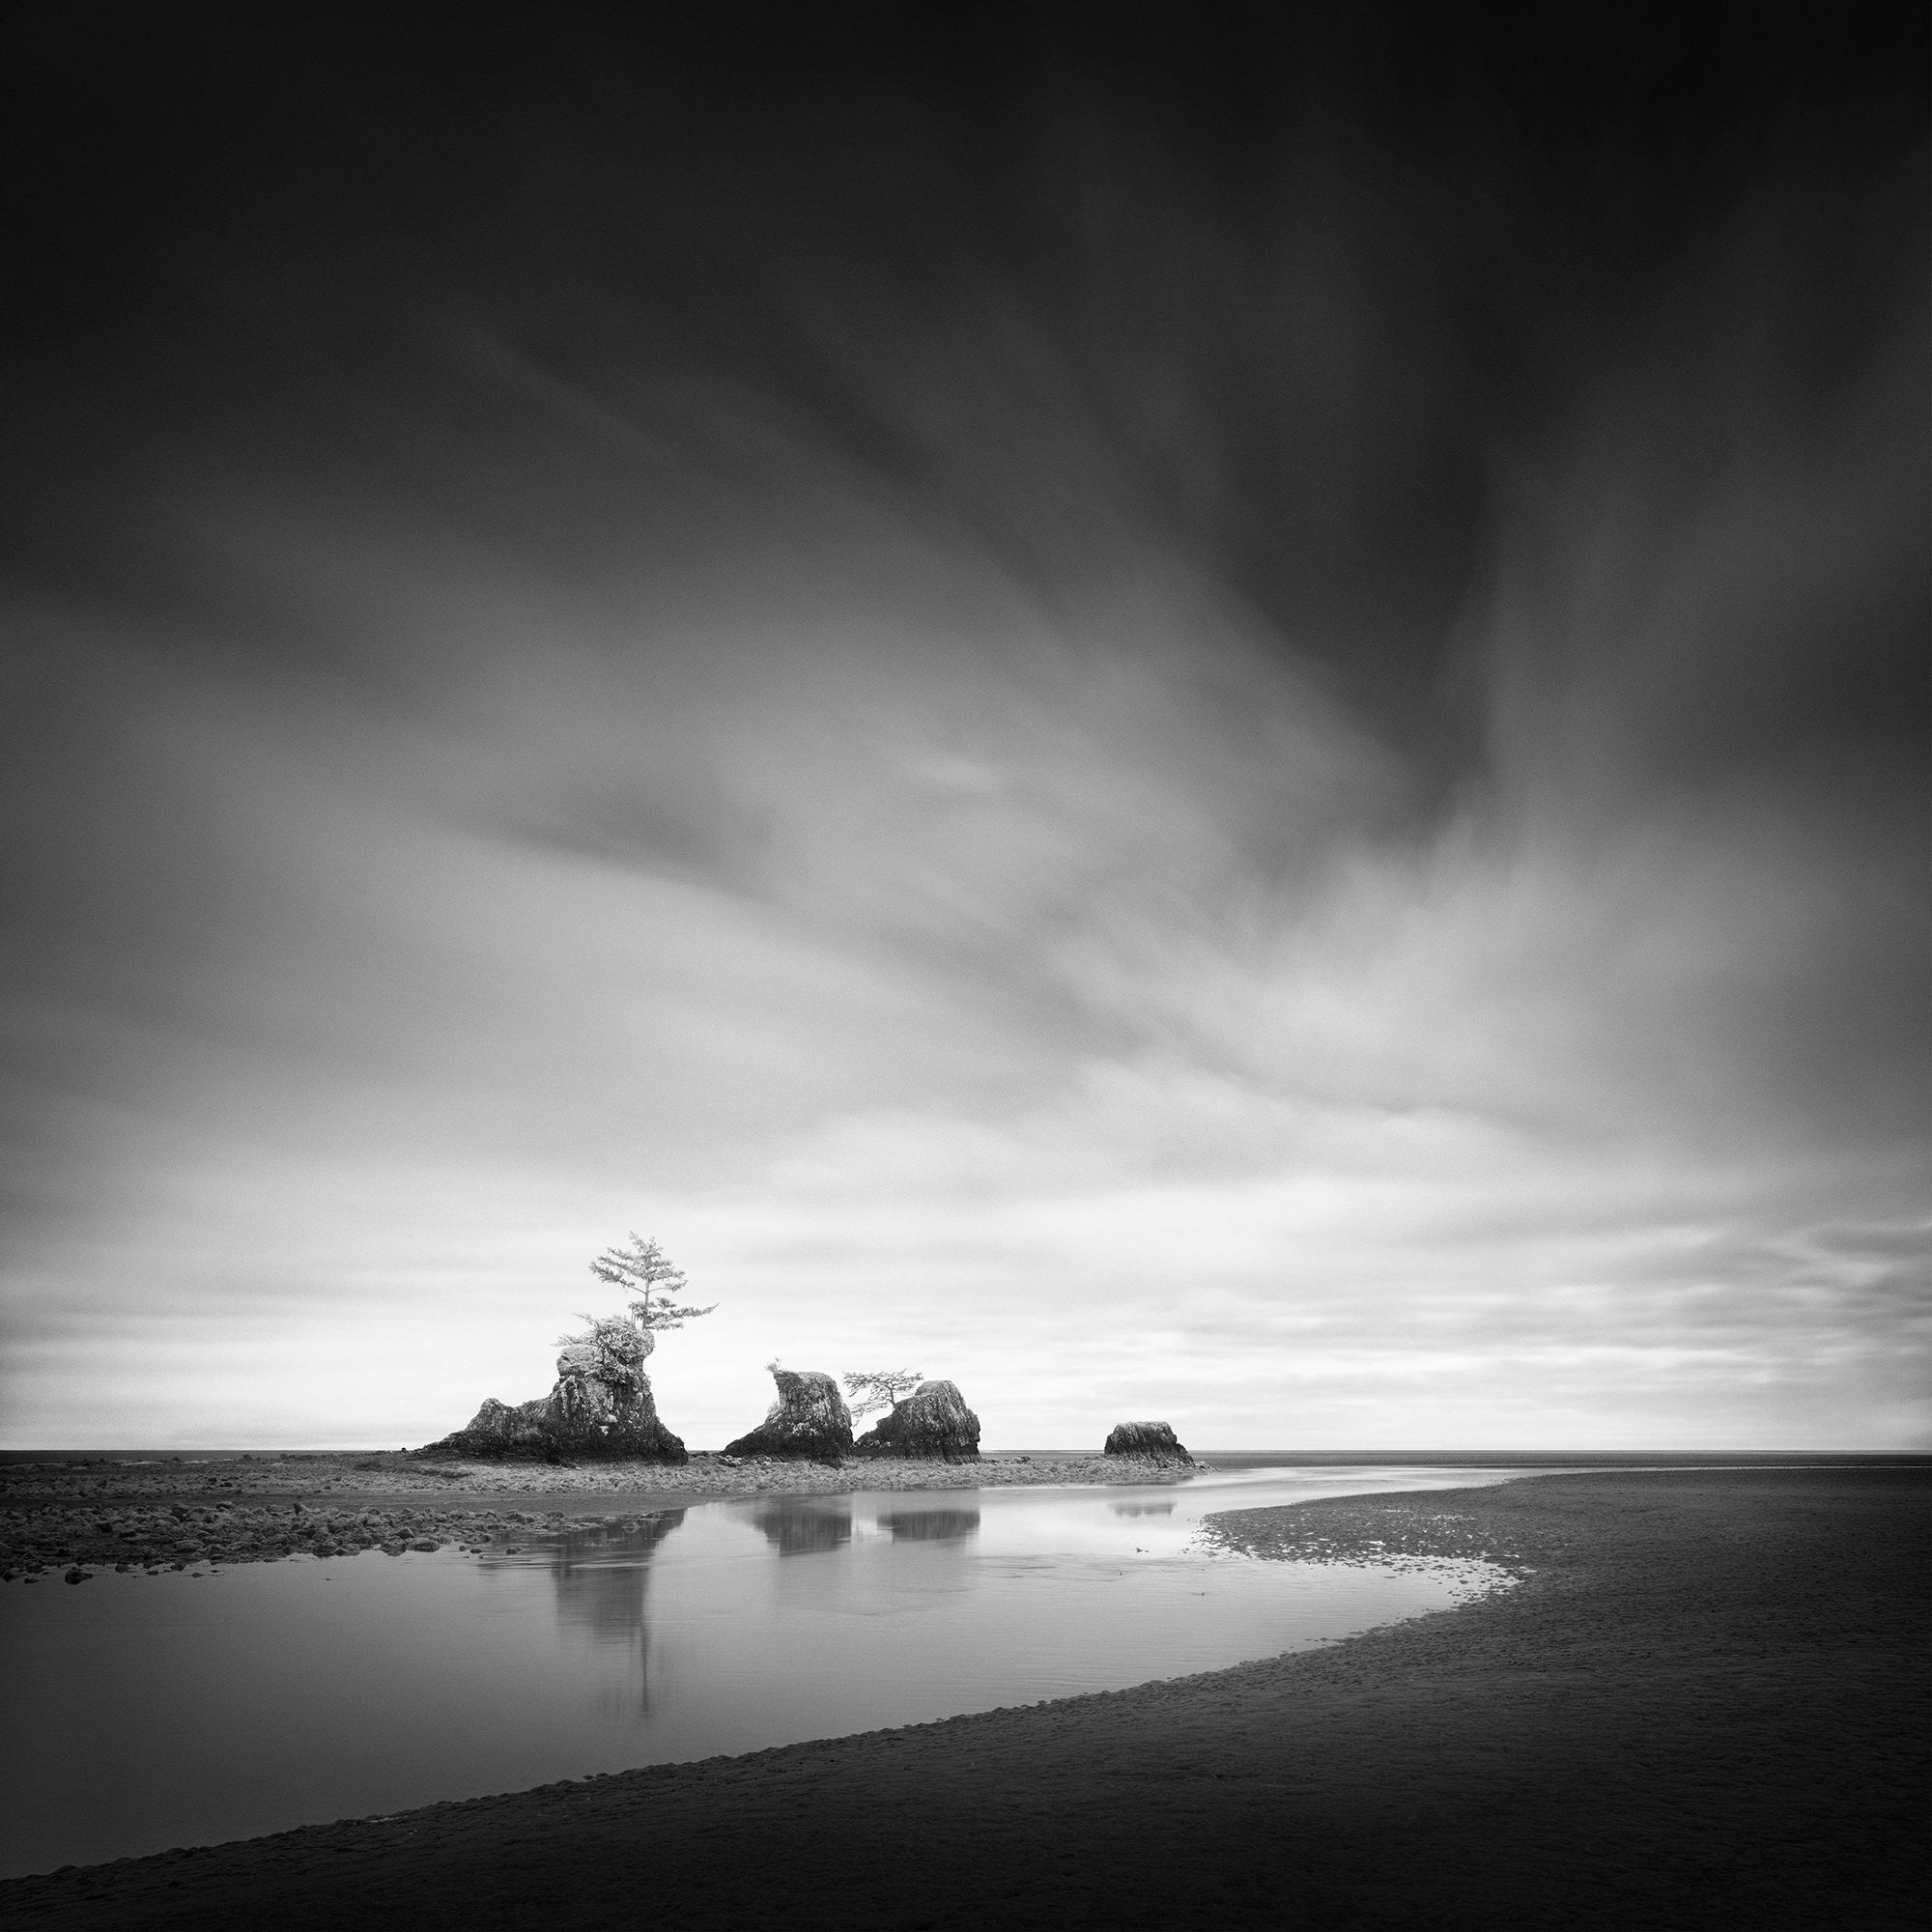
Photo by Thibault Roland. Sony Alpha 7R IV. Sony 24-70mm f/2.8 G Master. 237-sec., f/11, ISO 100
Set Drive Mode To Single Shooting
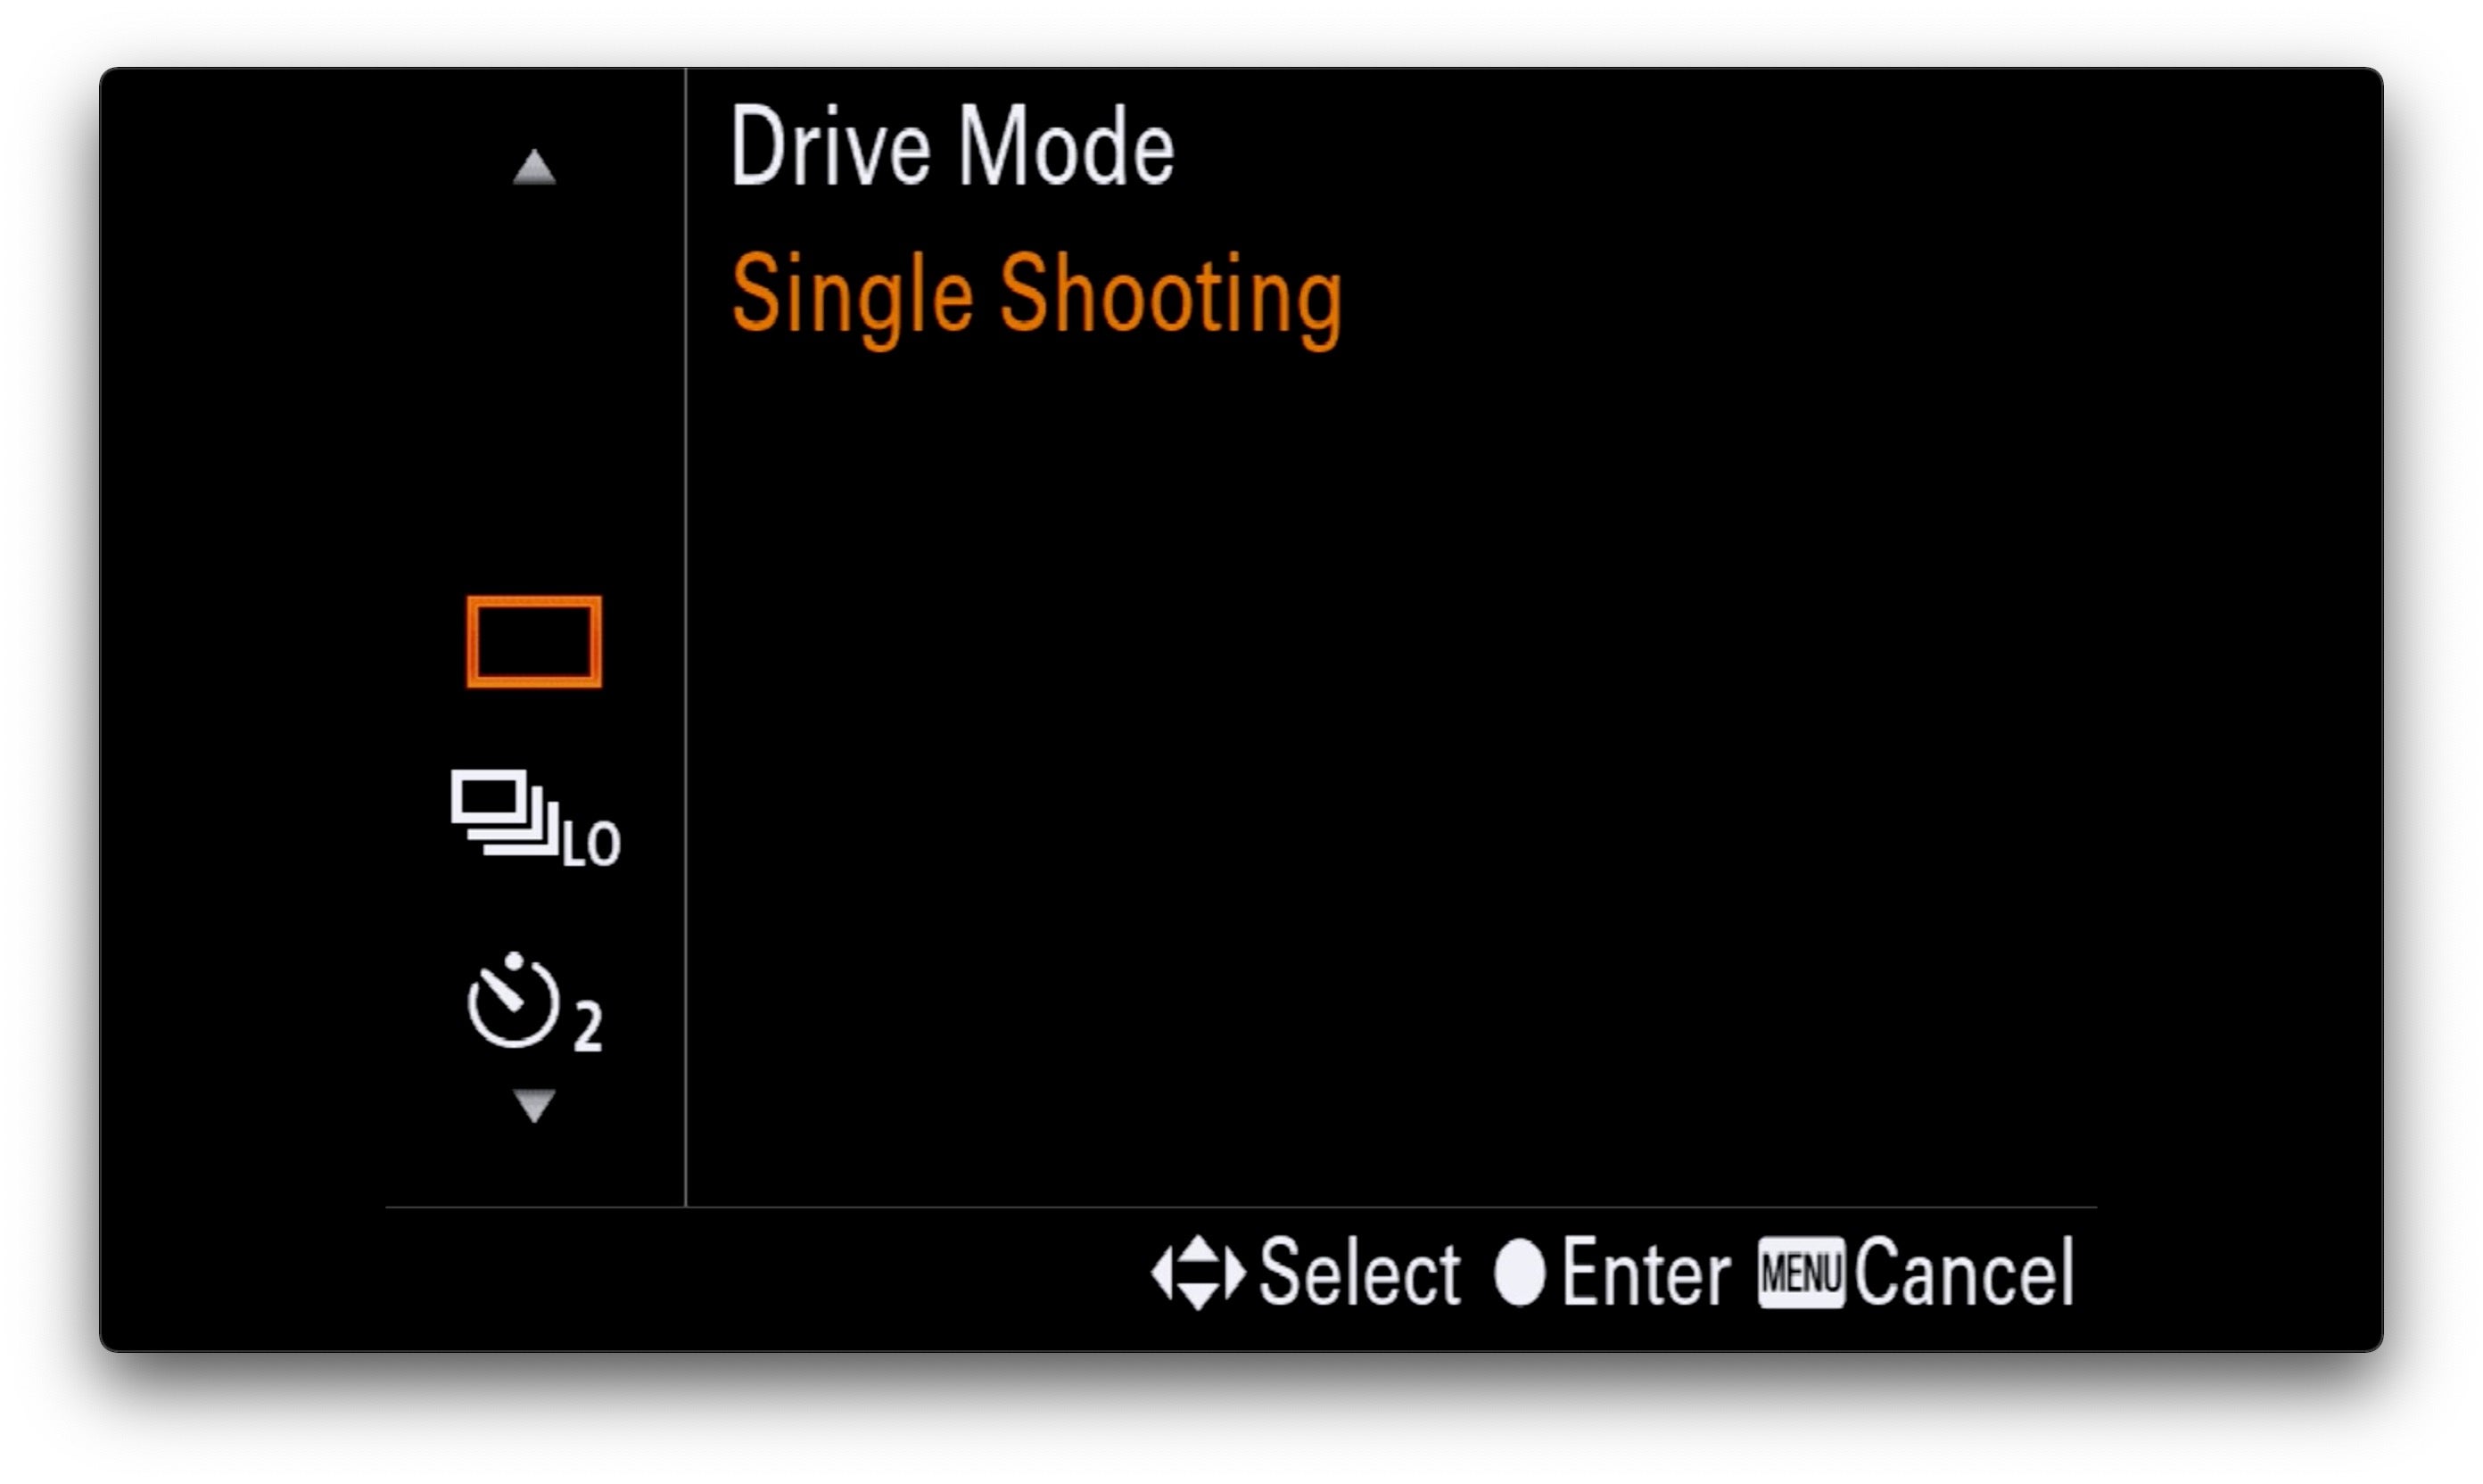
In order to enable Bulb mode, one needs to set the Drive Mode to Single Shooting.
Set The Intervalometer/Remote Shutter
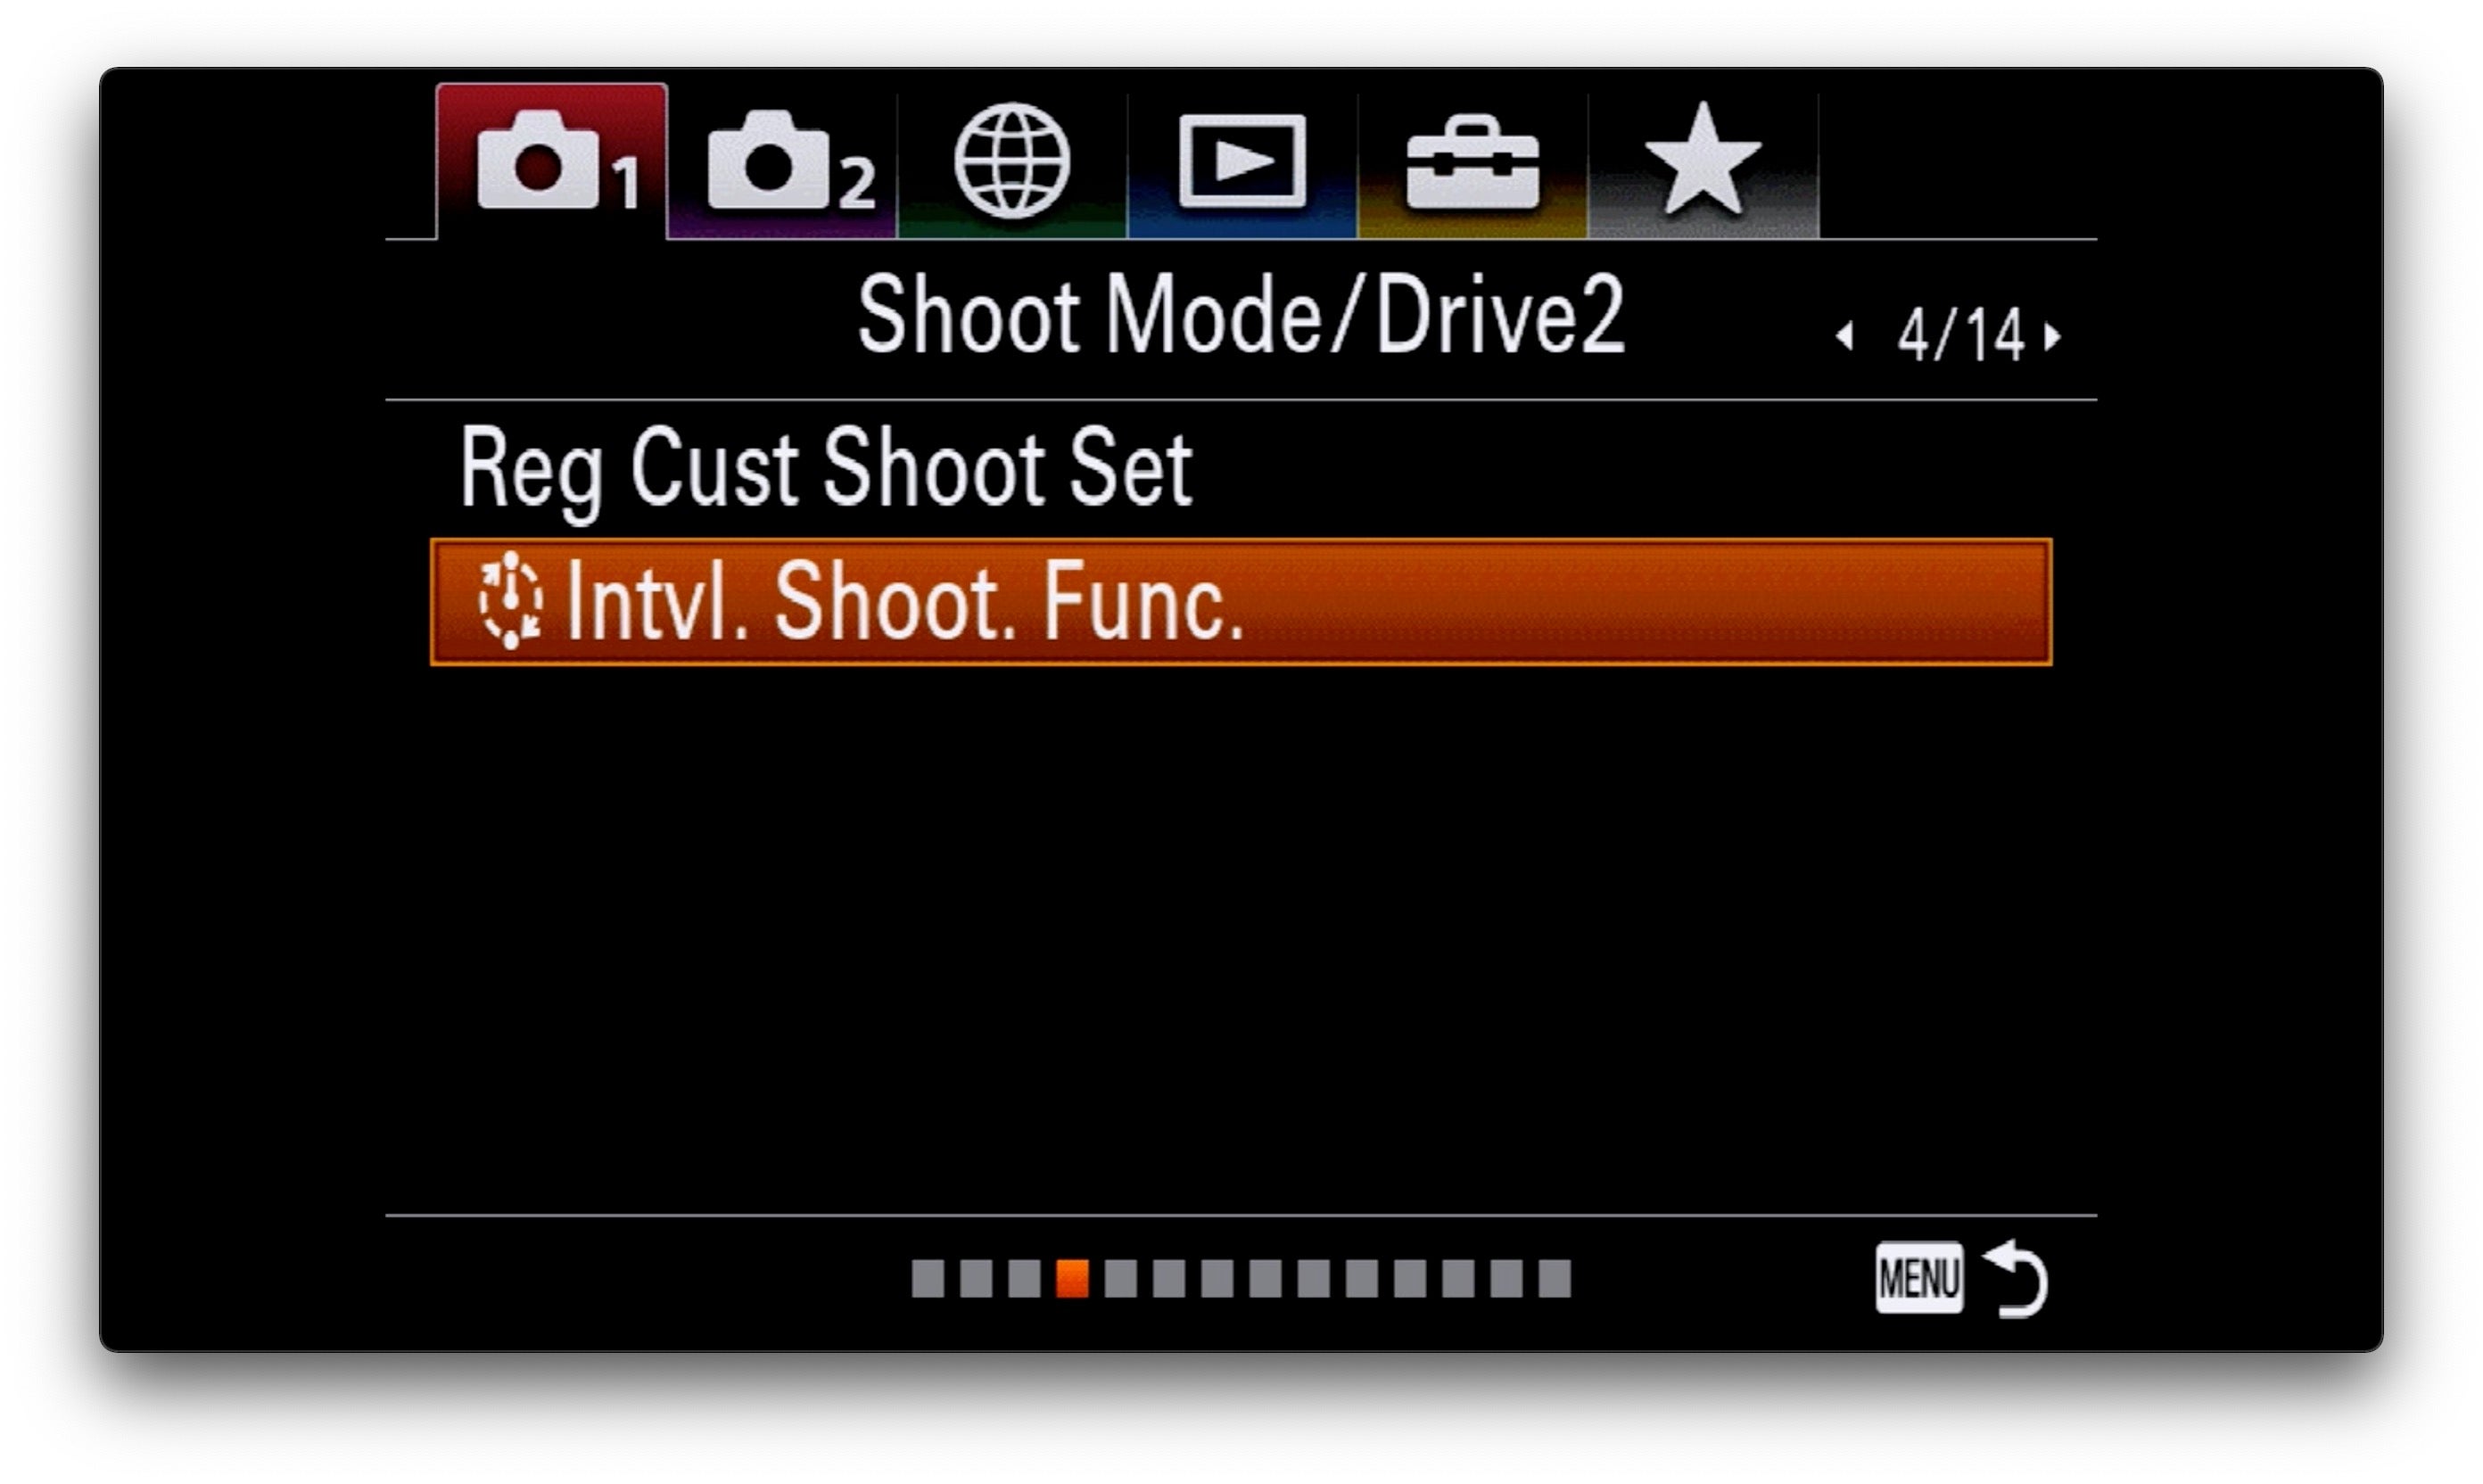
A timer, an intervalometer or a remote are highly recommended to avoid vibrations and allow the shutter to be started and stopped at any time. Wired devices are OK, but using Bluetooth or infrared ones are more desirable. As a side note, it is also possible for certain models to use a cell phone to trigger the shutter.
See more of Thibault Roland’s work on his Alpha Universe Profile, at thibaultroland.com and on Instagram @thibaultrolandphoto.

