Wesley Overklift (@wesleyoverklift) is a professional photographer and brand and marketing manager. In his spare time he posts regularly to his Instagram where he focuses his content on landscape, nature, product photography and portraits. Through his posts, he likes to explain why he posted a certain picture and how he composed it, hoping that his thoughts on composition might inspire others too. Previously he shared his composition tips for landscapes with people, and here he shows us how he composed and captured a few portrait shots.
Pro photographer Wesley Overklift (@wesleyoverklift) shares his process for composing the perfect portrait.
Inspiration & Location
Both these shots were taken during our trip to the Tiveden National Park in Sweden. With many of my travel photos, I tried to capture genuine moments of my fiancé (@aliiciaekstrom) when she’s enjoying the scene or the nice weather. Relatively seen it’s not that often that we have great weather in Sweden, so you have to enjoy it while it lasts!
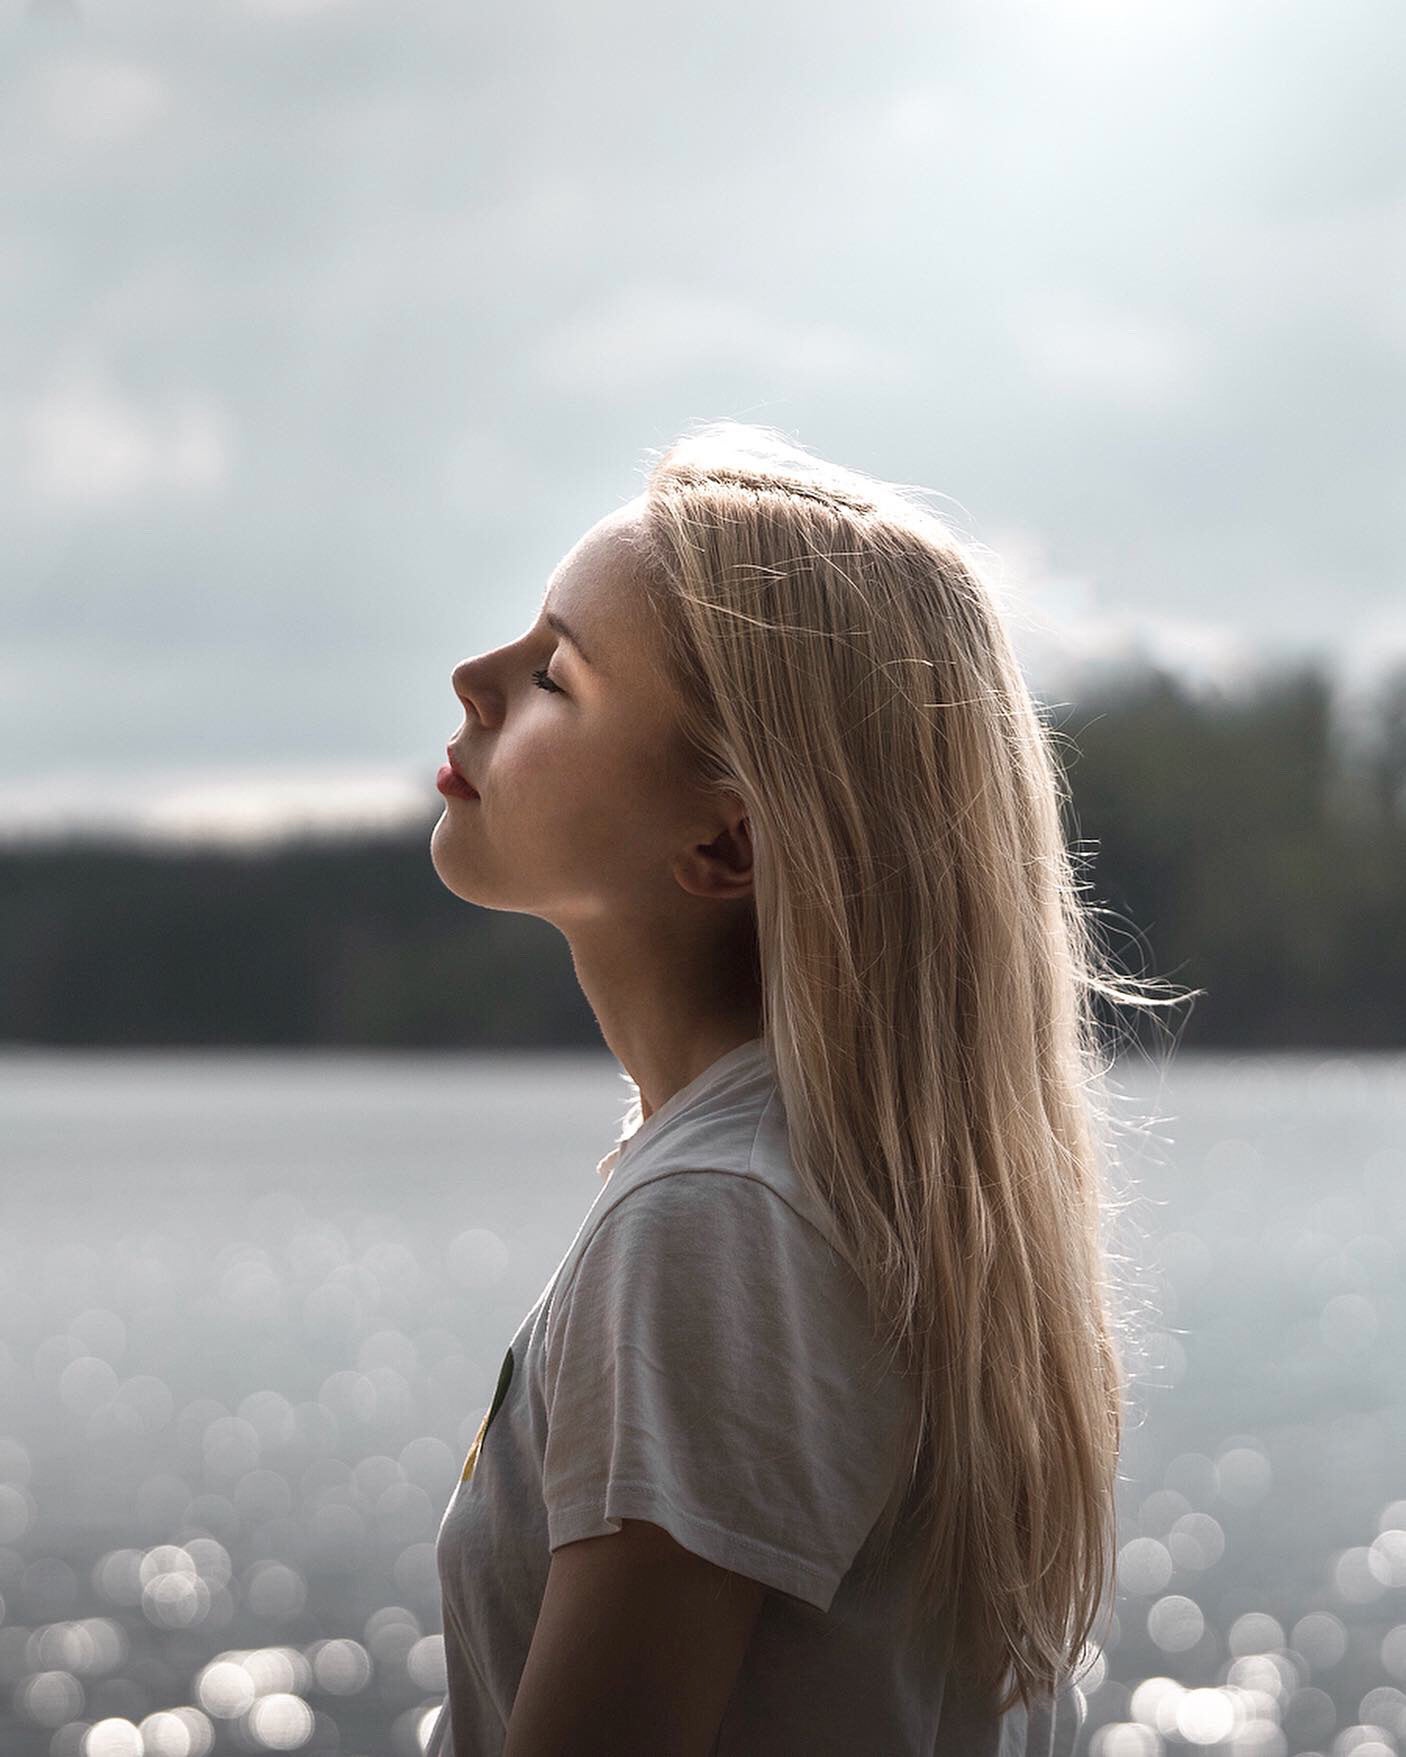
Sony α7R III. Sony 70-200mm f/2.8 G Master @ 100mm. 1/6400-sec., f/4, ISO 500
My Composition Techniques
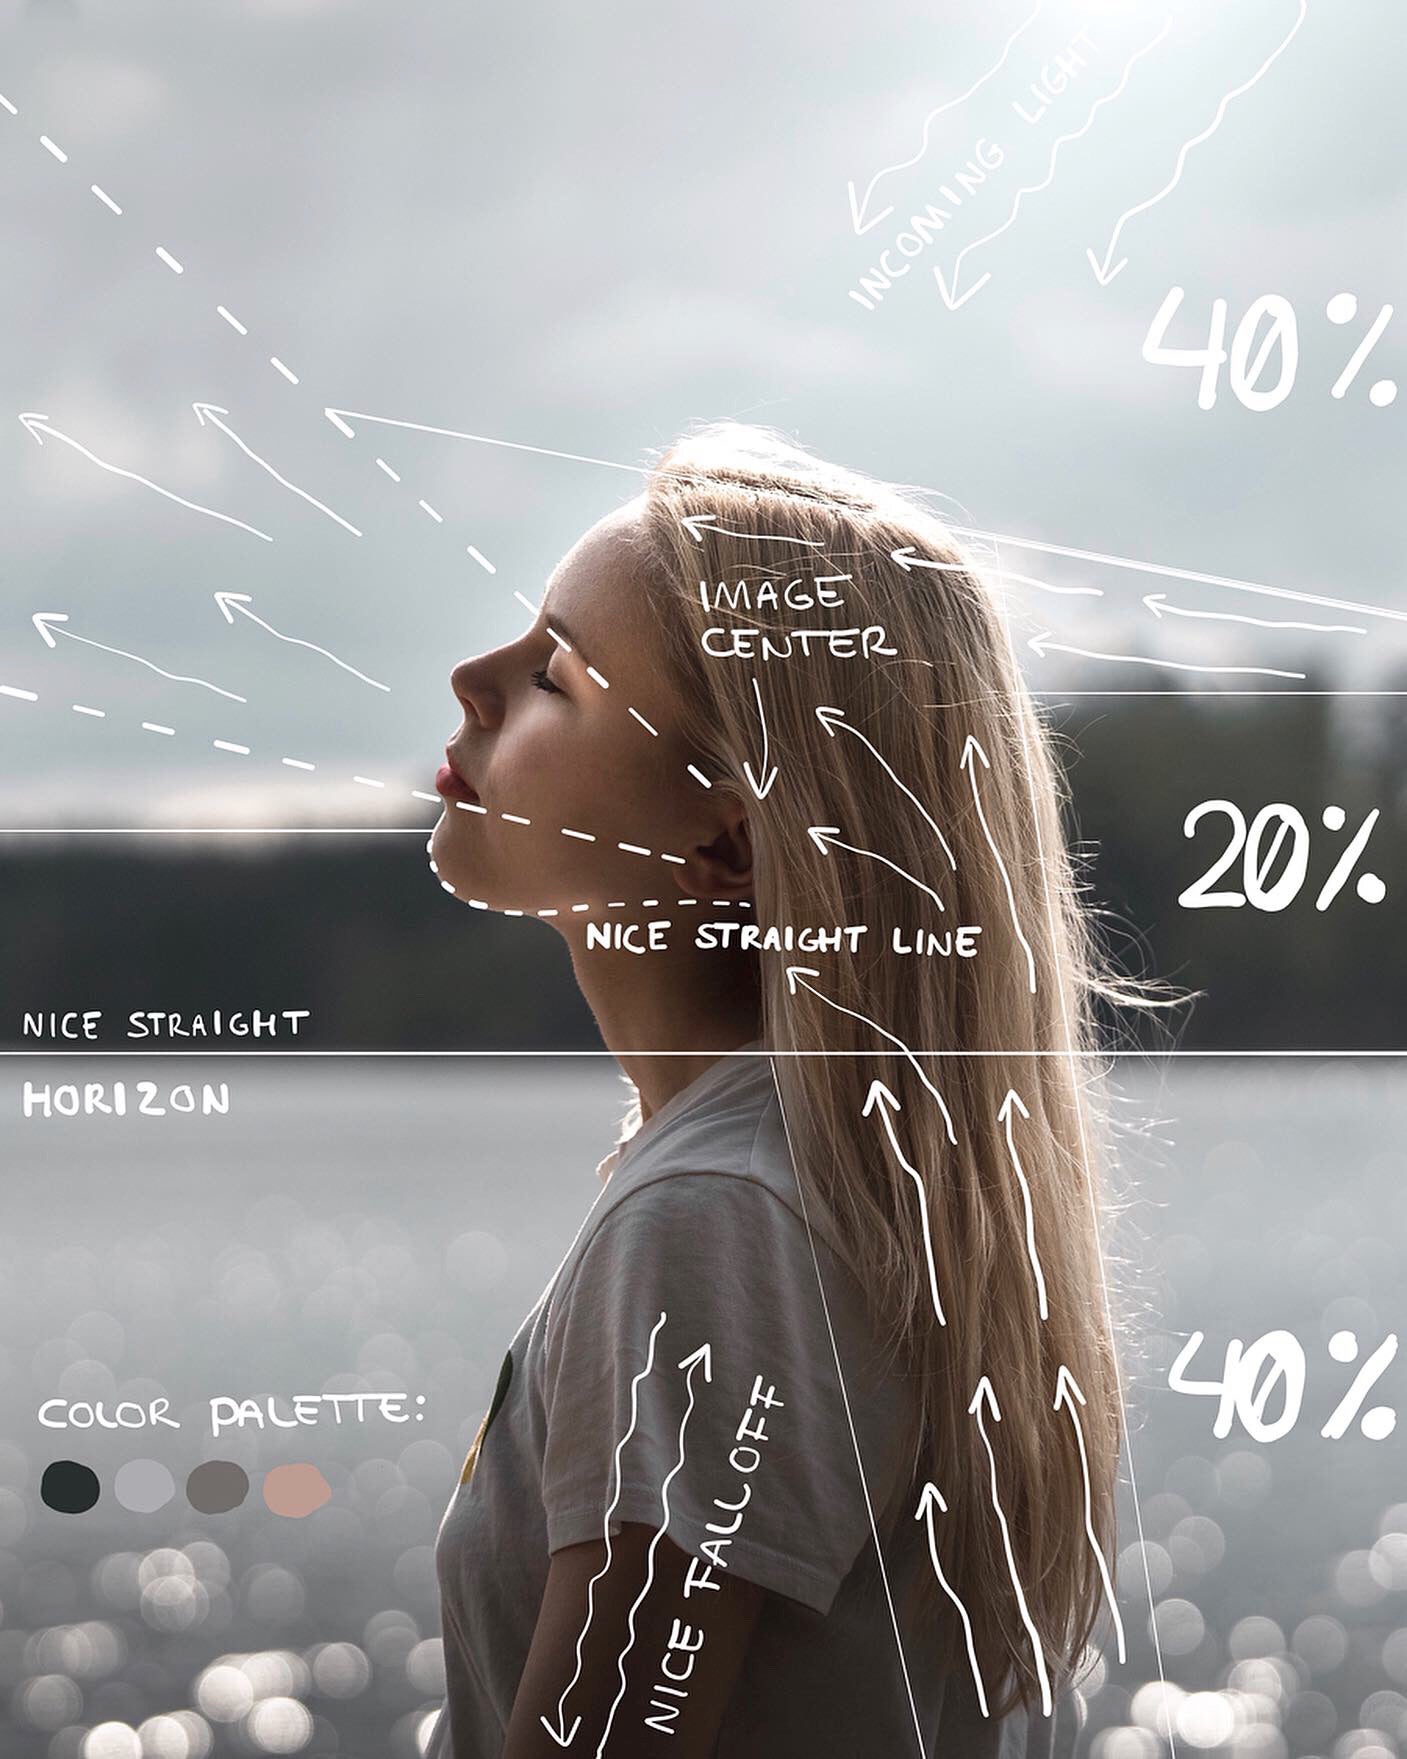
For most shots I find the background to be the most important. It sets the scene and color palette and usually takes up well over 60-80 percent of the pixels of each image. Here I decided to go for an equal division of the water (40%) and the sky (40%) to have that band of forest (20%) aligning right over her shoulders and head. I made sure her head is still above the forest, so that you get this nice background separation. Of course, I always make sure my horizons are straight, then I just wait for the right expression and take the shot. I especially liked the angle on the chin and face here.
My Cameras & Lenses For Portraits
I used my α7R III with the Sony 70-200 f/2.8 G Master Lens to capture these shots. This is probably my all-time favorite lens because of the reach and compression it creates. And the sharpness, it’s just SO good! It functions really well as a portrait lens as well as an overall good travel lens. Pair it with the α7R III and you’ll end up with a super sharp and versatile combination. This is also the combo I use for most of my product photography.
The 70-200 is a versatile lens, and so I bring that one with me often. Sometimes, as you can see from the settings in the portrait above, I stop down the aperture anyways to still capture some of that background. I don’t always want to blur the background out completely.
When these photos were taken, I didn’t own the Sony 85mm f/1.4 G Master Lens yet. I would definitely recommend that lens for portraits as well because of the even more beautiful background compression it creates.
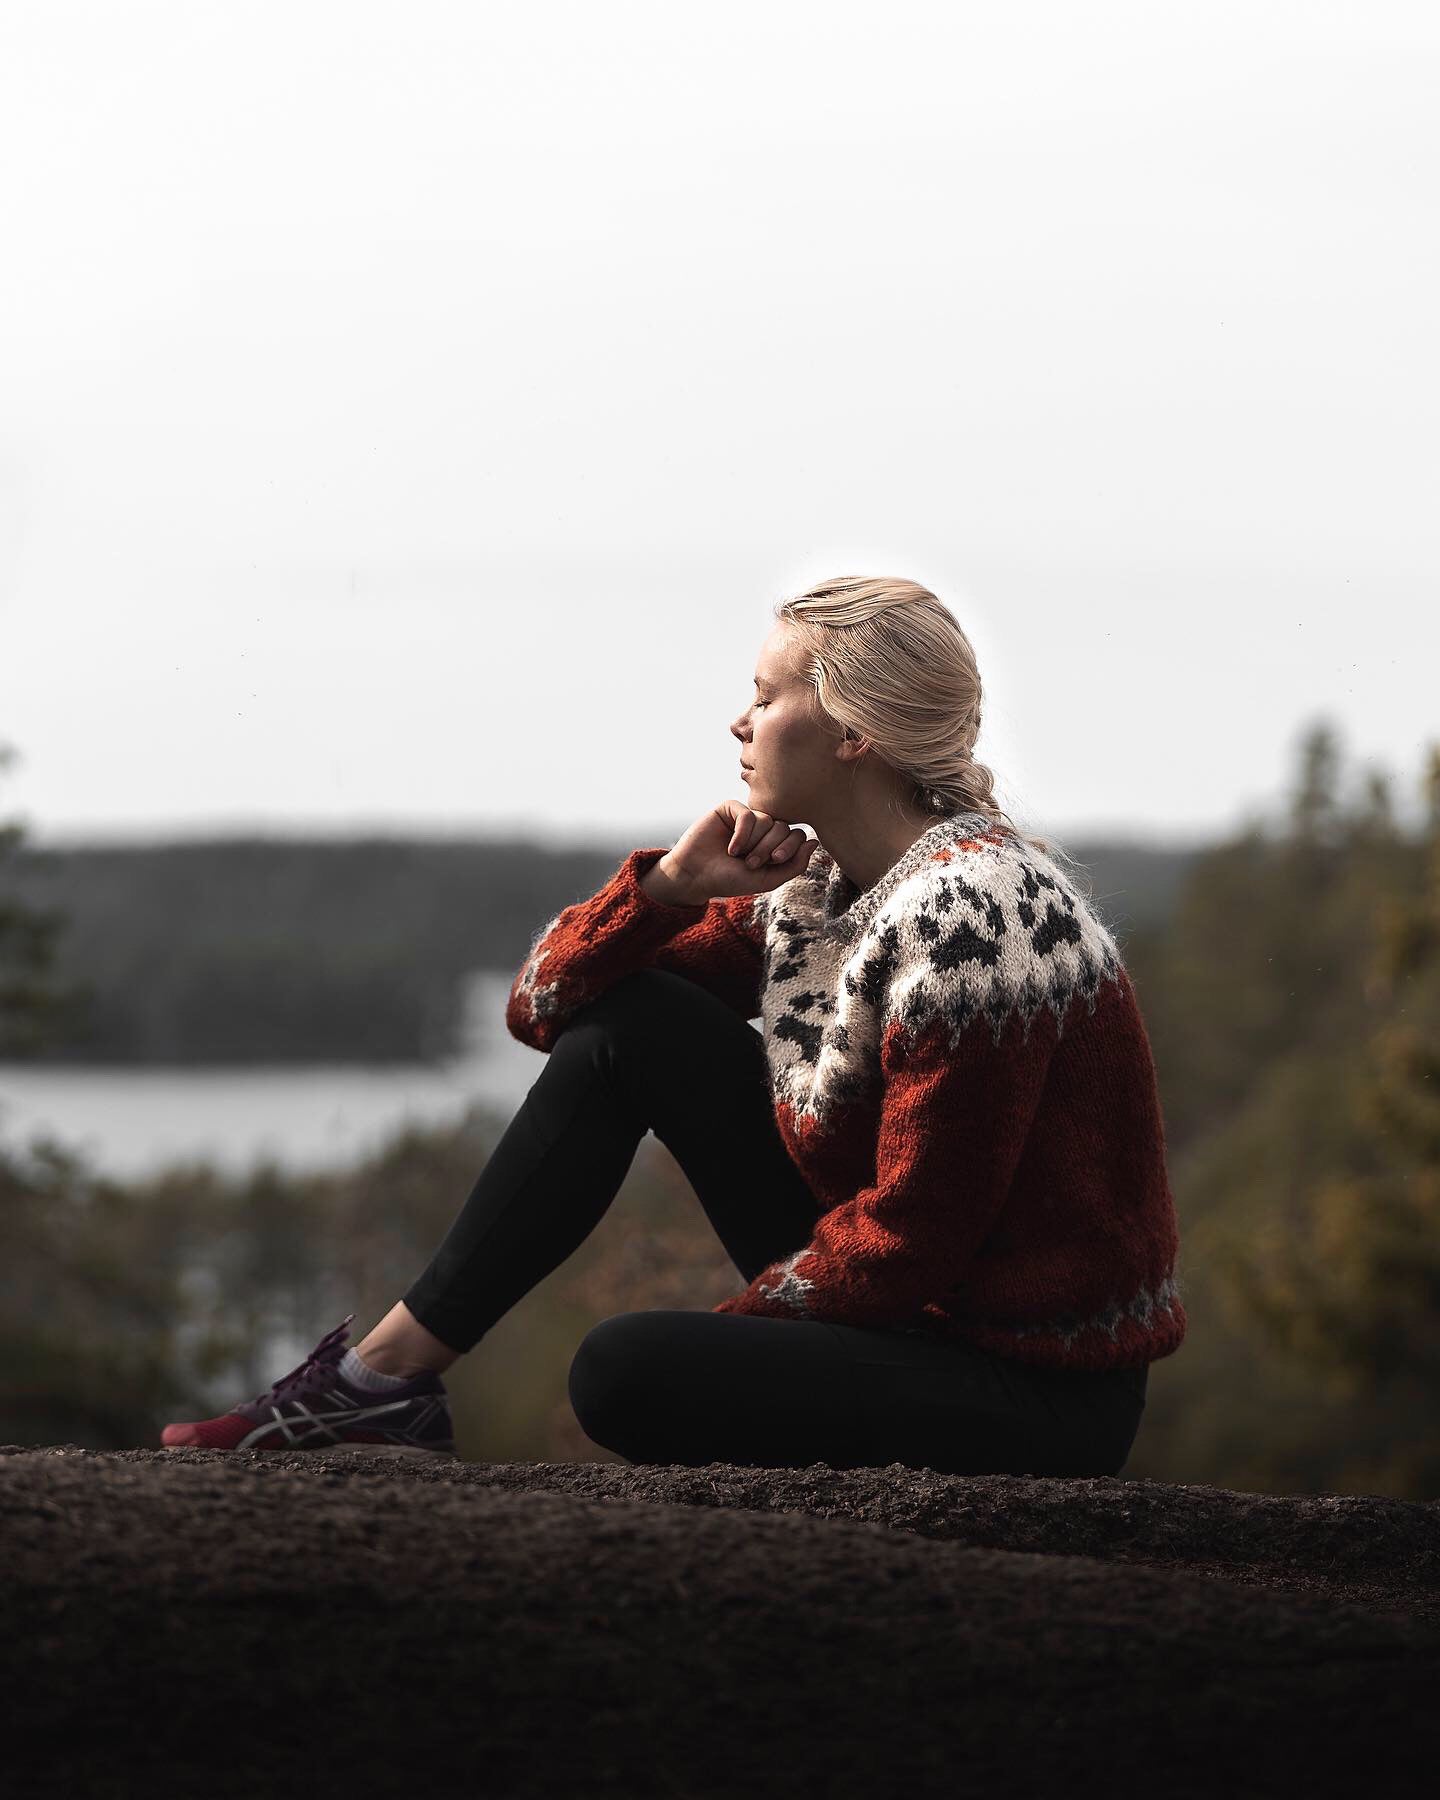
Sony α7R III. Sony 70-200mm f/2.8 G Master @ 116mm. 1/1600-sec., f/2.8 ISO 100
Composition
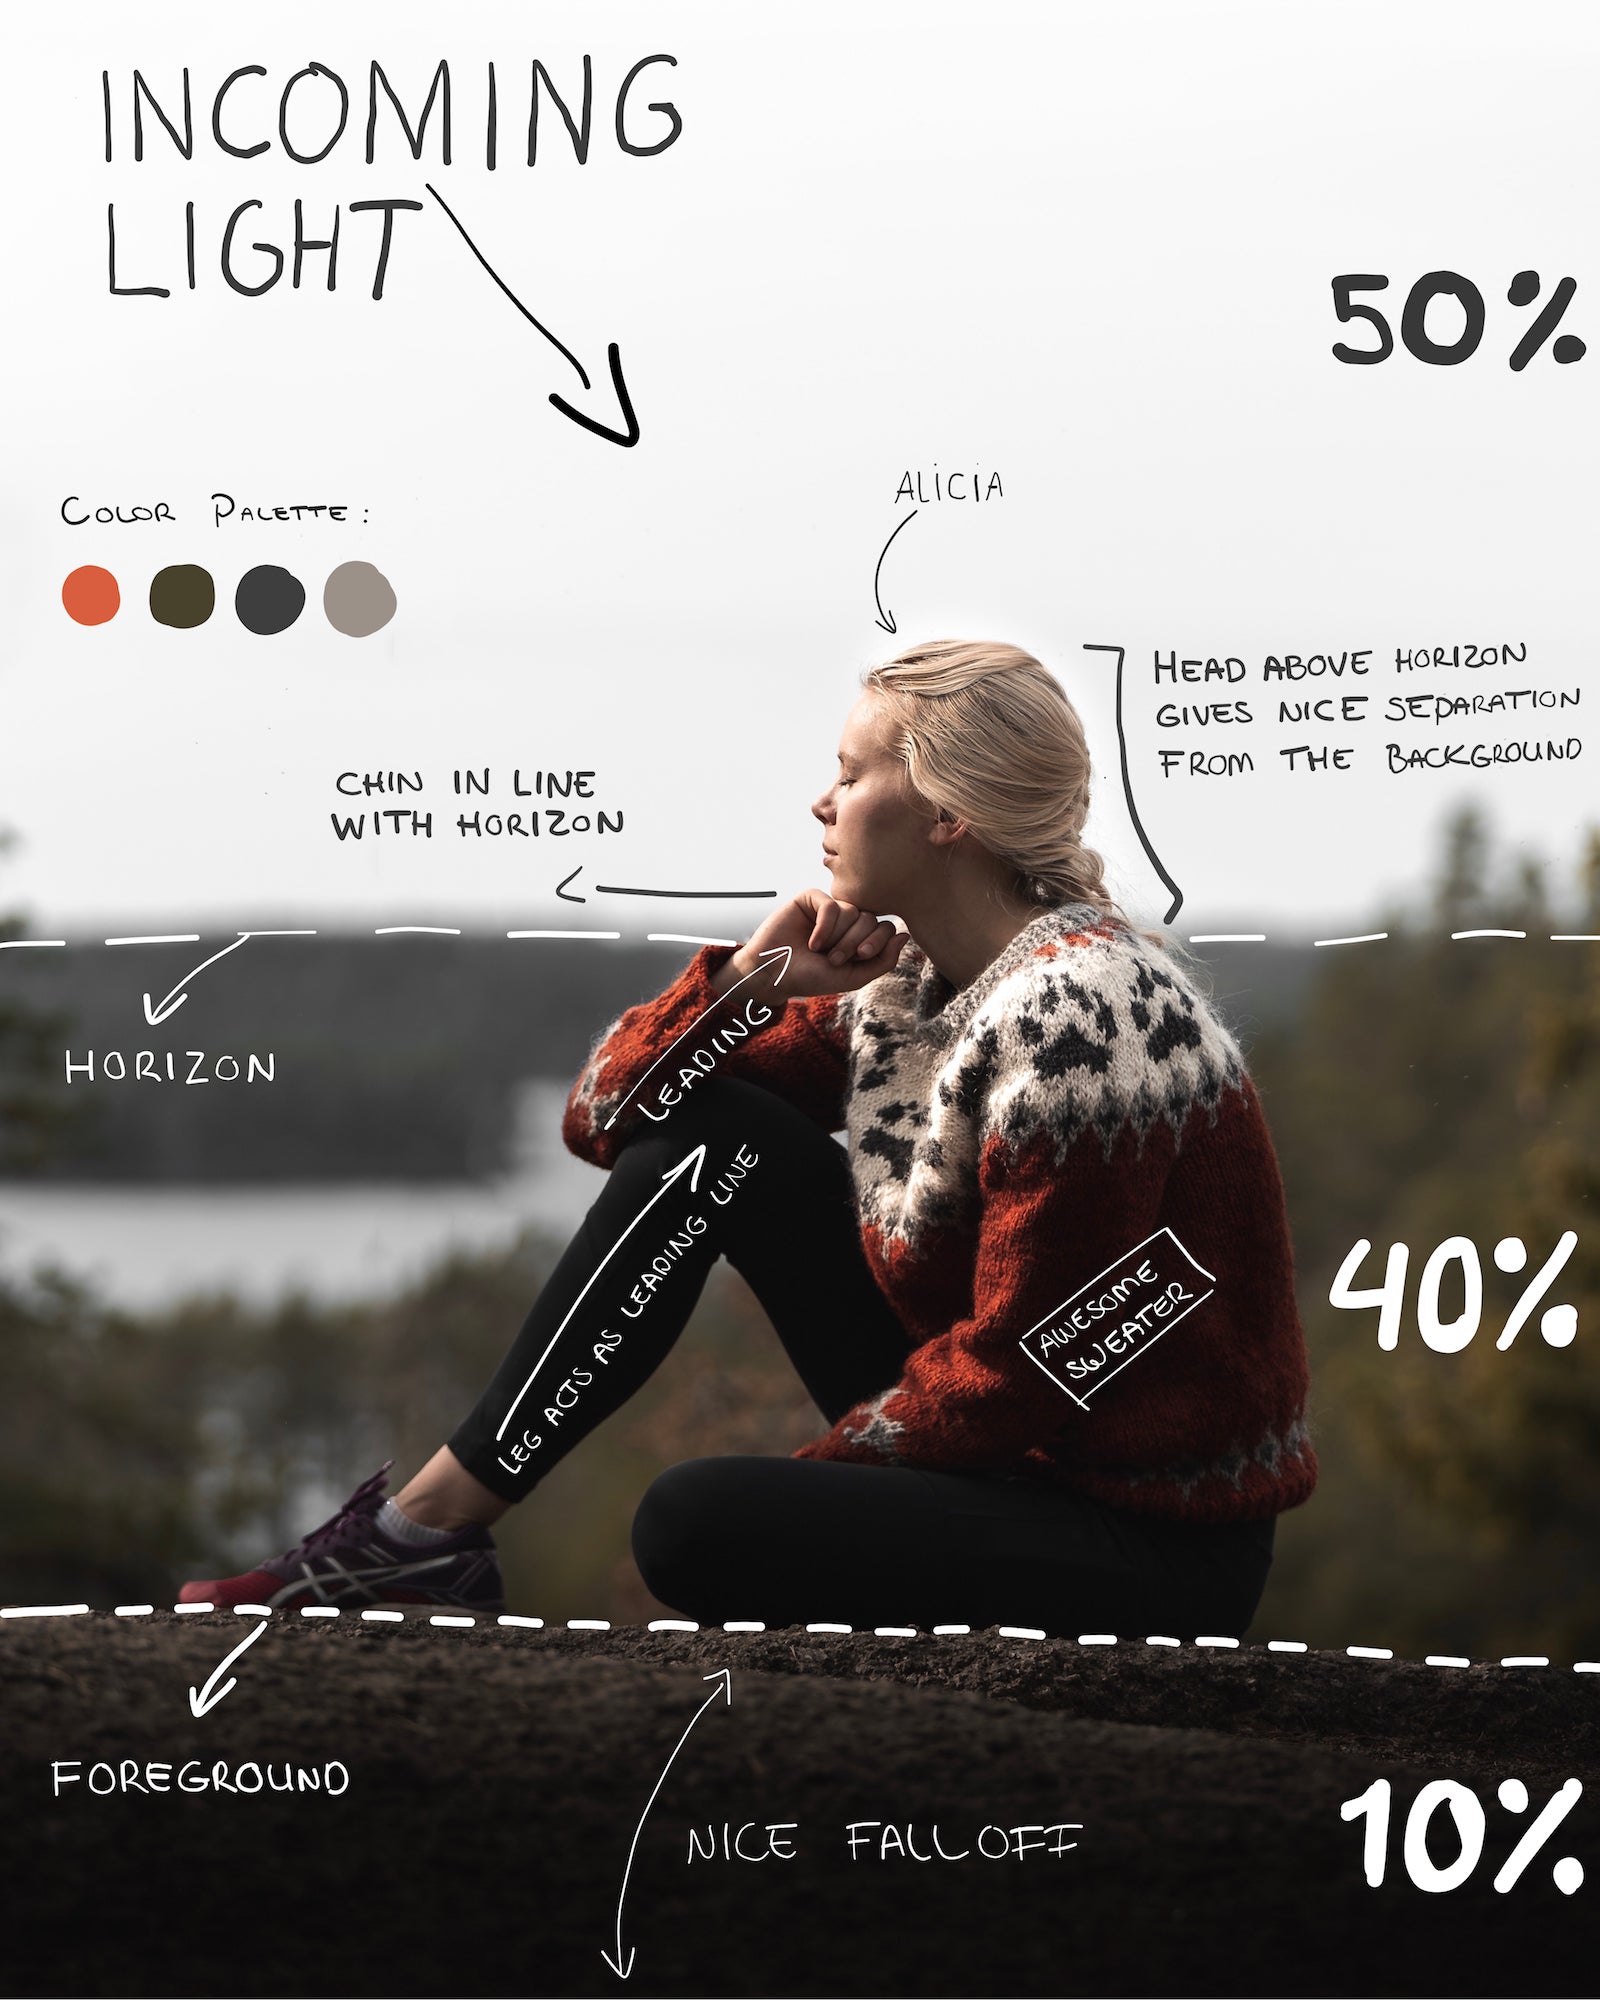
For this shot I kneeled down to make sure my subject gets nice background separation by making sure her shoulders and head are above the horizon. I find my subjects disappearing in the background too much if I don’t use the horizon to create that separation. I also always try to have some of the foreground in the shot and here I tried to align the horizon in the middle. This way it feels well-balanced between the sky and the ground. Then I waited for the right expression and body position.
How I Got The Shots
I always have my camera ready when we are out traveling. I rather enjoy the moment and maybe miss a good shot than to give my fiancé a lot of instructions. I gotta say she’s kind of a natural at posing genuinely on our travels. I guess we’ve been doing this for so long that she just knows what works, we have a great dynamic when it comes to that. So yeah, both shots were kind of genuine moments during our travels when we took a little break from walking and enjoyed the scene. I mentioned it in the previous article already, but this wasn’t possible if the Sony Alpha cameras weren't as fast as they are. Within seconds the camera is booted and settings are dialed in, ready to capture a genuine scene. All that is left for me is to position myself, get that angle and composition and press the shutter button. You can read my thoughts on composition in the images.
Post-Production
I use Lightroom on an iPad Pro for post-processing. This is a very light, portable and powerful workflow. I love how I can transfer photos using USB-C from my Sony camera to my iPad. In these images, I used the Apple Pencil to do some Dodge and Burn to lighten and darken certain areas of the picture. For example, around the face and hair. Furthermore I tried to keep a pleasant color palette by eliminating any colors that didn’t fit the mood and scene.
