I have just returned from teaching two monsoon season workshops at the Grand Canyon with Gary Hart. Arizona’s monsoon season officially begins on June 15 and ends on September 30, but the storms peak between mid-July and mid-August. On average, about half of Arizona receives about half of its annual rainfall during the monsoon.
This was the 4th year that we have co-taught this workshop and this year, we witnessed and photographed the most lightning ever over the Grand Canyon. Even when the lightning storms weren’t firing, we were treated to vibrant sunrises and sunsets along with a bevy of colorful rainbows. We were also able to get enough clearing one evening to capture the Milky Way over the Canyon!
Even though I brought along three Sony Alpha Mirrorless cameras (Sony α7R II, Sony α6300 and Sony α7S), I ended up just using the α7R II to capture all of my images on this trip. This camera is my “go-to” for all of my landscape photography. I will use my α6300 when I need a longer reach or if I am trying to stop action but that was not the case for any of my location shoots. Moreover, I also brought along my α7S for night photography; however, the one night we did shoot was completely unexpected and unfortunately I had left it behind in my cabin (not one of my smarter moves).
‘Even when the lightning storms weren’t firing, we were treated to vibrant sunrises and sunsets along with a bevy of colorful rainbows. We were also able to get enough clearing one evening to capture the Milky Way over the Canyon!’
Regardless, I found the α7R II up to the task for every situation I faced over 10 straight days of photographing the Canyon. Our days were long – usually beginning with 4:15am wakeup calls and not ending until my head hit the pillow around 10:30pm each evening, but the resulting images were worth the effort and lack of sleep.
NOTE: All the images presented in this blog were captured using the Sony 24-70mm G Master lens. Though I used a variety of lenses during my shoots, this lens got its fair share of attention. The more I work with this amazingly sharp piece of glass, the more impressed I become!
The image (above) was captured along the North Rim of the Canyon during a very active late-afternoon storm. We had chased a couple of active cells and wound up photographing this one through sunset. As the sun lowered over my shoulder in the west, a hole opened in the clouds and spotlit the eastern Canyon’s walls. With all of the moisture in the air, this partial double-rainbow appeared. As the wind whipped and the rain pelted, the outside bow appeared to twist and I was fortunate to capture the moment. In reality, it was bands of rain that made the cloud appear to bend – not the actual bow itself, but it created the illusion that the bow was bending. I’d never quite seen anything like it before!
NOTE: While a primary rainbow is visible when light is reflected once off the back of a raindrop, a secondary and usually dimmer rainbow can be seen when light is reflected twice in a more complicated pattern. The colors of the second rainbow are inverted, with blue on the outside and red moved to the inside. The second bow appears dimmer or cloudier because much more light is released from two reflections, and both bows cover a larger portion of the sky.
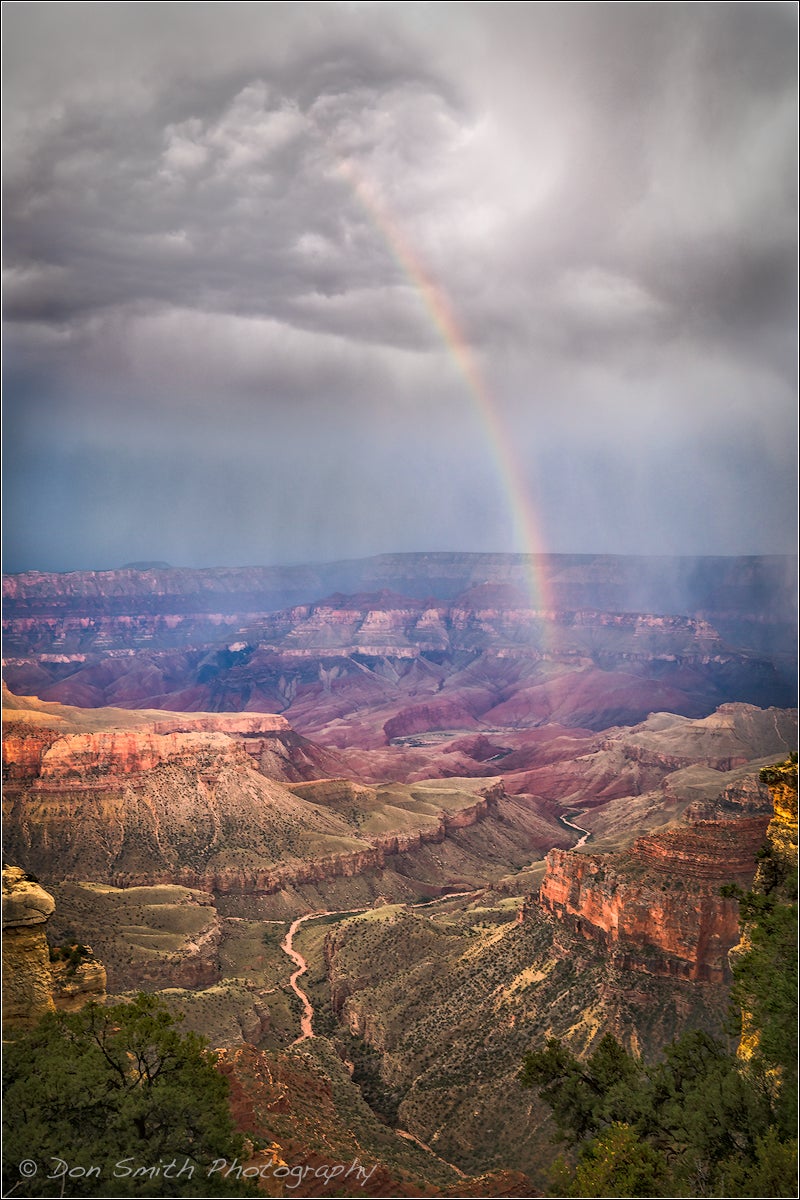
Rainbow extends into Grand Canyon, North Rim, Grand Canyon National Park, Arizona. Sony α7R II, Sony FE 24-70mm f/2.8 GM lens, 1/4-sec., f/16, ISO 80. Singh-Ray LB Neutral Polarizer
Rainbows are always a possibility during monsoon season and are created when the sun angle is low in the sky. One simply has to look down one’s shadow line and be ready when they appear. Rainbows will appear when the angle of the sun and the angle of your view intersect at 42 degrees or less. Oftentimes you will only see either the left or right side of the bow.
We were lucky in that this bow started at the level of the rim, then extended down into the Canyon. I loved the angry looking cloud near the top of the bow and quickly oriented my camera to get a vertical composition. Rainbows can come and go quickly as the sun darts in and out of openings in the clouds, so I had to work fast.
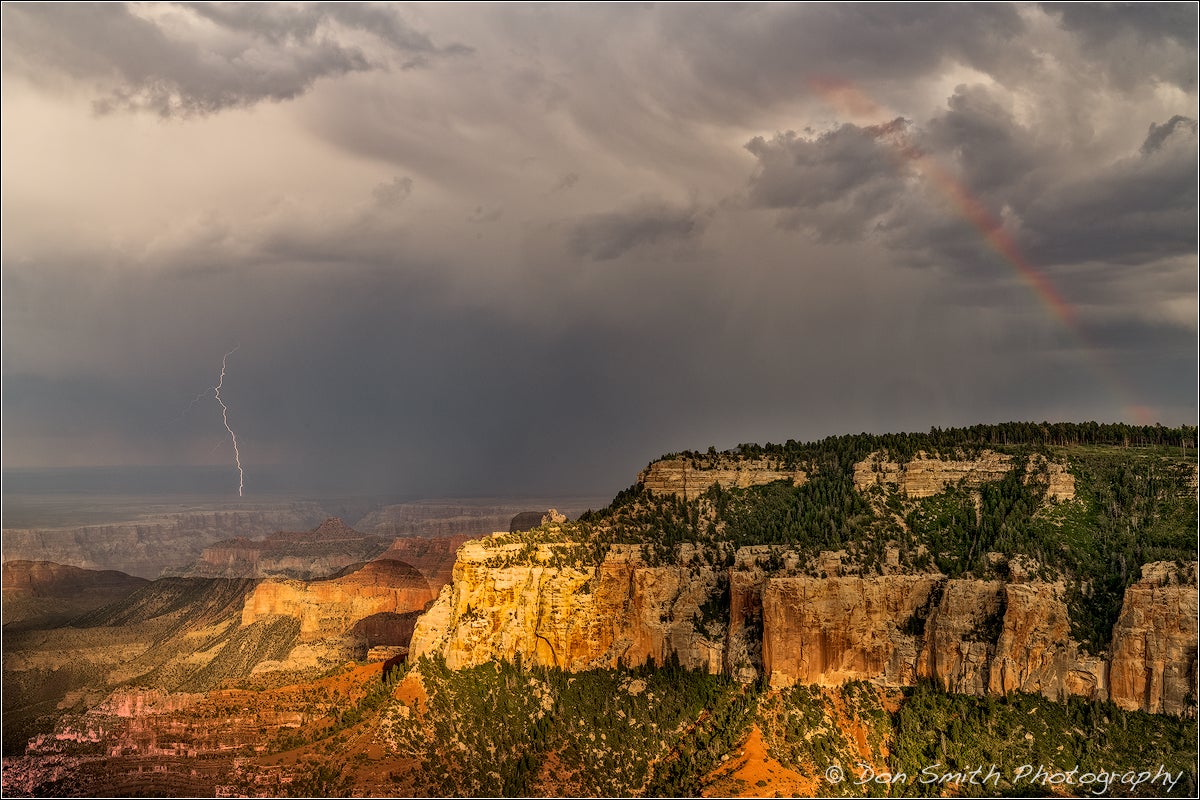
Lightning strike and rainbow, Roosevelt Point, North Rim, Grand Canyon National Park, Arizona. Sony α7R II, Sony FE 24-70mm f/2.8 GM lens. 1/4-sec., f/16, ISO 50. Singh-Ray LB Neutral Polarizer, Lightning Trigger IV
Besides working a composition to just include a rainbow, I had to always be cognizant that lightning could strike at any time. My hopes of capturing both in one frame came to fruition at the North Rim’s Roosevelt Point. Gary and I felt like storm chasers as we saw this cell develop while at Cape Royal. We positioned ourselves at Roosevelt and waited (and hoped). Once I saw the partial rainbow over the plateau, I composed to place it on the right side of my frame and hoped I would get a strike in the active cell that had been firing to the left.
To capture lightning during daylight hours, I use the Lightning Trigger IV. We recommend this trigger to all of our participants and we both believe it is the best lightning trigger on the market. It will capture about 70% of the cloud-to-ground bolts that we see; paired with the Sony α7R II, that percentage was probably higher.
One of the keys to capturing daylight hour lightning is to use a camera with a minimal amount of shutter lag. According to the Lightning Trigger’s developer and the company’s owner, Rich Davis, this means optimal shutter lags of 60 milliseconds or less. The LTIV’s constantly keep the camera in prefocused mode, which results in the fastest lag times. The Sony α7R II has a prefocused lag time of 20 milliseconds, making it one of the best cameras on the market for lighting photography. Lag times for your cameras can be found at Imaging Resource under the Performance tab.
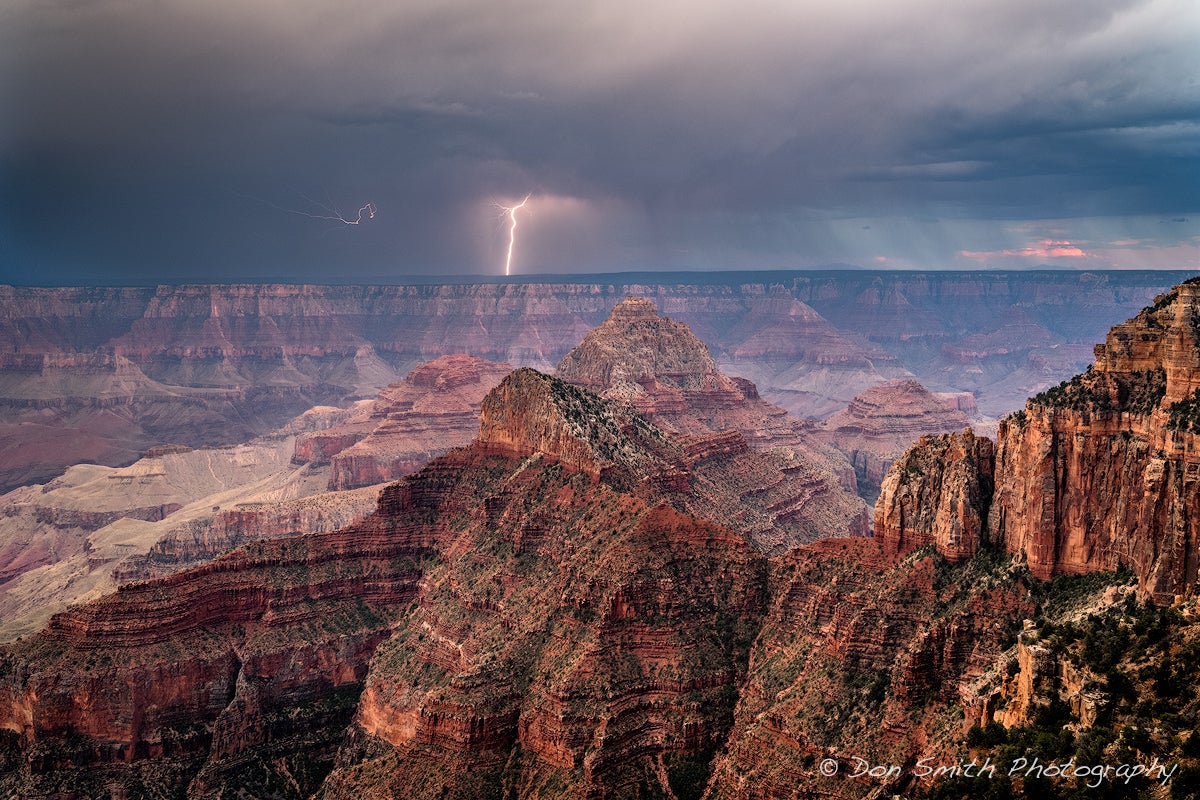
Lightning bolt at Wallaha Point, North Rim, Grand Canyon National Park, Arizona. Sony α7R II, Sony FE 24-70mm f/2.8 GM, 1/4-sec., f/16, ISO 50. Singh-Ray LB Neutral Polarizer. Lightning Trigger IV
There is always a risk when photographing lighting. We make all of our participants aware of the danger and it is up to each one as to where their comfort level lies. Lighting can jump up to 10 miles. The easiest way to tell how far away it is is to count the seconds between seeing the flash until you hear the thunder. Every five seconds equals one mile.
There are three categories of lighting: cloud-to-ground, cloud-to-cloud and within a cloud. The most dramatic are the cloud-to-ground strikes that can sometimes come in pairs or even more. I find the lightning shows best when the sky is at its darkest.
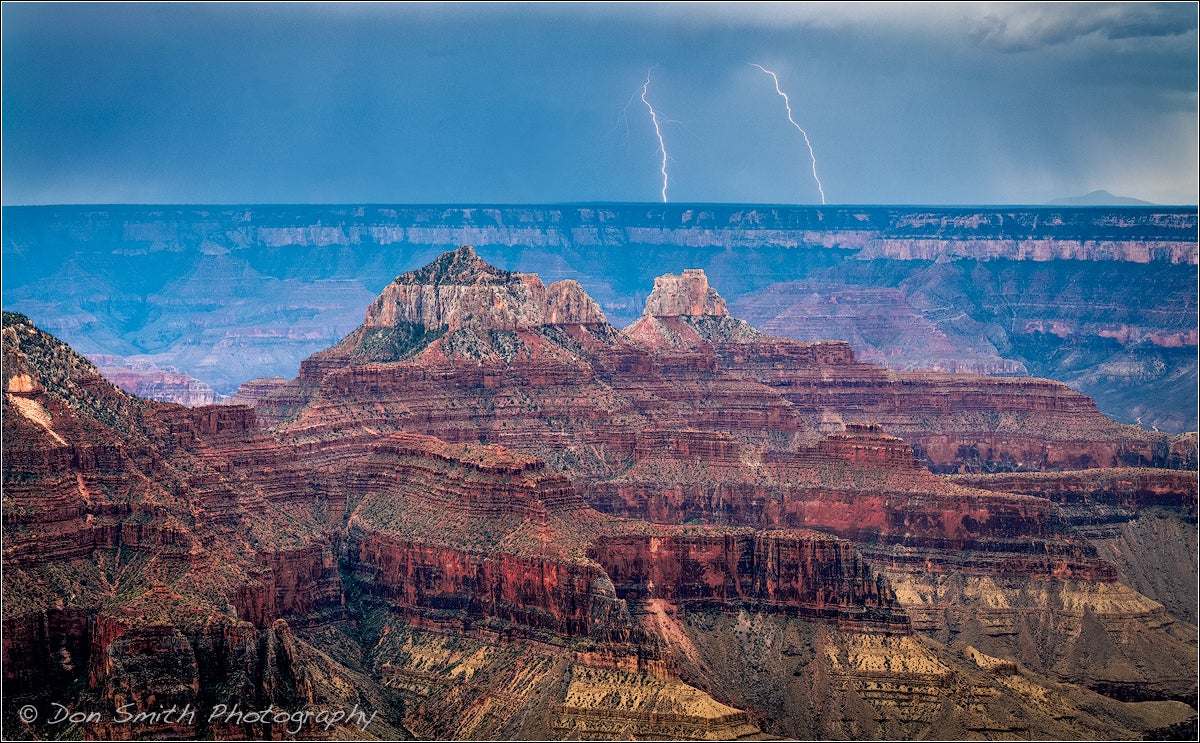
Double lightning strikes along South Rim of Grand Canyon National Park, Arizona. Sony α7R II, Sony FE 24-70mm f/2.8 GM lens. 1/4-sec., f/16, ISO 50. Singh-Ray LB Neutral Polarizer. Lighting Trigger IV
As I mentioned earlier, we got an unexpected break in the clouds one evening during the second workshop so we took our group to Wahalla Point to place them in line with the Milky Way. The location also oriented us in a southerly position allowing us to photograph the brightest section of the Galactic Belt.
There are literally millions of Milky Way images these days so it is important to have something interesting to place with it. How about the Grand Canyon?
The trick is in getting enough exposure on the Canyon itself so it doesn’t appear as a black void. One of the techniques is to take two exposures – one for the Milky Way and one for the Canyon – and blend them together in post-processing. Fortunately, the Sony α7RII with its incredible “back illuminated sensor” was able to get it in one capture.
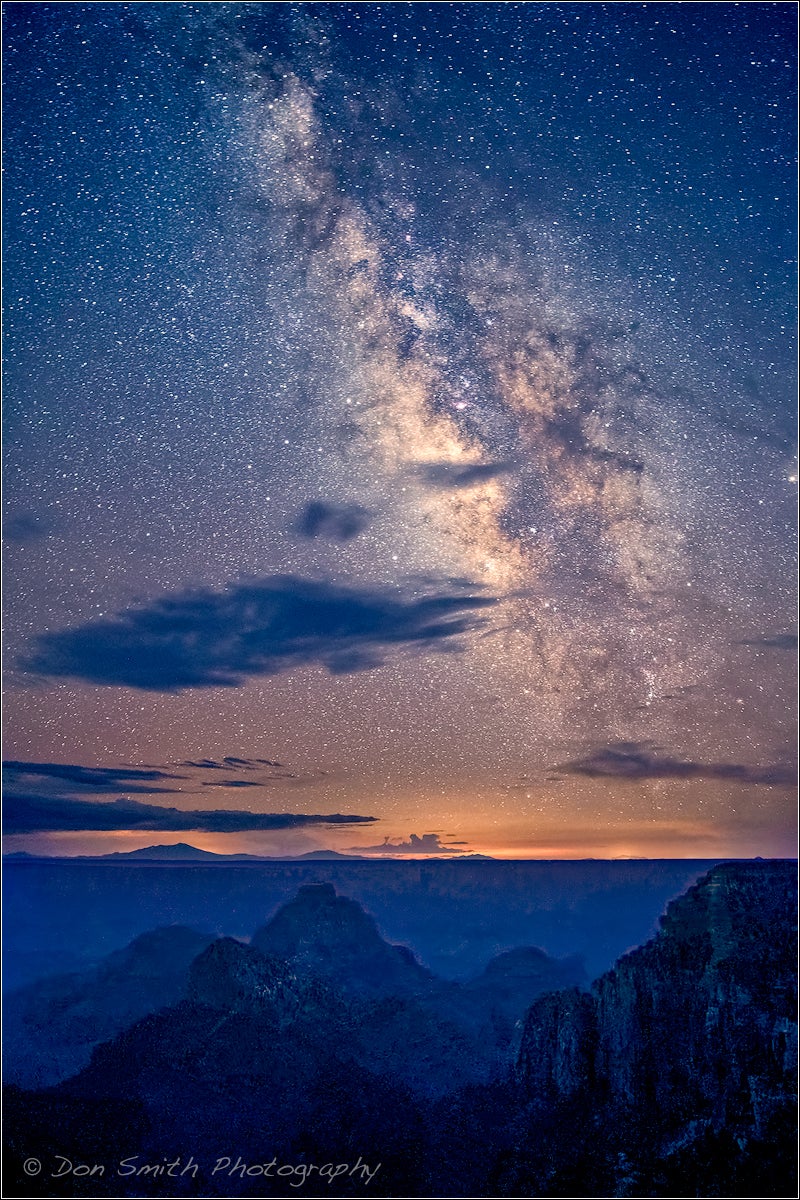
Milky Way over Grand Canyon, North Rim, Grand Canyon National Park, Arizona. Sony α7R II, Sony 24-70mm f/2.8 GM, 1/4-sec., f/16, ISO 6400.
What surprised me more than anything was how well the file held up with the camera’s ISO set to 6400. I always make a first pass of the RAW file through DxO OpticsPro 11 Elite Edition software using PRIME noise reduction mode. I find that it removes about 1 1/2 stops of noise from the file without softening the image. I then reroute it back into Lightroom and finish processing the file globally, then I open it into Photoshop to do my final tweaks.
If you have never visited the Grand Canyon during monsoon season you are missing out on a visual treat. Rainbows, lighting, and colorful sunrises and sunsets. We will do it all over again next August if you are interested in joining us: 2017 Grand Canyon Monsoon Workshop.
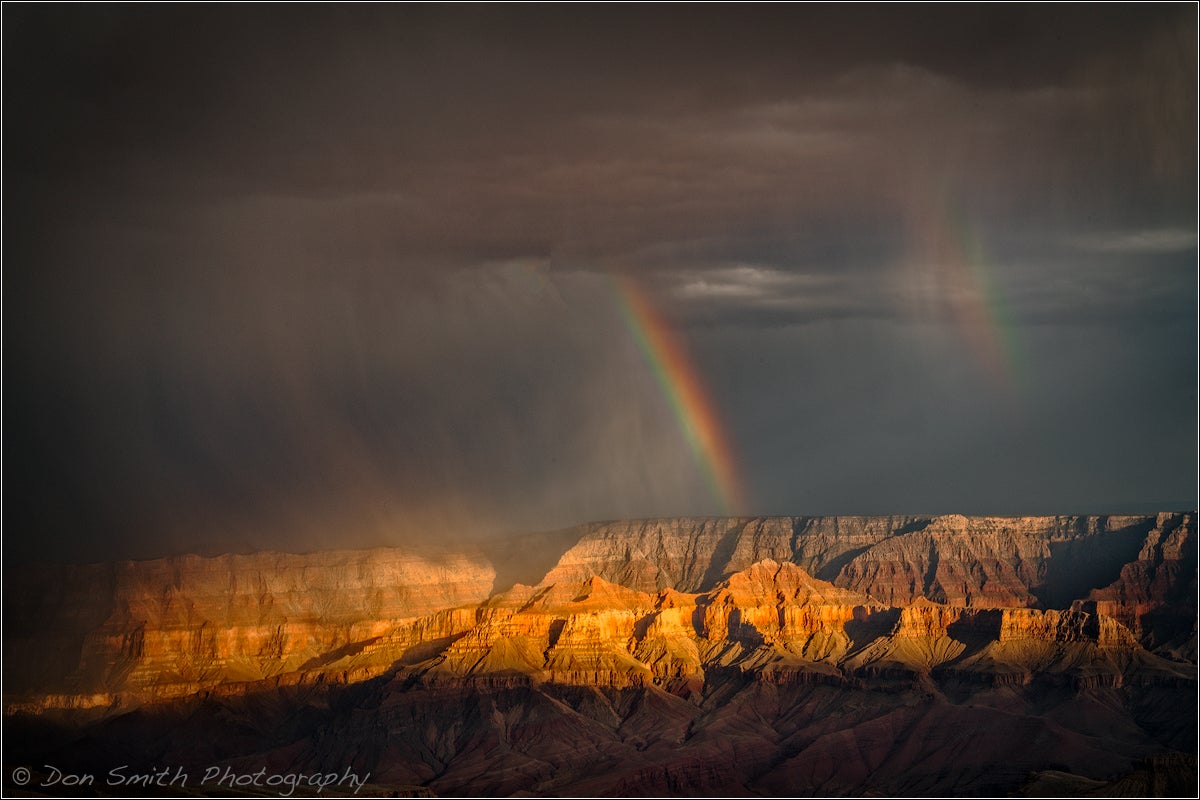
Double rainbow over Grand Canyon, Wallaha Point, North Rim, Grand Canyon National Park, Arizona. Sony α7R II, Sony 24-70mm f/2.8 GM, 1/4-sec., f/20, ISO 50. Singh-Ray LB Neutral Polarizer

