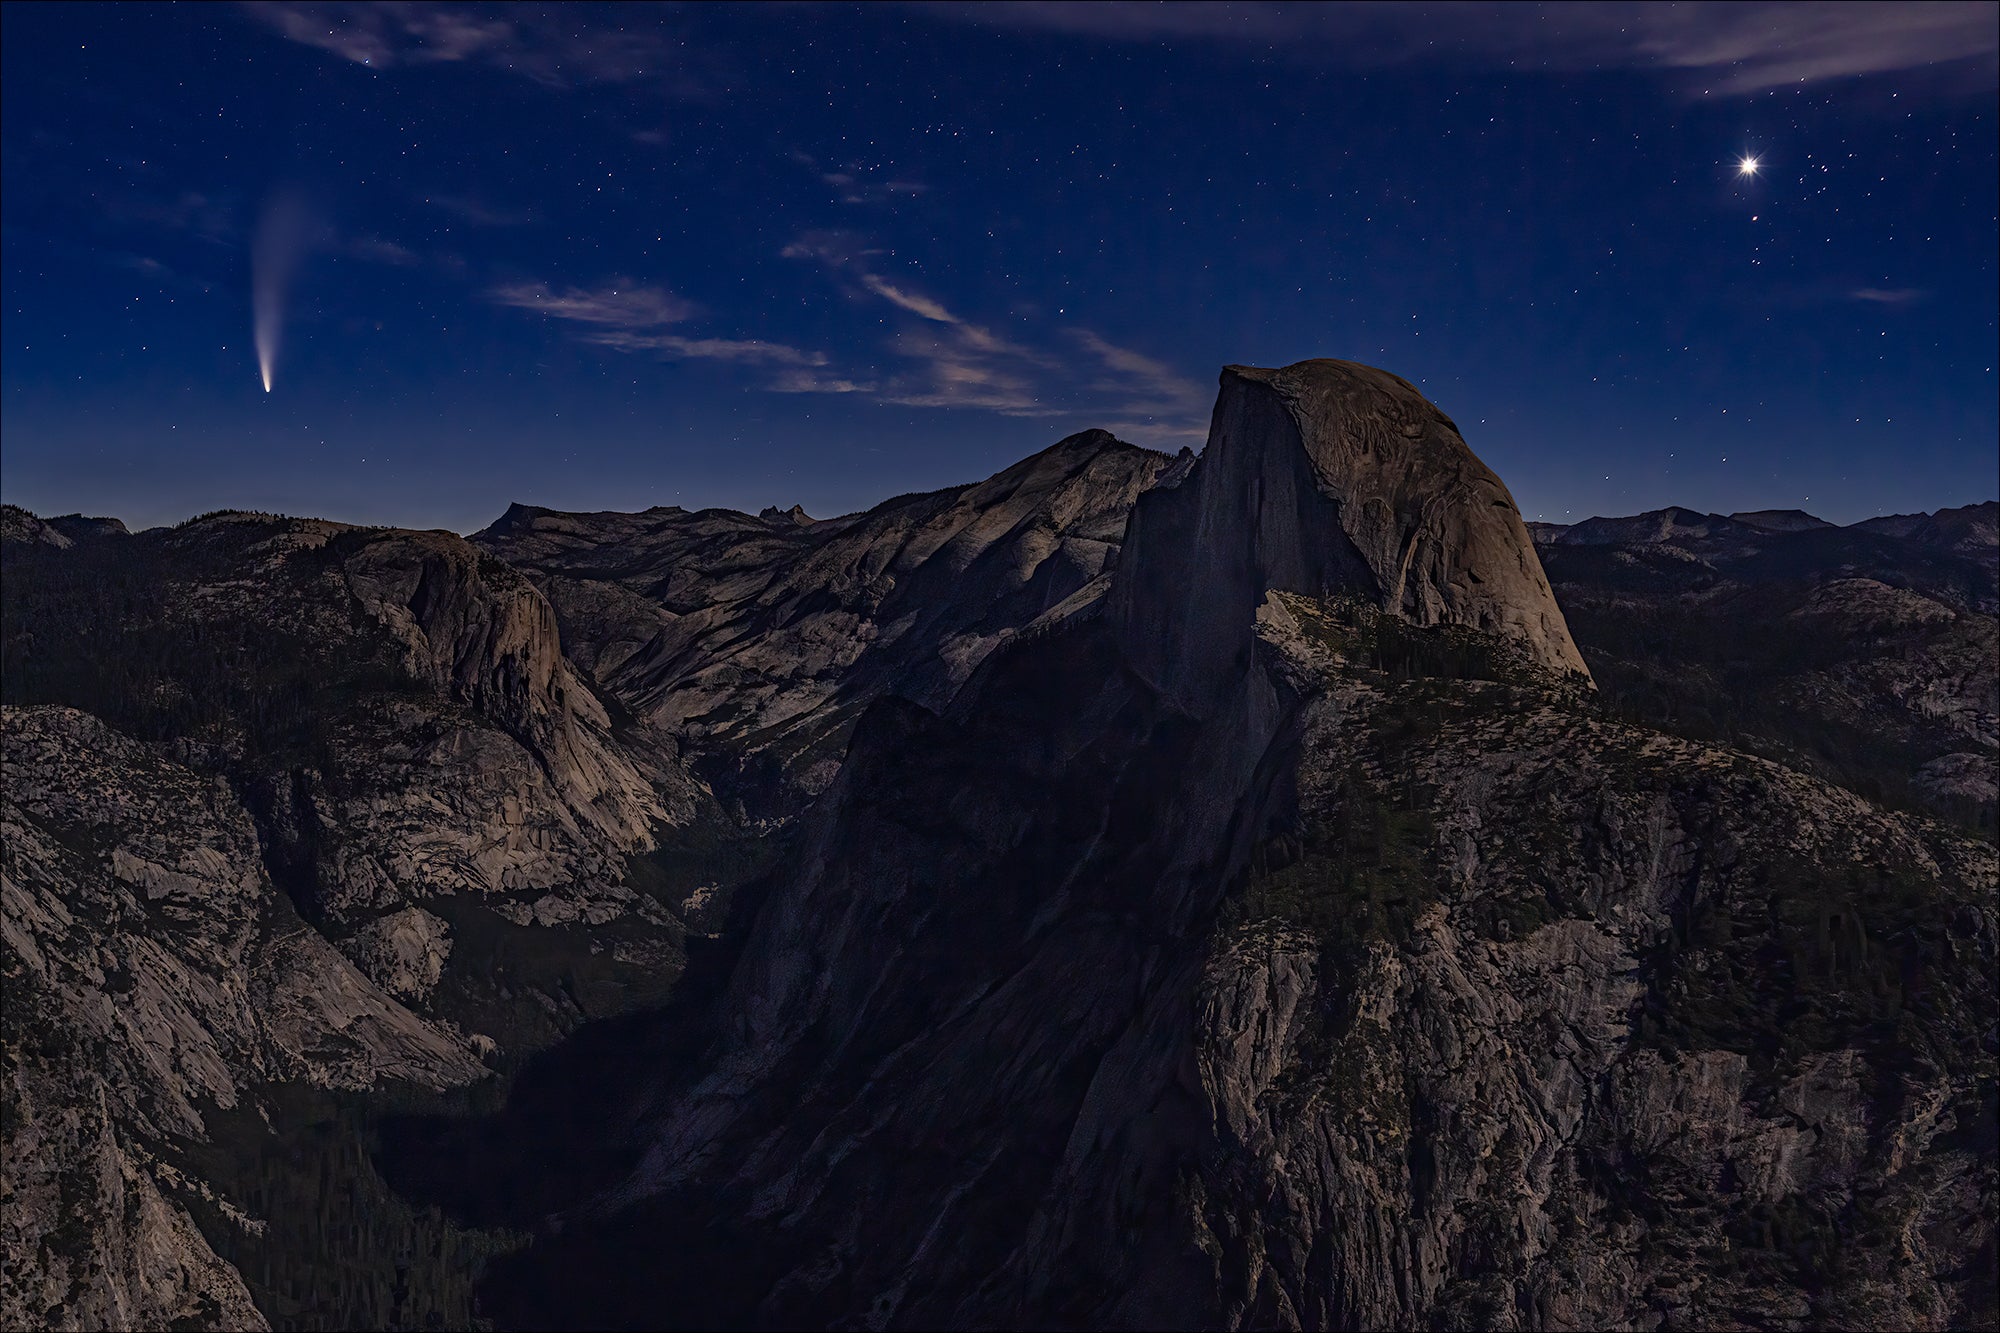
For the next couple of weeks you have the rare opportunity to see and photograph one of the night sky's rarest and most spectacular occurances as Comet NEOWISE starts making its graceful exit from the inner solar system. Tonight, July 22, the comet will be at perigee (closest to the Earth). After tonight the comet will simultaneously get farther from the Earth, move higher in the evening sky and grow dimmer. It has already put on a brilliant show and is in a beautiful position for earthbound photographers. Pro landscape photographer and Artisan of Imagery Gary Hart explains how he photographed Comet NEOWISE with his Sony α7R IV and 24-105mm lens on a moonlit evening above Yosemite Valley. Hart prefers to capture an image completely in camera versus compositing in post – here he explains how he does it:
One of my favorite quotes, on any topic, is from astronomer David Levy: “Comets are like cats: they have tails and do precisely what they want.” As a cat owner with an interest in comets since I was 10 years old, I can absolutely verify that sentiment. From Kohoutek, to Halley’s, to ISON, I can list at least a half-dozen promised naked-eye comets that teased me with their potential, only to disappoint.
Sony Artisan Gary Hart details how he captured Comet NEOWISE and Half Dome in one frame, with one click.
This year two comets with great potential, Atlas and Swan, broke my heart. So forgive me for not letting the initial excitement about newly discovered Comet NEOWISE move me. But when word came that NEOWISE had survived its spin around the sun (the most dangerous part of a comet’s journey) and pictures began popping up online, I started making plans.

Photo by Gary Hart. Sony α7R IV. Sony 24-105mm f/4 G. 10-secs., f/5.6, ISO 3200
Choosing A Location
In all of my astrophotography I try to align my celestial subject with a striking terrestrial object. For the first week or so after perihelion (when it’s brightest), NEOWISE was a tricky terrestrial match because it was only visible shortly before sunrise, low on the northeast horizon and blocked the Sierra from any vantage point near my Northern California home. And my favorite California location, Yosemite Valley, shadowed by towering granite walls, was no better.
I considered Mono Lake on the other side of the Sierra, but eventually settled on Glacier Point. High above Yosemite Valley, not only did Glacier Point give me a clean view of the northeast horizon, quick plotting with my astronomy software (Starry Night Pro 8) told me that I could get Half Dome in my frame with the comet. I was in business.
I drove up to Yosemite on the afternoon of July 9, got a room just outside the park, and was on the road to Glacier Point before 3 a.m. the next morning. I was pretty confident I’d be able to see NEOWISE with my camera, but wasn’t prepared for how bright it would appear to the naked eye. A bonus that morning was Venus, which paired beautifully with NEOWISE to bookend Half Dome.
Camera Gear & Settings
For this shoot I’d packed my Sony α7R IV and α7R III bodies, and Sony 16-35mm f/2.8 G Master, 24-105mm f/4 G, and 100-400mm f/4.5-5.6 G Master lenses (polarizers off!). Flanked by two tripods, on the α7R IV I switched between my two wider lenses, while the α7R III was dedicated to the 100-400mm. (Learn more about the gear Gary uses for landscape and astro in his What's In My Bag article.)
Because I consider myself a film shooter with a digital camera, I never blend images—if I can’t get it with one click, I don’t shoot it. That means I have to do all I can to mitigate noise in extreme low-light scenes (a big reason I shoot Sony). On this morning 75% moon helped a lot, but whenever I have exposures measured in seconds, at a higher than ideal ISO (>100), I turn on Long Exposure Noise Reduction. I was also careful to turn off the camera when I switched to the other to allow the sensor time to cool down.
One of the things I love most about Sony Alpha bodies is their ease of focus at night. There are actually several approaches that work, from autofocusing on Venus or the moon, to manual focus with focus peaking and maximizing the red points that represent each star. But I prefer manual focus on a star magnified in my viewfinder (Focus Magnifier in the menu, but customized the Center Button on all my bodies), and dialing my focus ring until the star is the smallest dot possible. Whichever focus method I choose, each time I change my focal length I verify sharpness by magnifying the review image in my viewfinder. When checking focus, don’t magnify too much because anything will look soft when magnified enough. I only hit the Magnify button once, then move the viewfinder to something with a defined edge against the horizon, like trees.
Post-Production
I process my comet images with a combination of Lightroom and Photoshop, starting in Lightroom by cooling the color temperature a bit because I think cooler looks more night-like. Next, with the entire image displayed, I bring up Shadows, then tweak Highlights and Whites. Sometimes I’ll make gentle adjustments to Texture, Clarity, and Dehaze, but be careful because these can easily intensify noise. Before moving to Photoshop I magnify the view to 100 percent and check the areas with the most potential for noise (usually the darkest areas)—if I don’t like what I see, I pull Shadows, and/or Texture/Clarity/Dehaze back down.
The first thing I do in Photoshop is apply Topaz DeNoise AI. The rest of my Photoshop work is usually limited to targeted adjustments, most frequently by selecting and feathering to create a Curves, Saturation, or Color Balance layer.
There’s no telling when your next opportunity will come to photograph a comet, truly one of the most beautiful sights to grace the night. Comet NEOWISE has left the morning sky and is now found left of the Big Dipper starting an hour or so after sunset. The comet is fading and not nearly as easy to see with the naked eye, but it’s easily found with binoculars, and should still be spectacular in an image through July.


