My name is Stefaan Hoste (@fotokepano) and I’m a photographer based in Belgium. Photography has always been part of my life. In the beginning, these were mainly holiday photos with an analogue camera. For a short period I developed my own black and white photographs in a darkroom in the attic. In 2015 I started studying photography and during that study, I became acquainted with the different genres of photography – especially landscape and architecture which strongly appealed to me. More recently I have become interested in macro photography and capturing flowers with ultimate clarity – something my Sony α7R III and Sony 90mm f/2.8 Macro G allow me to do. I'll show you how I made this image using the 90mm Macro G lens and a simple Photoshop technique that further enhances what I can do with that lens.
Photographer Stefaan Hoste shares how he captured this vibrant flower using the Sony α7R III, Sony 90mm f/2.8 Macro G lens and a few simple steps in Photoshop.
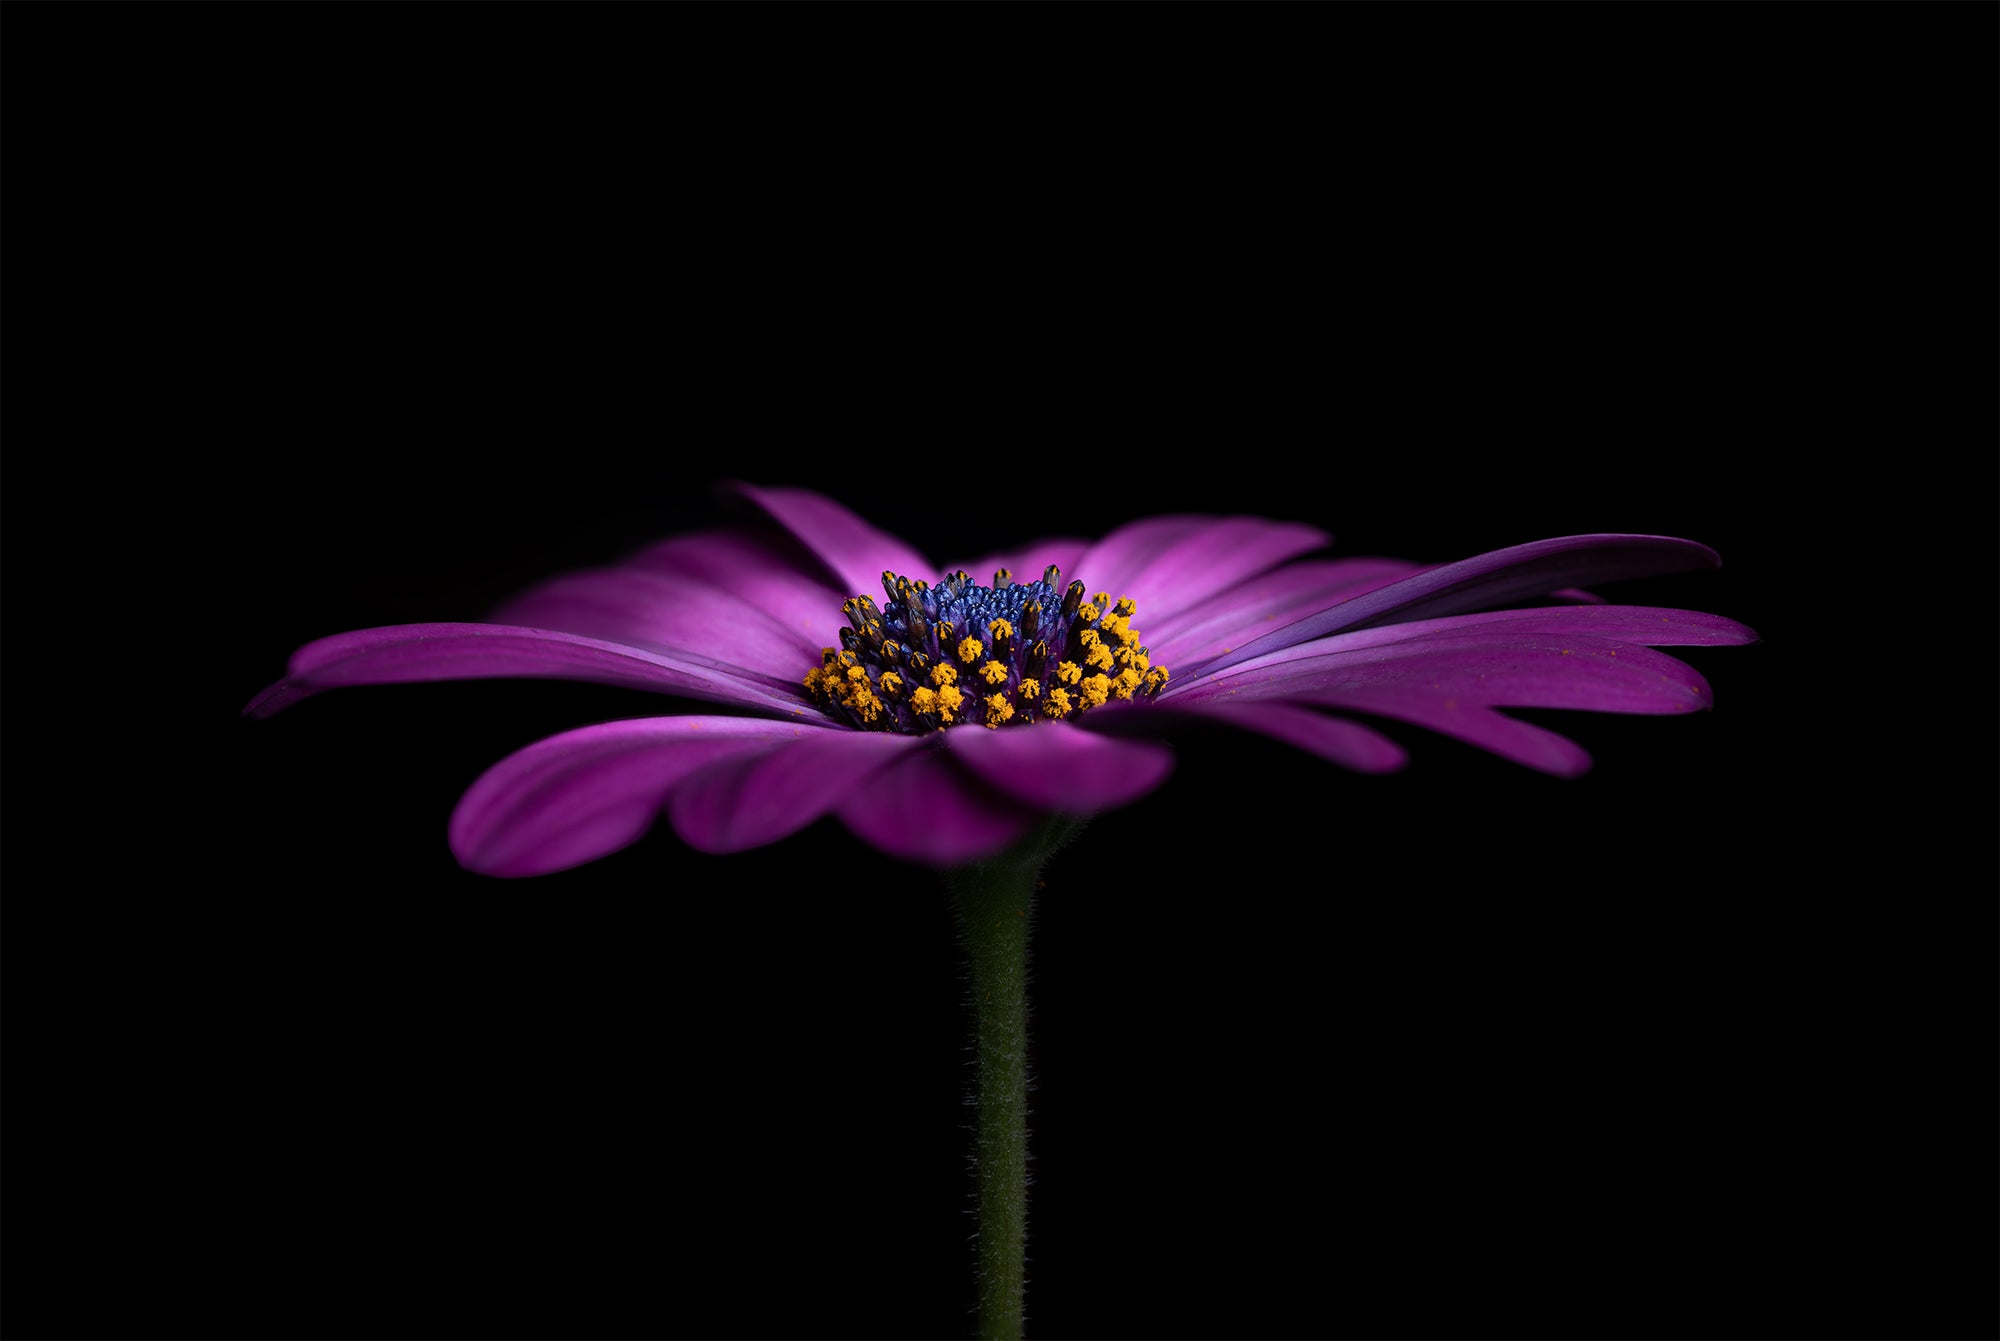
Photo by Stefaan Hoste. Sony α7R III. Sony 90mm f/2.8 Macro G. ⅕-sec., f/8, ISO 100
Inspiration
Detail and sharpness is something that has always fascinated me. I like to show the viewer things they normally don't think about. When looking for subjects for macro photography, I quickly came to flowers. Rather by coincidence I didn't start looking for them outside in nature this time. This picture was taken at home in my living room. The name "Osteospermum" is the Latin name for this flower.
The Gear
I was a loyal user of Canon equipment for many years, but in January 2019 I switched to Sony. I bought an α7R III with a Sony 24-70mm f/2.8 G Master. Then in May 2019 I bought the Sony 90mm f/2.8 Macro G. The 90mm is a beautiful lens that opened up the world of macro photography to me. In the beginning I started by experimenting and trying out different things. I tried the 90mm Macro for this image and it just produces razor sharp pictures.
How I Got The Shot
This picture was taken at home in my living room with a flower from a pot of flowers that I had. I wanted to practice my macro photography and I took more than 60 pictures. The exercise consisted of paying attention to composition and sharpness. I had my Sony α7R III with my Sony 90mm f/2.8 Macro G on a tripod with the lens' optical stabilization off. I had the camera set to manual exposure and ISO 100, and the aperture set to f/8. This gives me a shutter speed of ⅕-second. I focused manually and took several consecutive photos where I moved the focus point slightly each time. For the image shown here, I combined three exposures with different focus points. As you can see, the entire flower is not in focus, but only the heart. I did this to draw the viewer's attention to the center of the flower.
By placing a black piece of paper behind the flower, I created a nice black background free of clutter and distraction. I tilted the camera to make the flower stand horizontally, and the light was coming in perfectly through very large windows. I usually love to photograph macro outside because of the way the sunlight can shine through the leaves in my garden, but I was very lucky in this case to have the same beautiful effect while indoors, lighting the center of the flower.
Post-Production & Focus Stacking
Finishing was done in Lightroom and Photoshop. With the adjustment brush I lifted the heart of the flower a bit and put some structure in it. Also with the adjustment brush I worked on part of the black background to get a plain deep black. I applied these adjustments to the three images in Photoshop. By stacking the three images I got more depth of field in the heart of the flower.
To perform the focus stacking on an image like this in Photoshop CC, you go to File > Scripts > Load Files Into Stack and select the exposures you want to use. With a macro shot like this, it's important to shoot from a tripod and not have any movement from the camera or the subject in the exposures you choose to stack.
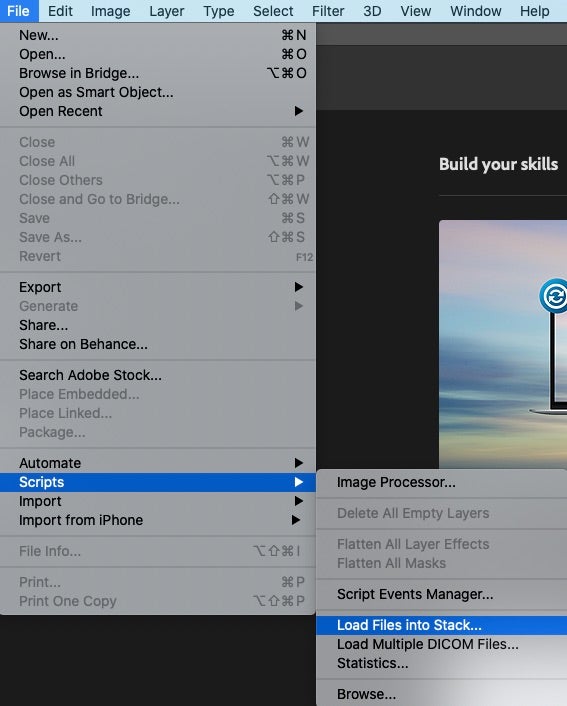
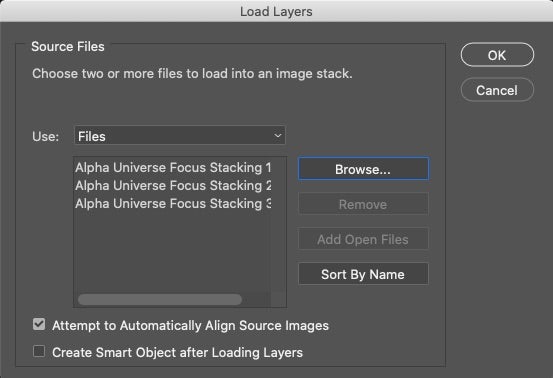
Photoshop will bring in the files and make each exposure into its own layer. Select all the layers in the stack...
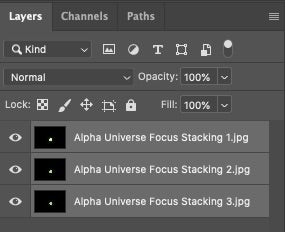
...then go to Edit > Auto-Align Layers.
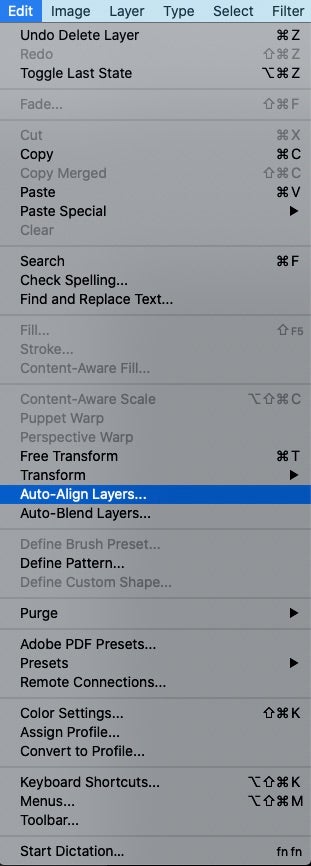
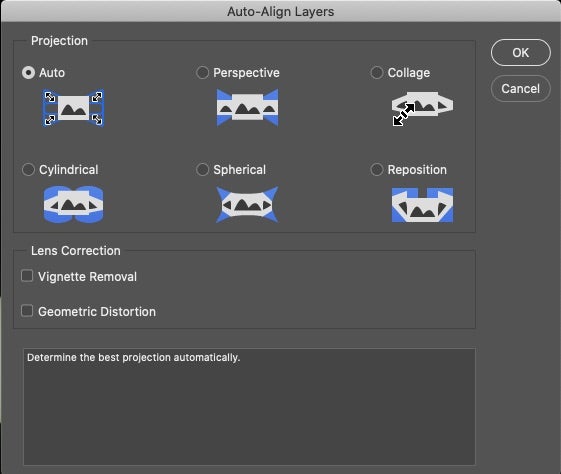
This brings up a dialog box where, if your images are all close to alignment, you can just choose Auto.
Next go to Edit > Auto-Blend Layers...
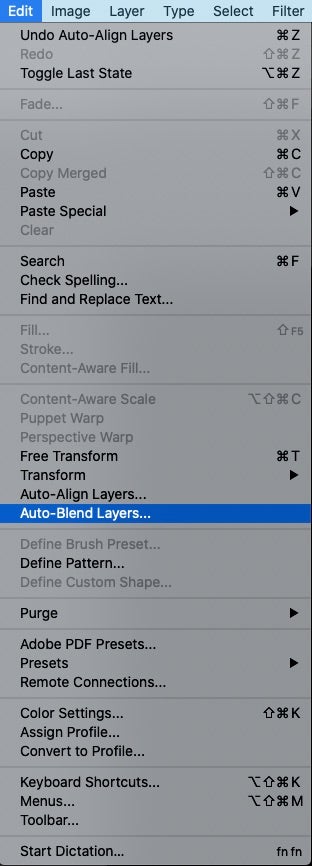
... and choose Stack Images in the dialog box. Check Seamless Tones And Colors and you can check or uncheck Content Aware Fill Transparent Areas (this will fill in any areas that around the edges that show slightly mis-aligned layers).
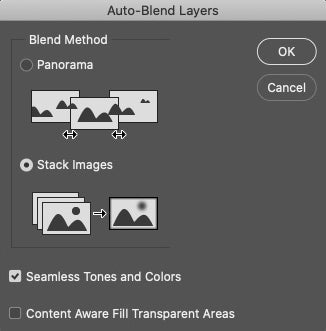
When you hit OK, the layers are masked and combined to show the sharpest parts of each exposure, in this case giving us tack-sharpness across the central area of the flower. The final result is a crisp, beautiful macro shot.

