One of Capture One’s many strengths lies with its huge potential for adjustment and optimization of color. The Color Editor is one part of this equation, enabling precise definition of a color range for adjustment and linking in to other possibilities for even finer control. In this article we will look at some of the options in the Advanced tab of the Color Editor tool.
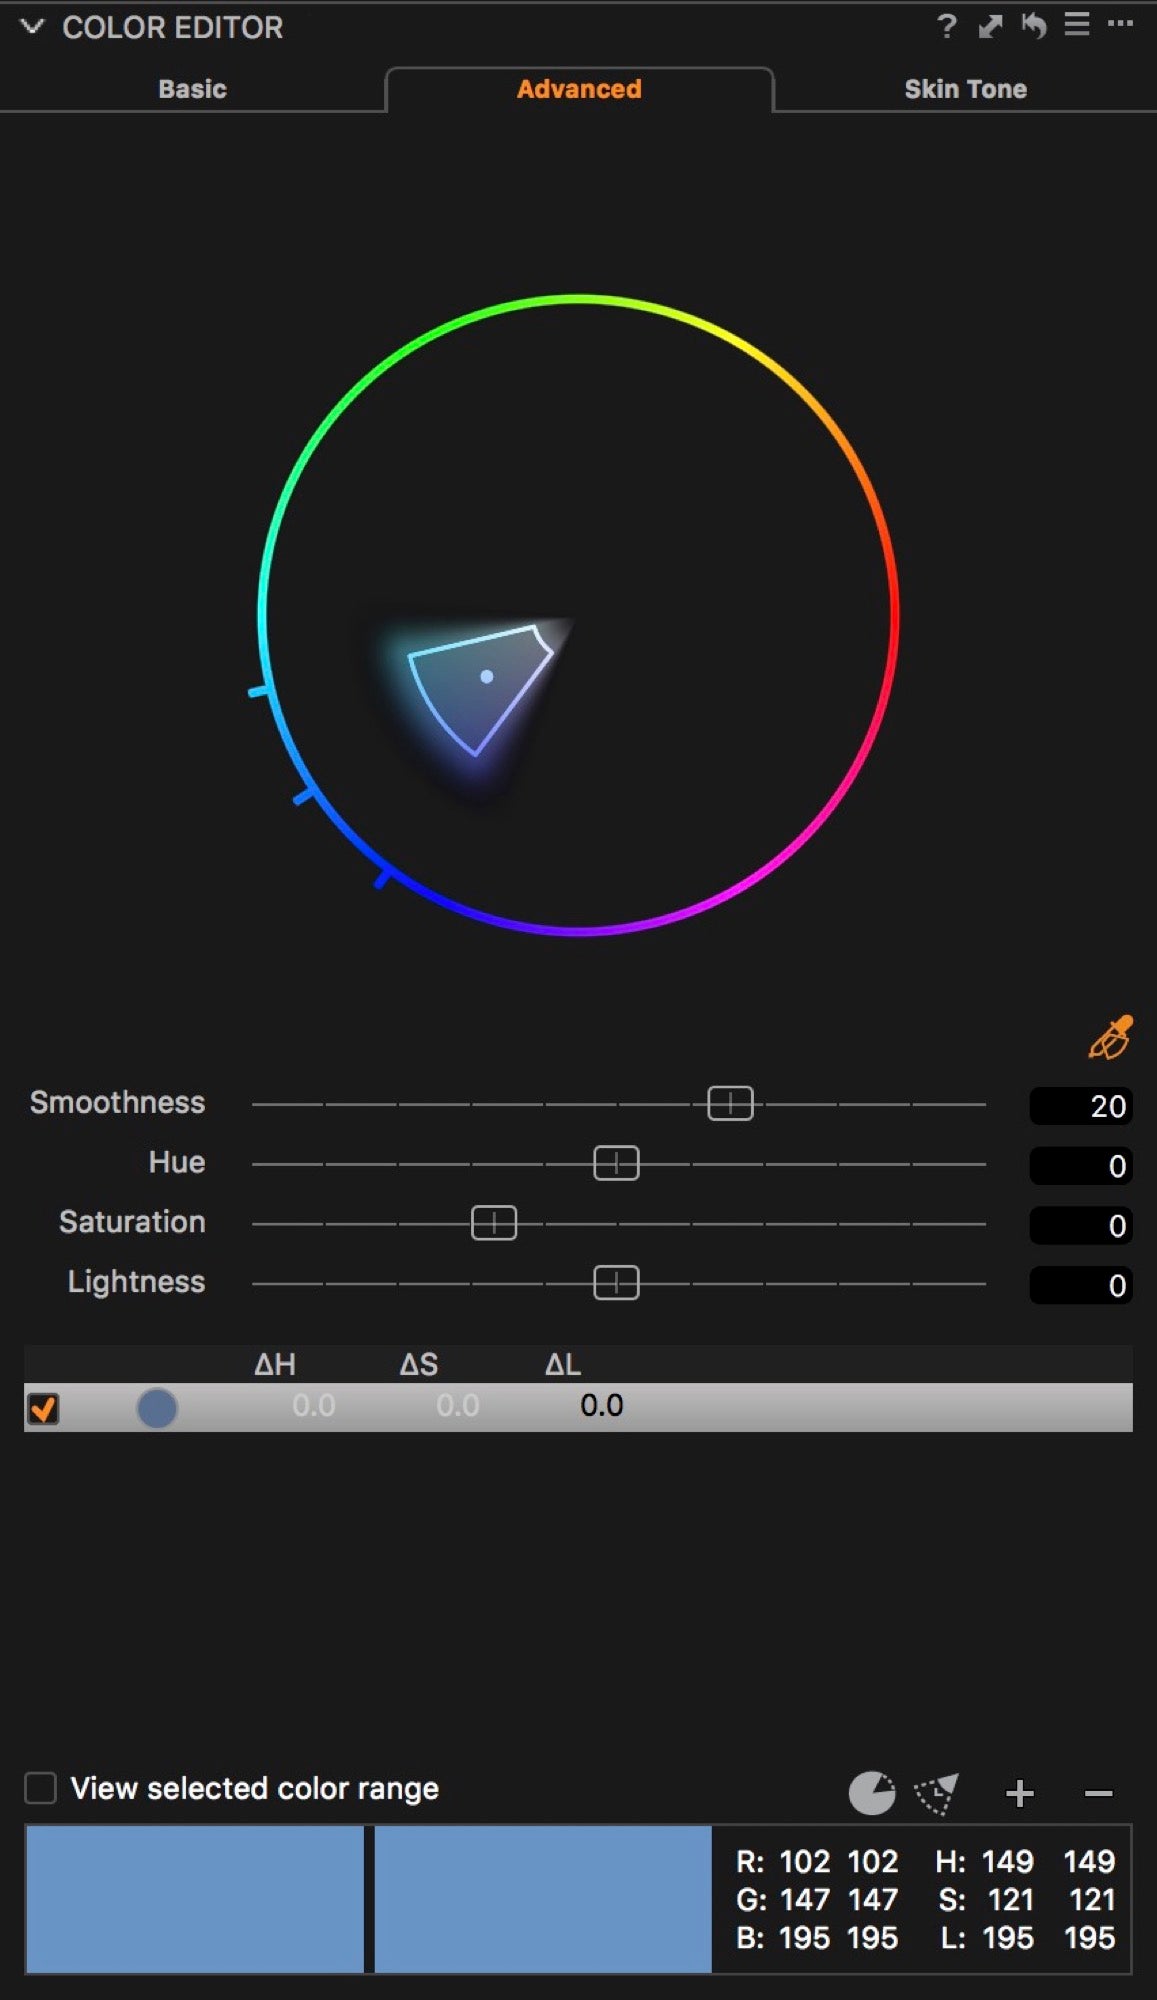
The Color Editor Tool in Capture One
What exactly can this tool do? Here are some brief definitions:
Target a precise color range and edit the Hue, Saturation and Lightness of this range
Convert color range selections into Local Adjustment masks
Invert color range selections
Editing Color
This process can be summarized in three simple steps:
Use the picker to identify the color you wish to edit
Define this range further
Adjust Hue, Saturation and Lightness.
Here’s how.
1, Use the picker to identify the color you wish to edit - Click on the picker to the right of the color wheel
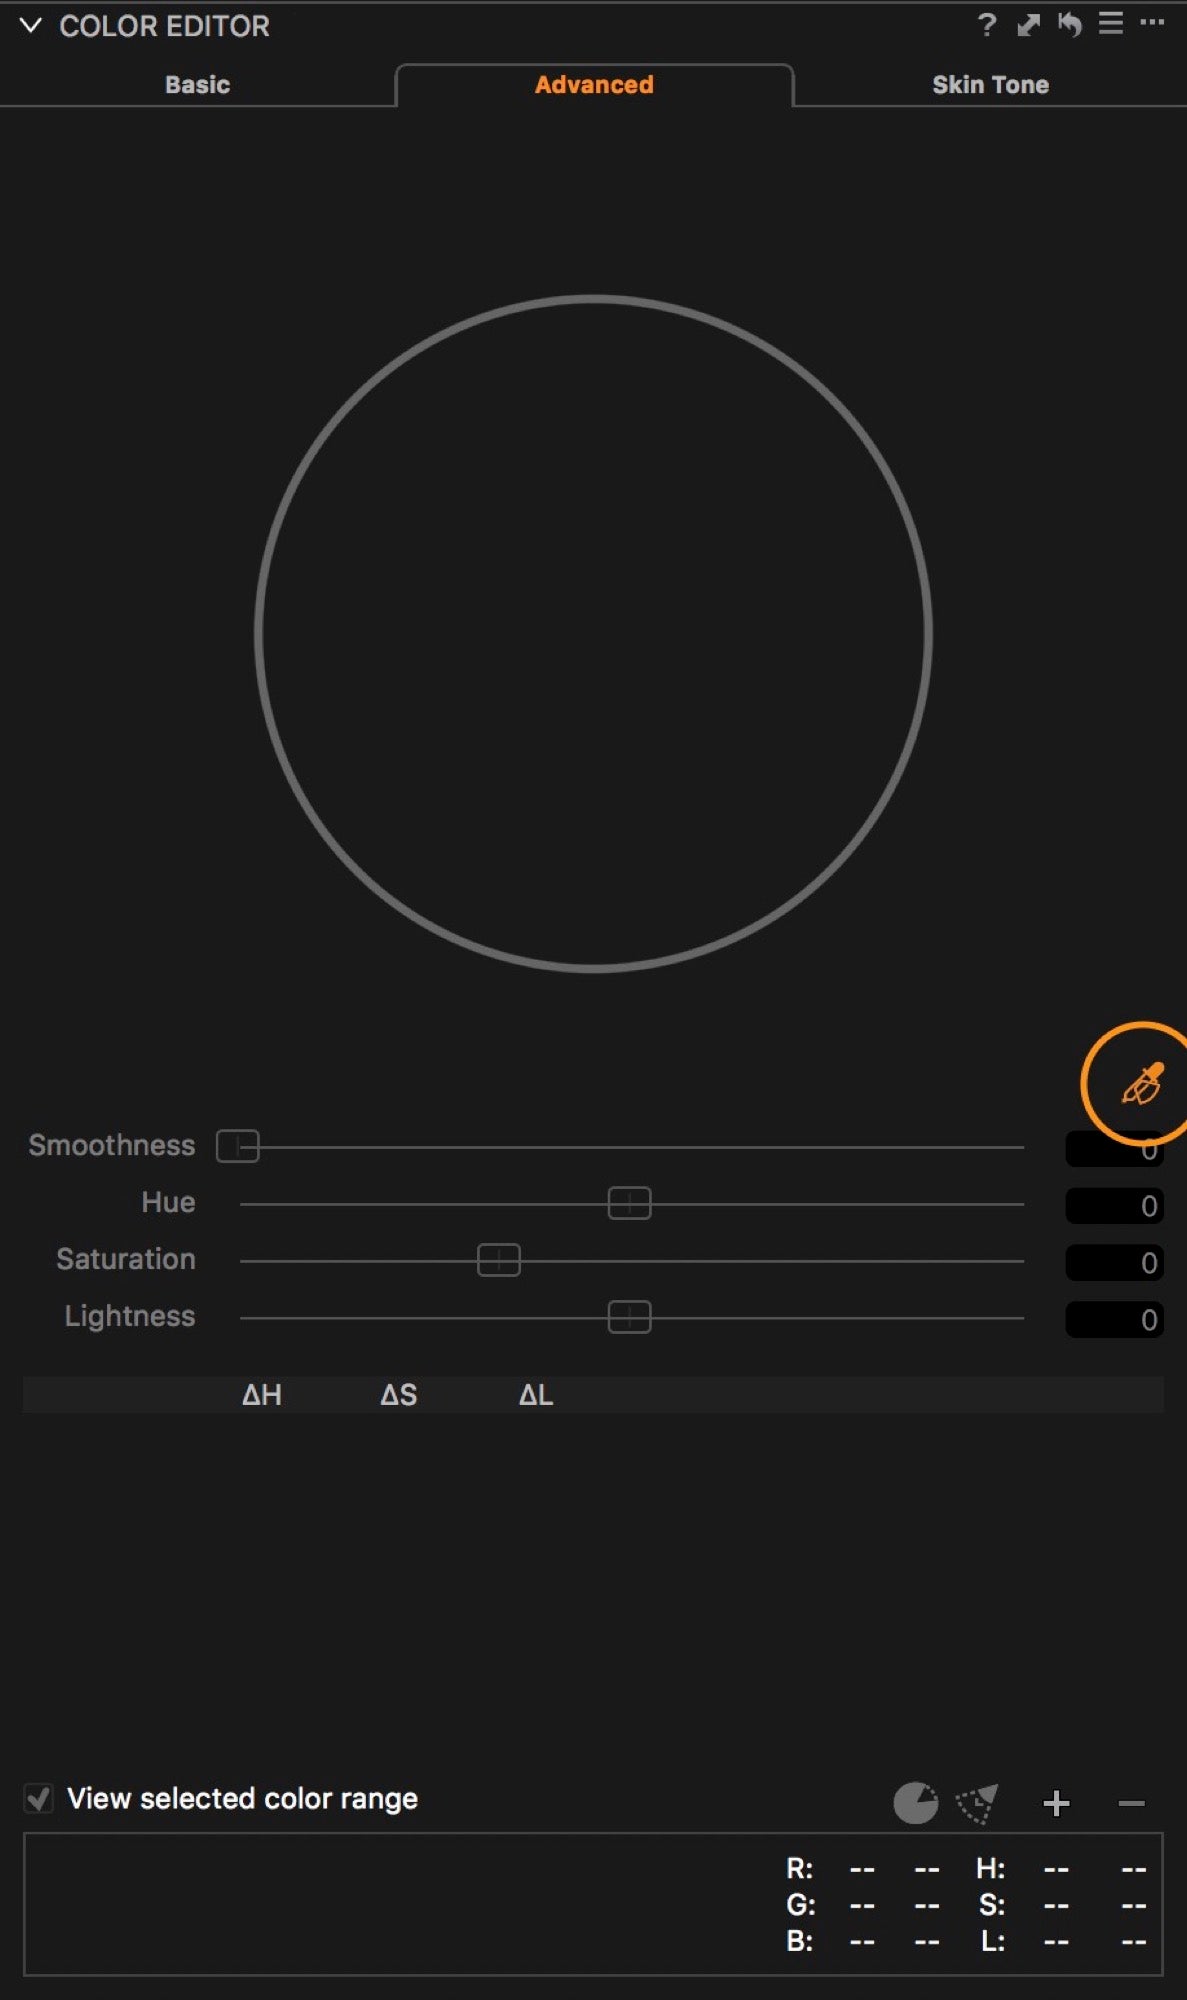
Pick Color cursor tool
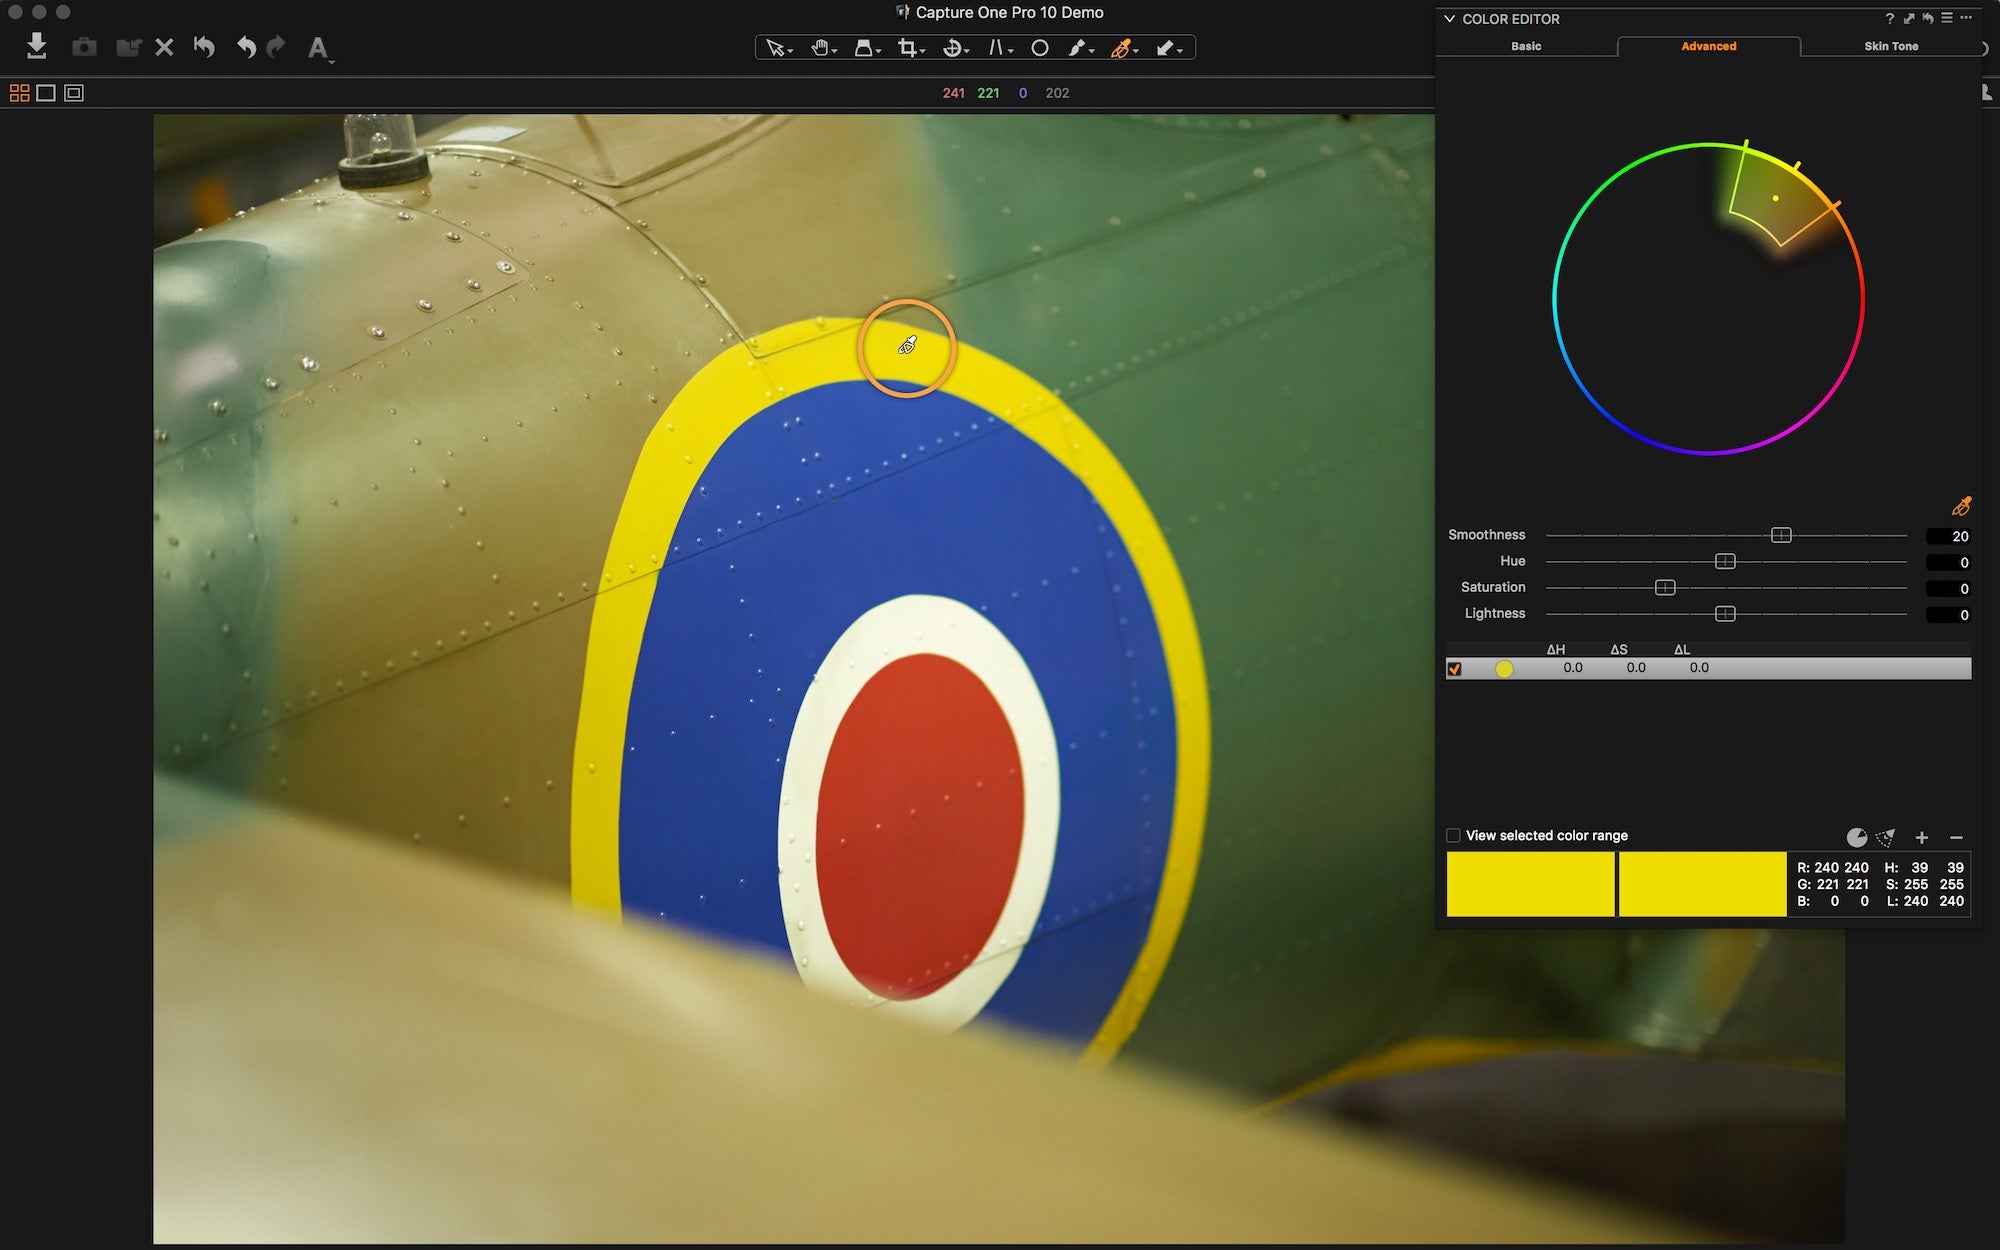
Choosing a Color
Note, in this image the yellow tone we are choosing sits very close to the neighboring greens of the rest of the aircraft body. A simple click will choose a suggested color range as shown in the Color Editor tool.
2, Define this range further
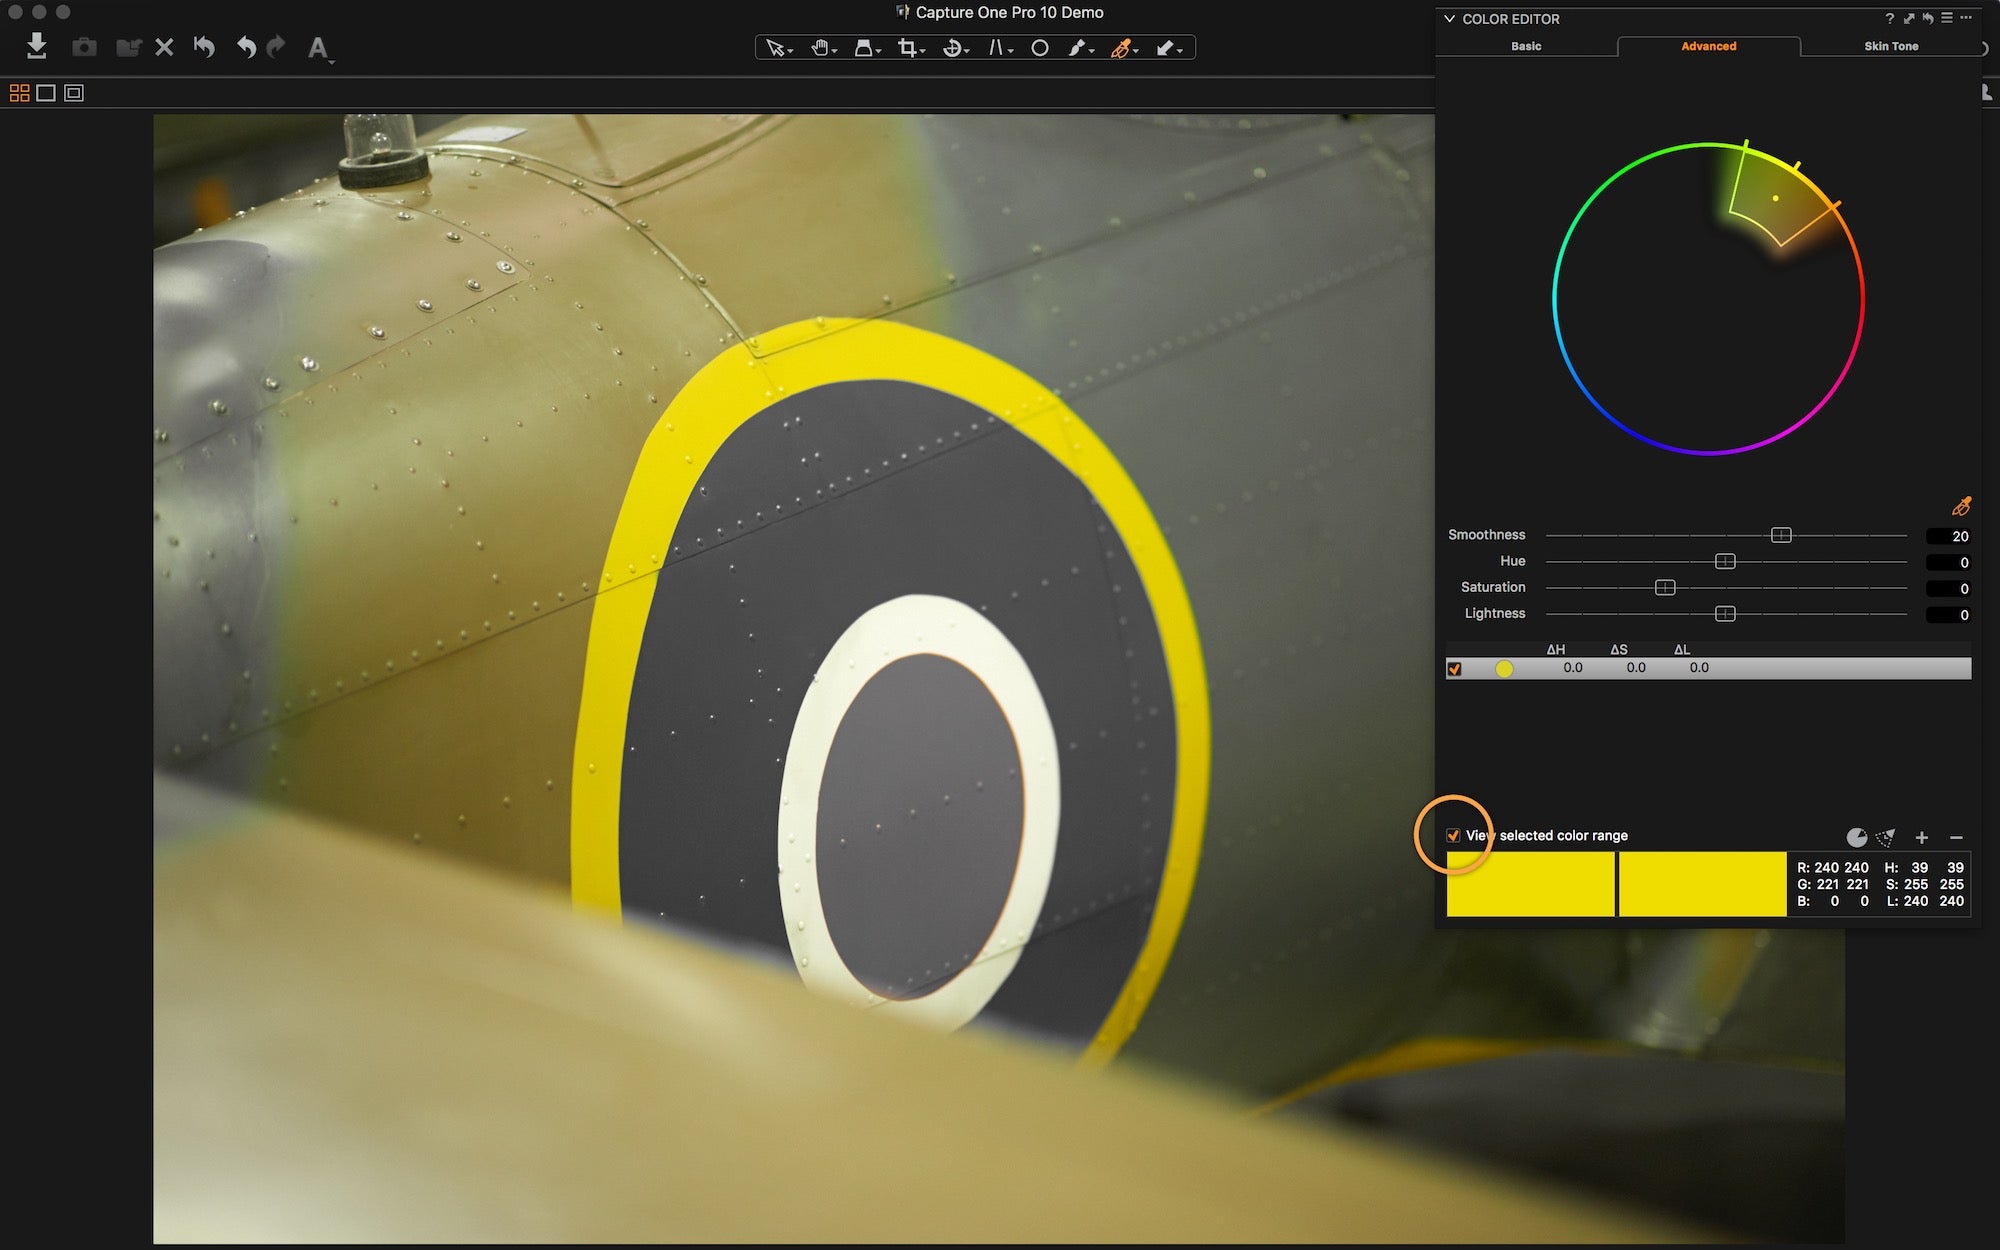
Activate View Selected Color Range
This option will help us visualise exactly what is part of the chosen range, to allow us to edit it further. Any part of this image that is not part of the selected range will be presented as monochrome – for example, now some, but not all of the aircraft body.
If we want to completely isolate the Yellow ring, it’s a simple task to reduce the Color Range and refine further with the Smoothness slider.
Hovering over any of the range boundary lines changes the cursor and allows the expansion or reduction of the range. The period mark in the centre of the boundary lines is the exact picked color from earlier.
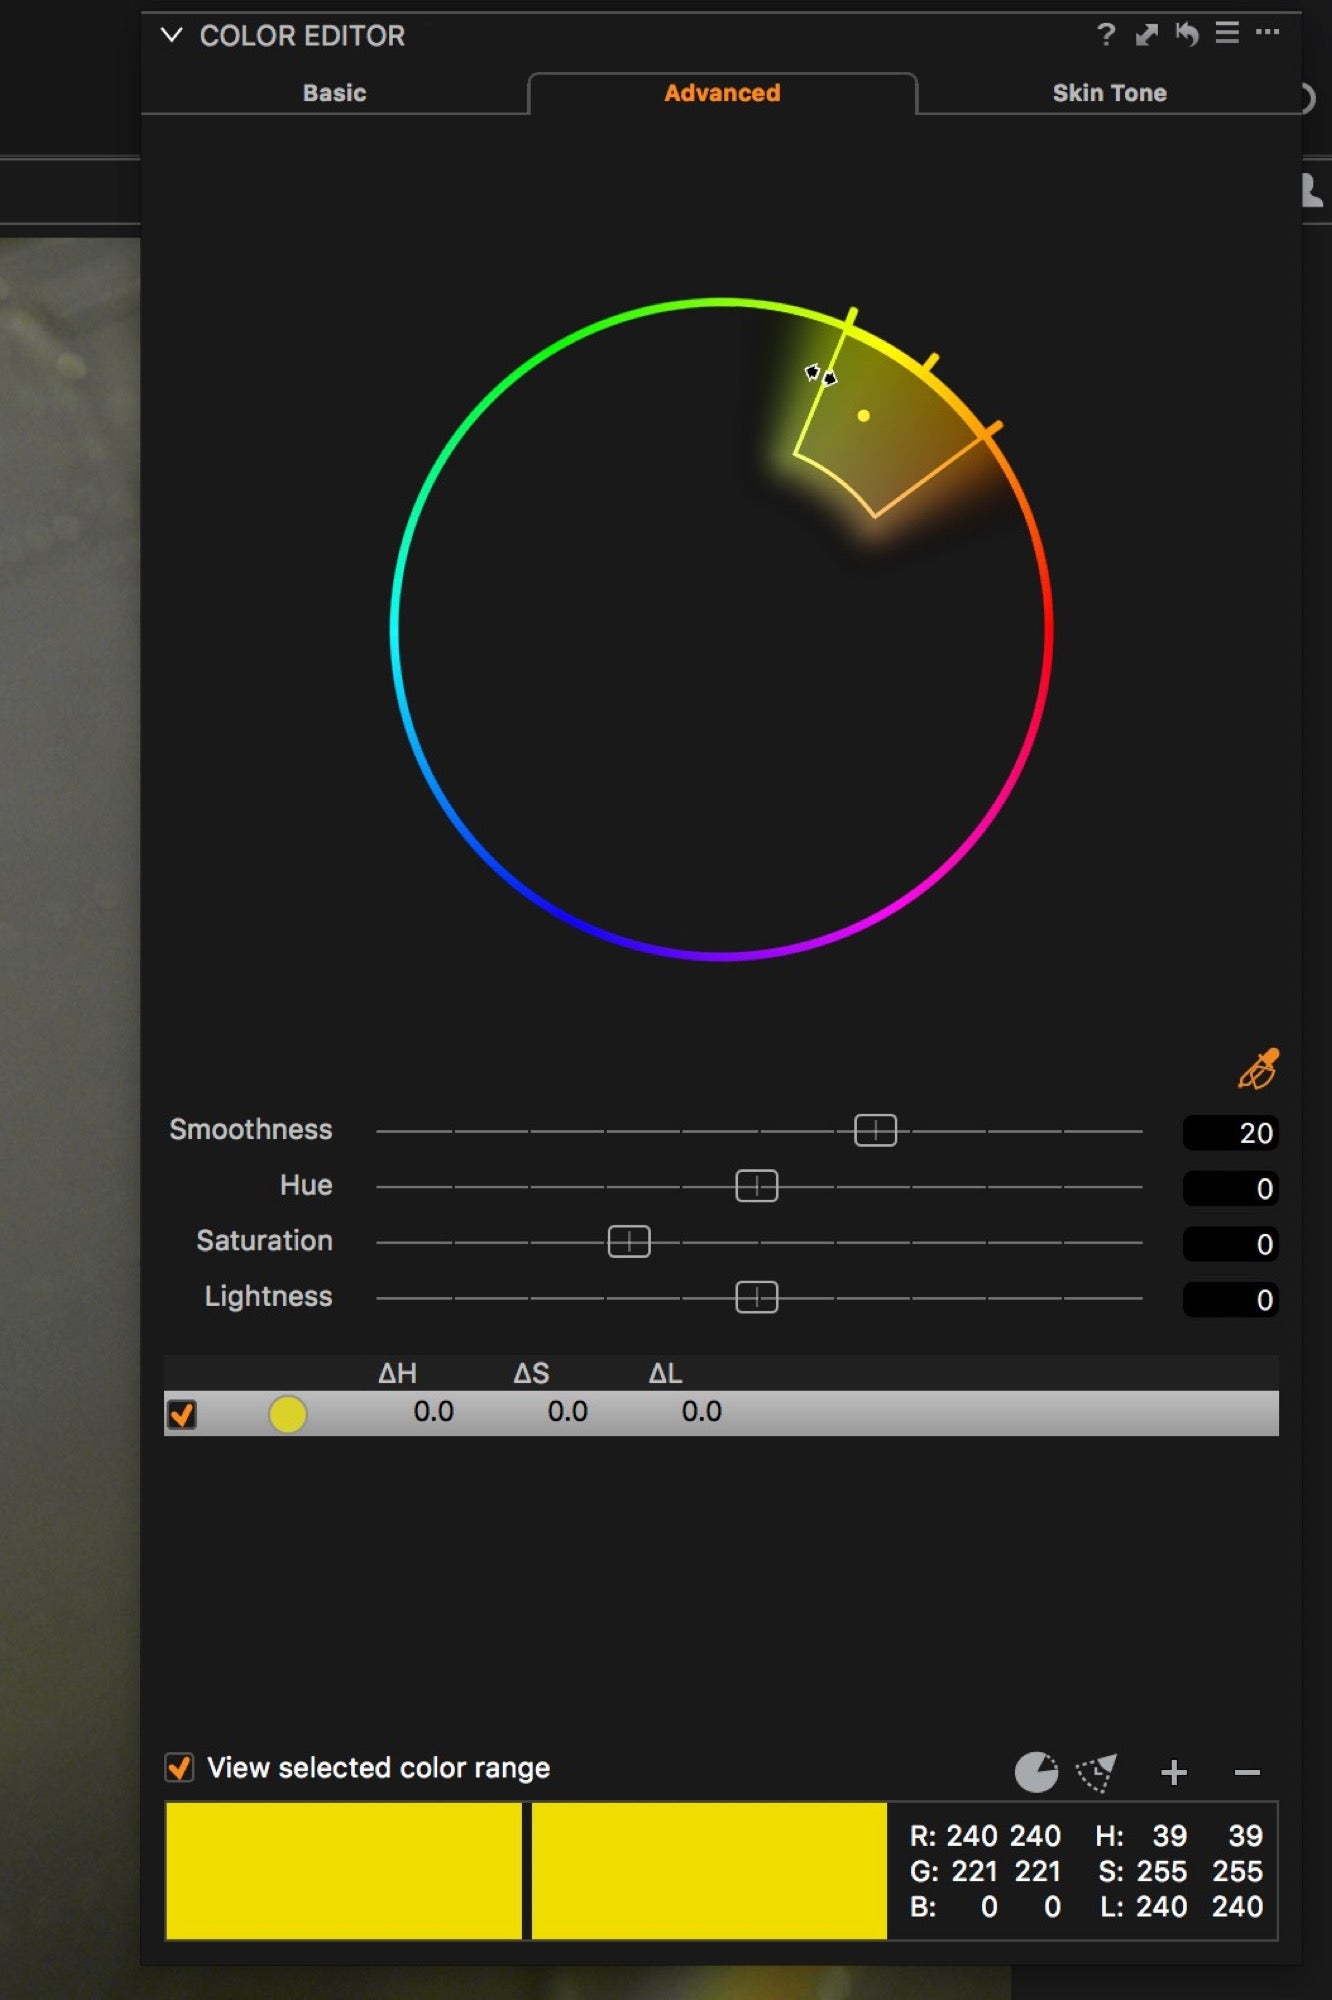
Editing the Color Range
As the range is edited, the image in the viewer will update in real time, giving you a good idea of when your desired selection is reached.
If neighbouring colors are very close, it may also be necessary to adjust the Smoothness slider. This adjustment controls how much roll-off there is to neighbouring colors around the boundary lines. This is shown visually by the “fuzzy” graphic around the boundary.
A Smoothness value of 0 will have no roll–off to neighboring colors
A Smoothness value of 30 will have the maximum roll-off to neighboring colors.
In the following short clip, see how the color range changes, with the reduction of the Smoothness value.
Reducing the Smoothness to the minimum value is too great in this case, as the bottom right of the yellow circle gets removed from the range. A slight increase is a perfect selection.
By adjusting the color range boundary and the Smoothness value it is possible to get extremely targeted adjustments.
3, Adjust Hue Saturation and Lightness
With a satisfactory range now selected, simply use the Hue, Saturation and Lightness sliders to edit the color. Remember to uncheck the View selected Color Range option.
A maximum of 30 color edits is possible, so simply repeat the above steps for additional color edits.
Inverting Selections
Sometimes it can be useful to invert a selection, if you wish to edit all colors with the exception of the picked color.
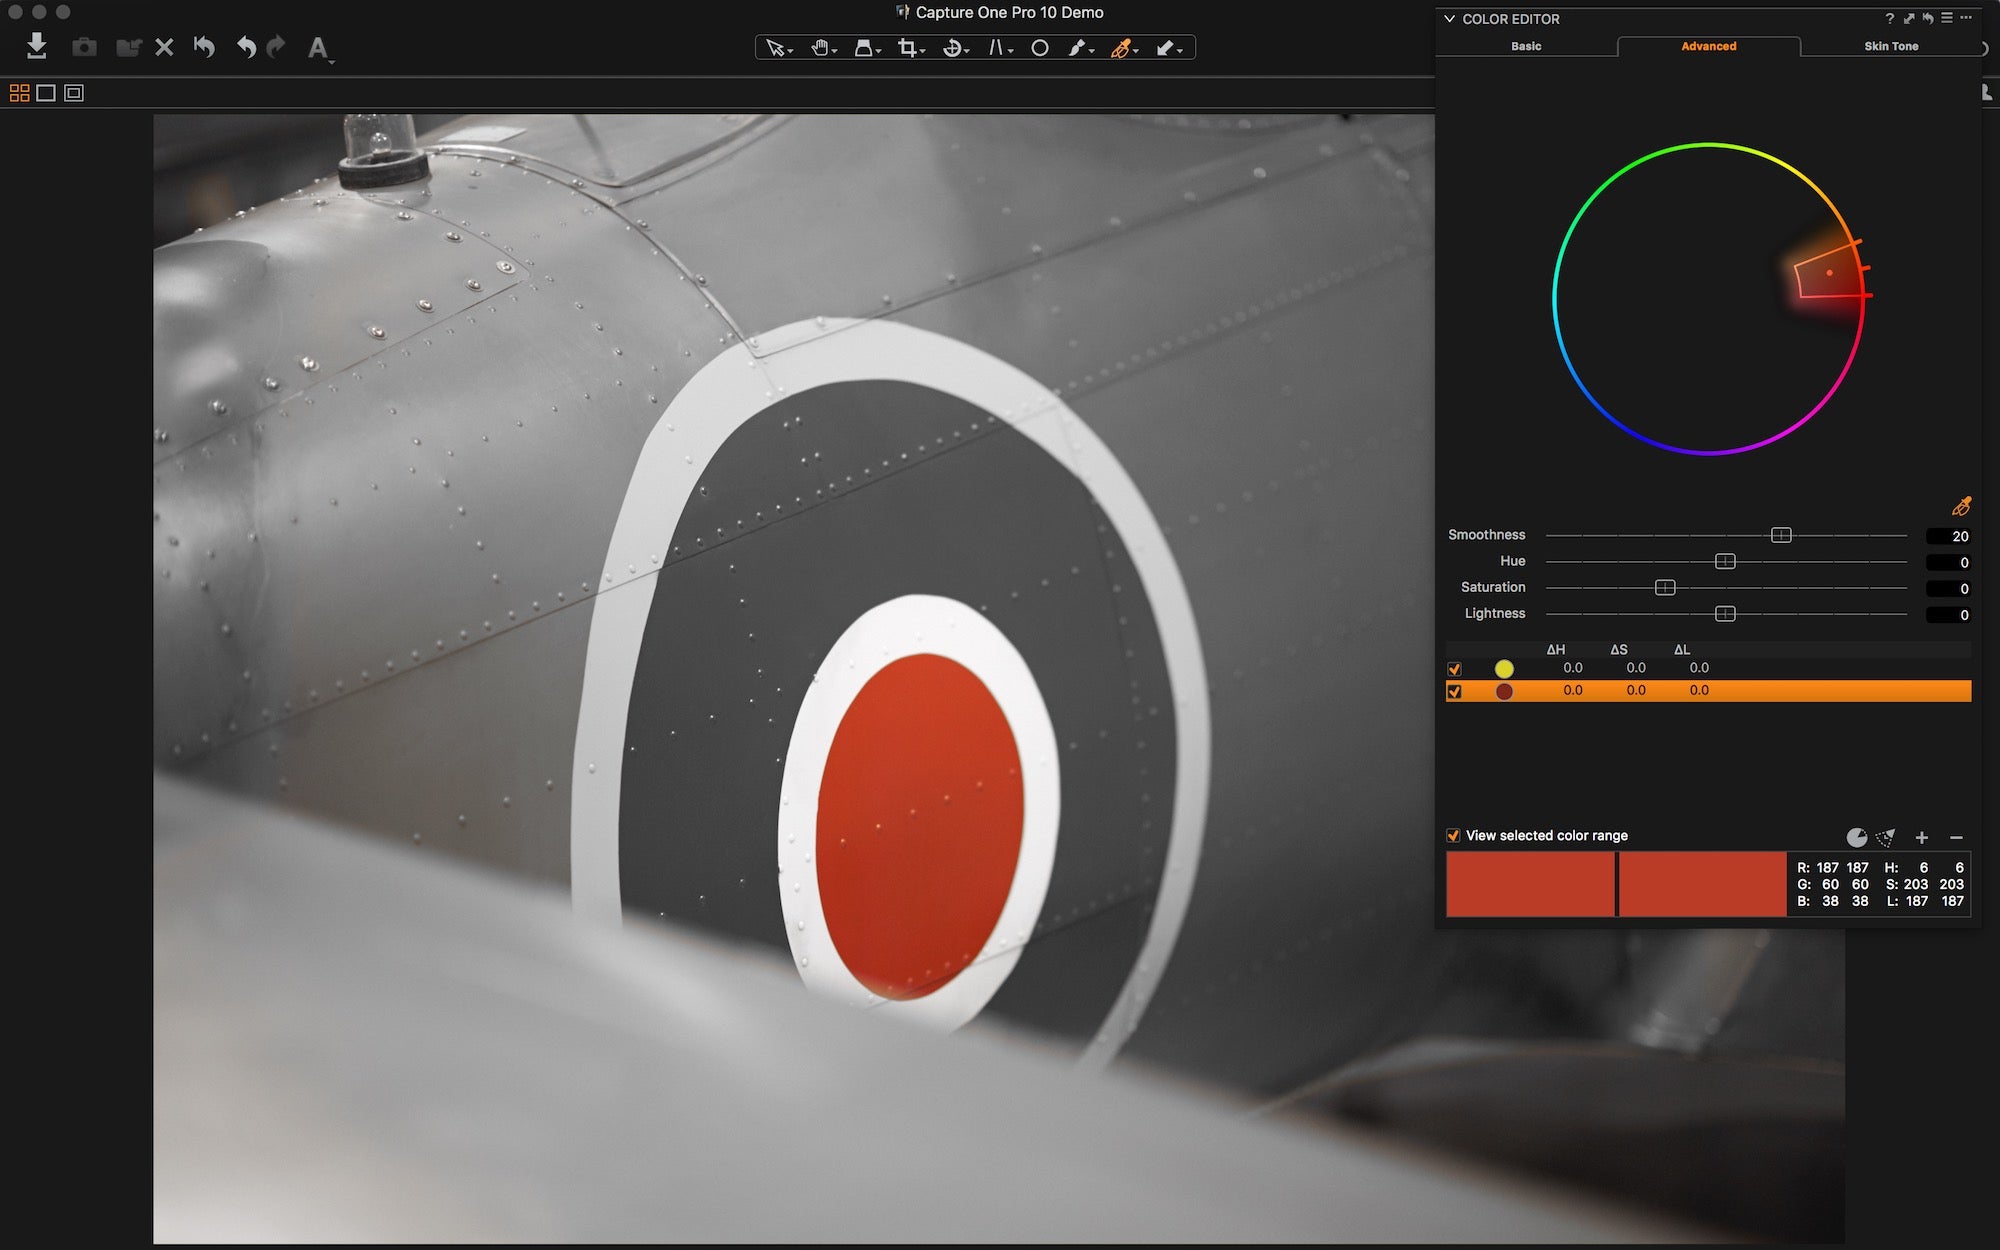
Central red circle selected
Clicking the Invert Slice icon (highlighted below) will invert the selection, meaning that any color edits will happen on the entire image, with the exception of the targeted red zone.
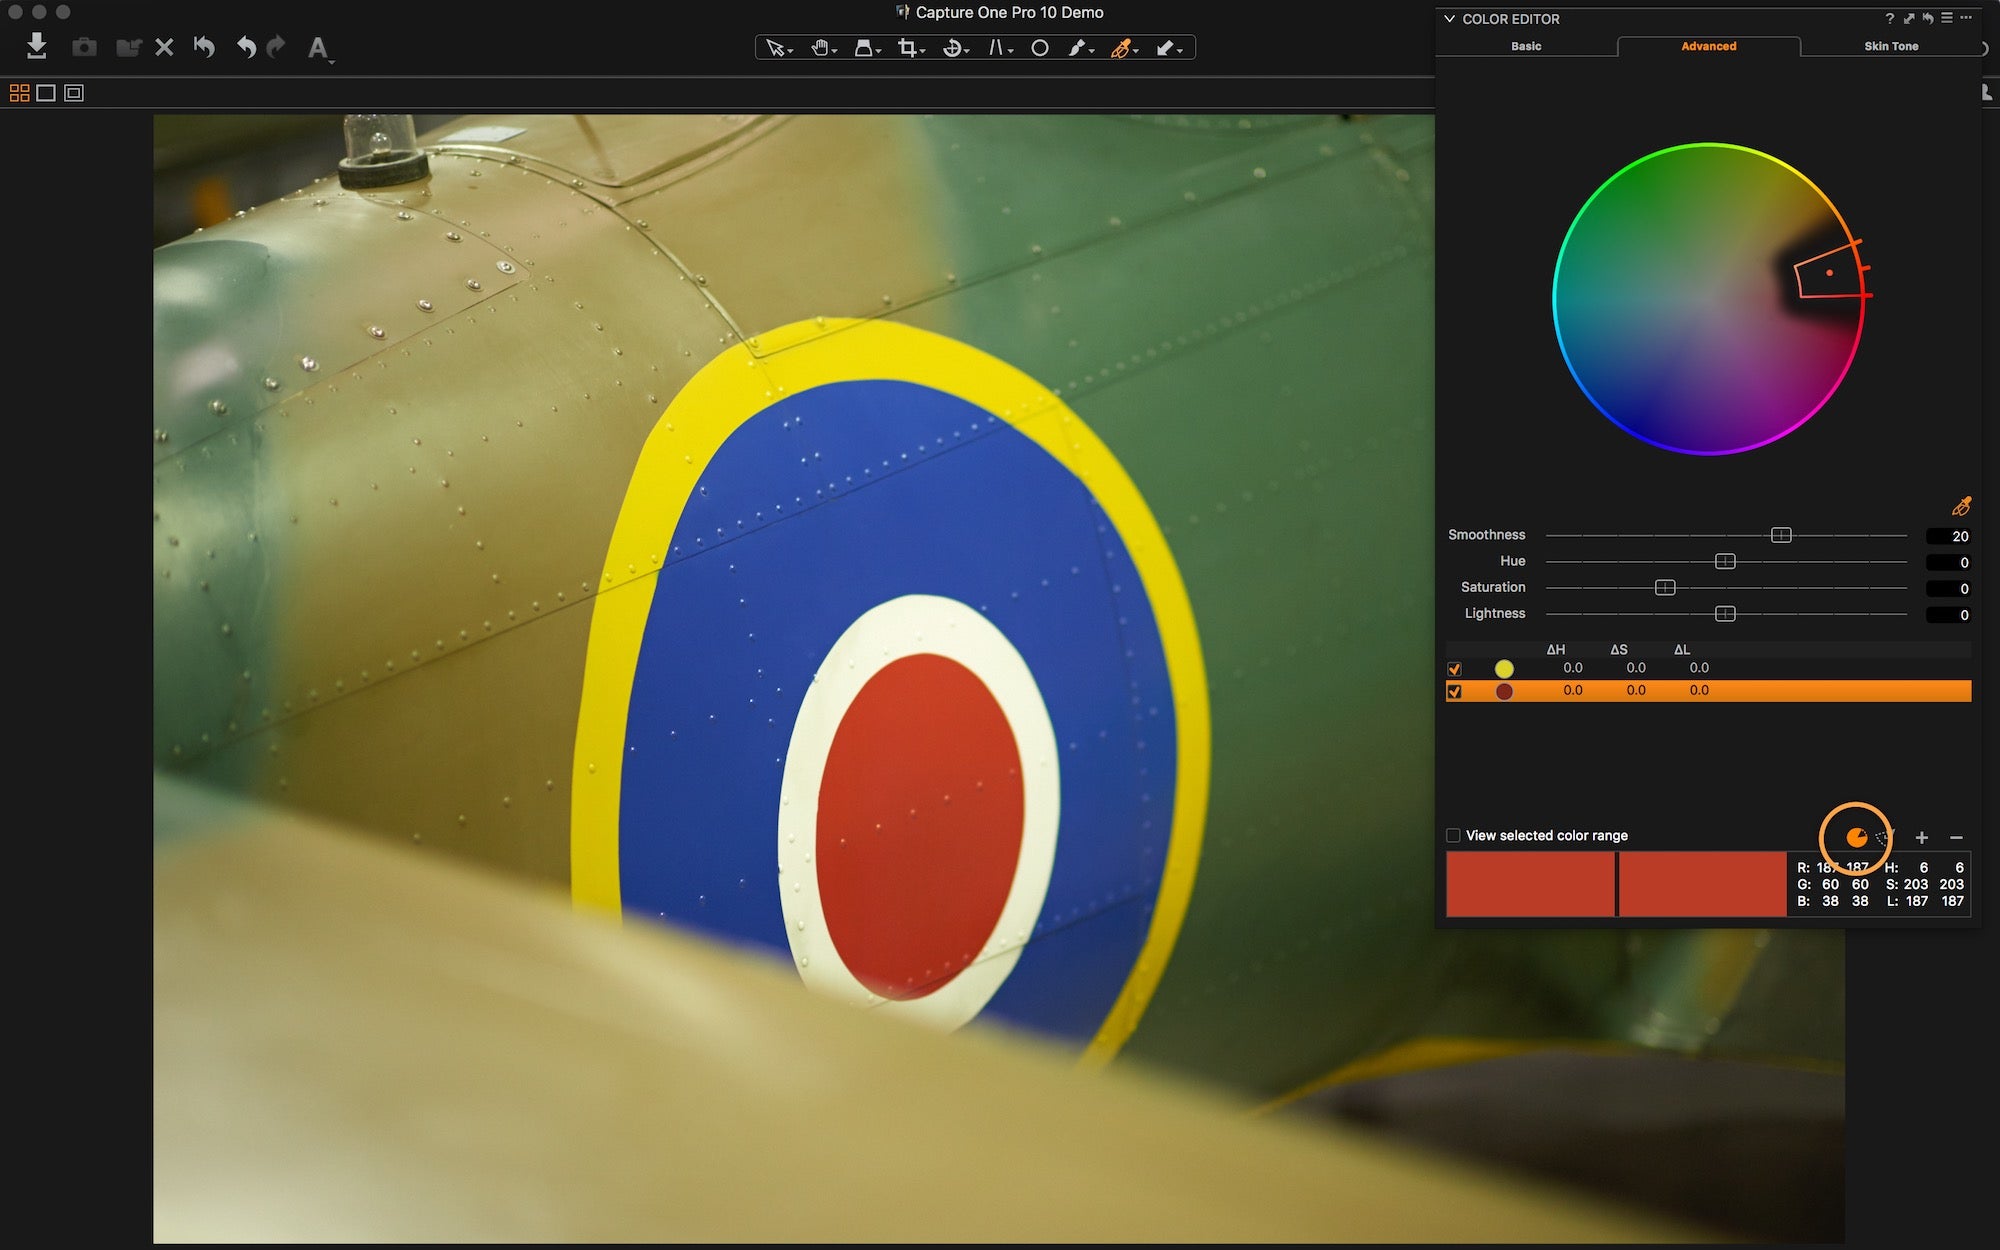
Invert Slice icon in the Color Editor tool
Converting selections to Local Adjustments Masks
Local Adjustments allow targeted adjustments to an image by drawing a mask with a brush or a gradient tool. It is also possible to convert a color range selection into a mask with a simple click.
The benefit here is that any of the other Capture One tools compatible with Local Adjustments can then be used to adjust the area.
In this example, the color range has been adjusted to include the majority of the grassy bank in the foreground. Trying to mask this manually would be a time consuming and laborious task.
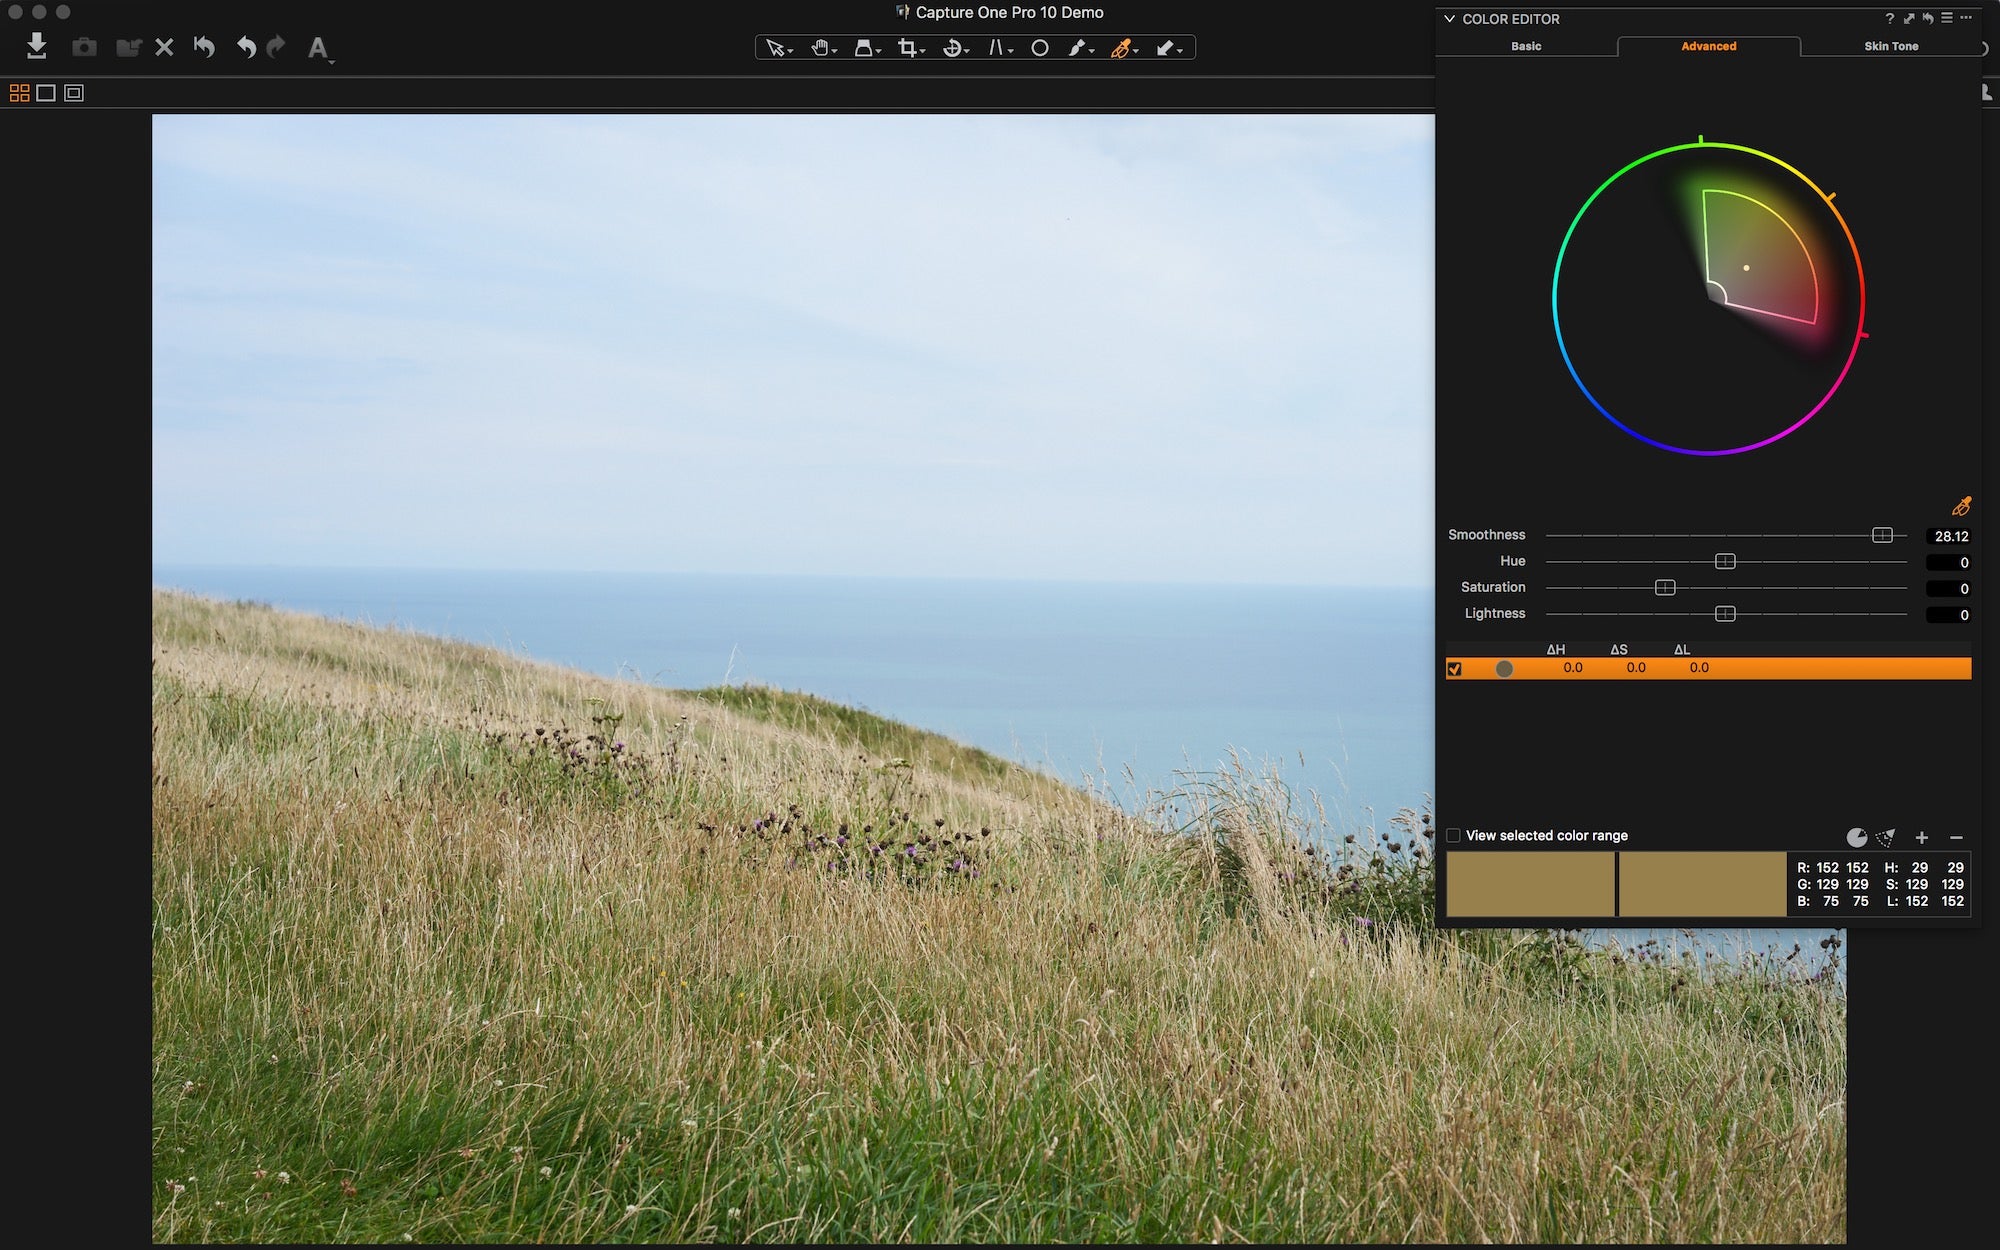
Color range set to include the majority of the foreground
In the Color Editor sub menu, simply choose Create Masked Layer from Selection to create a mask based on the color range.
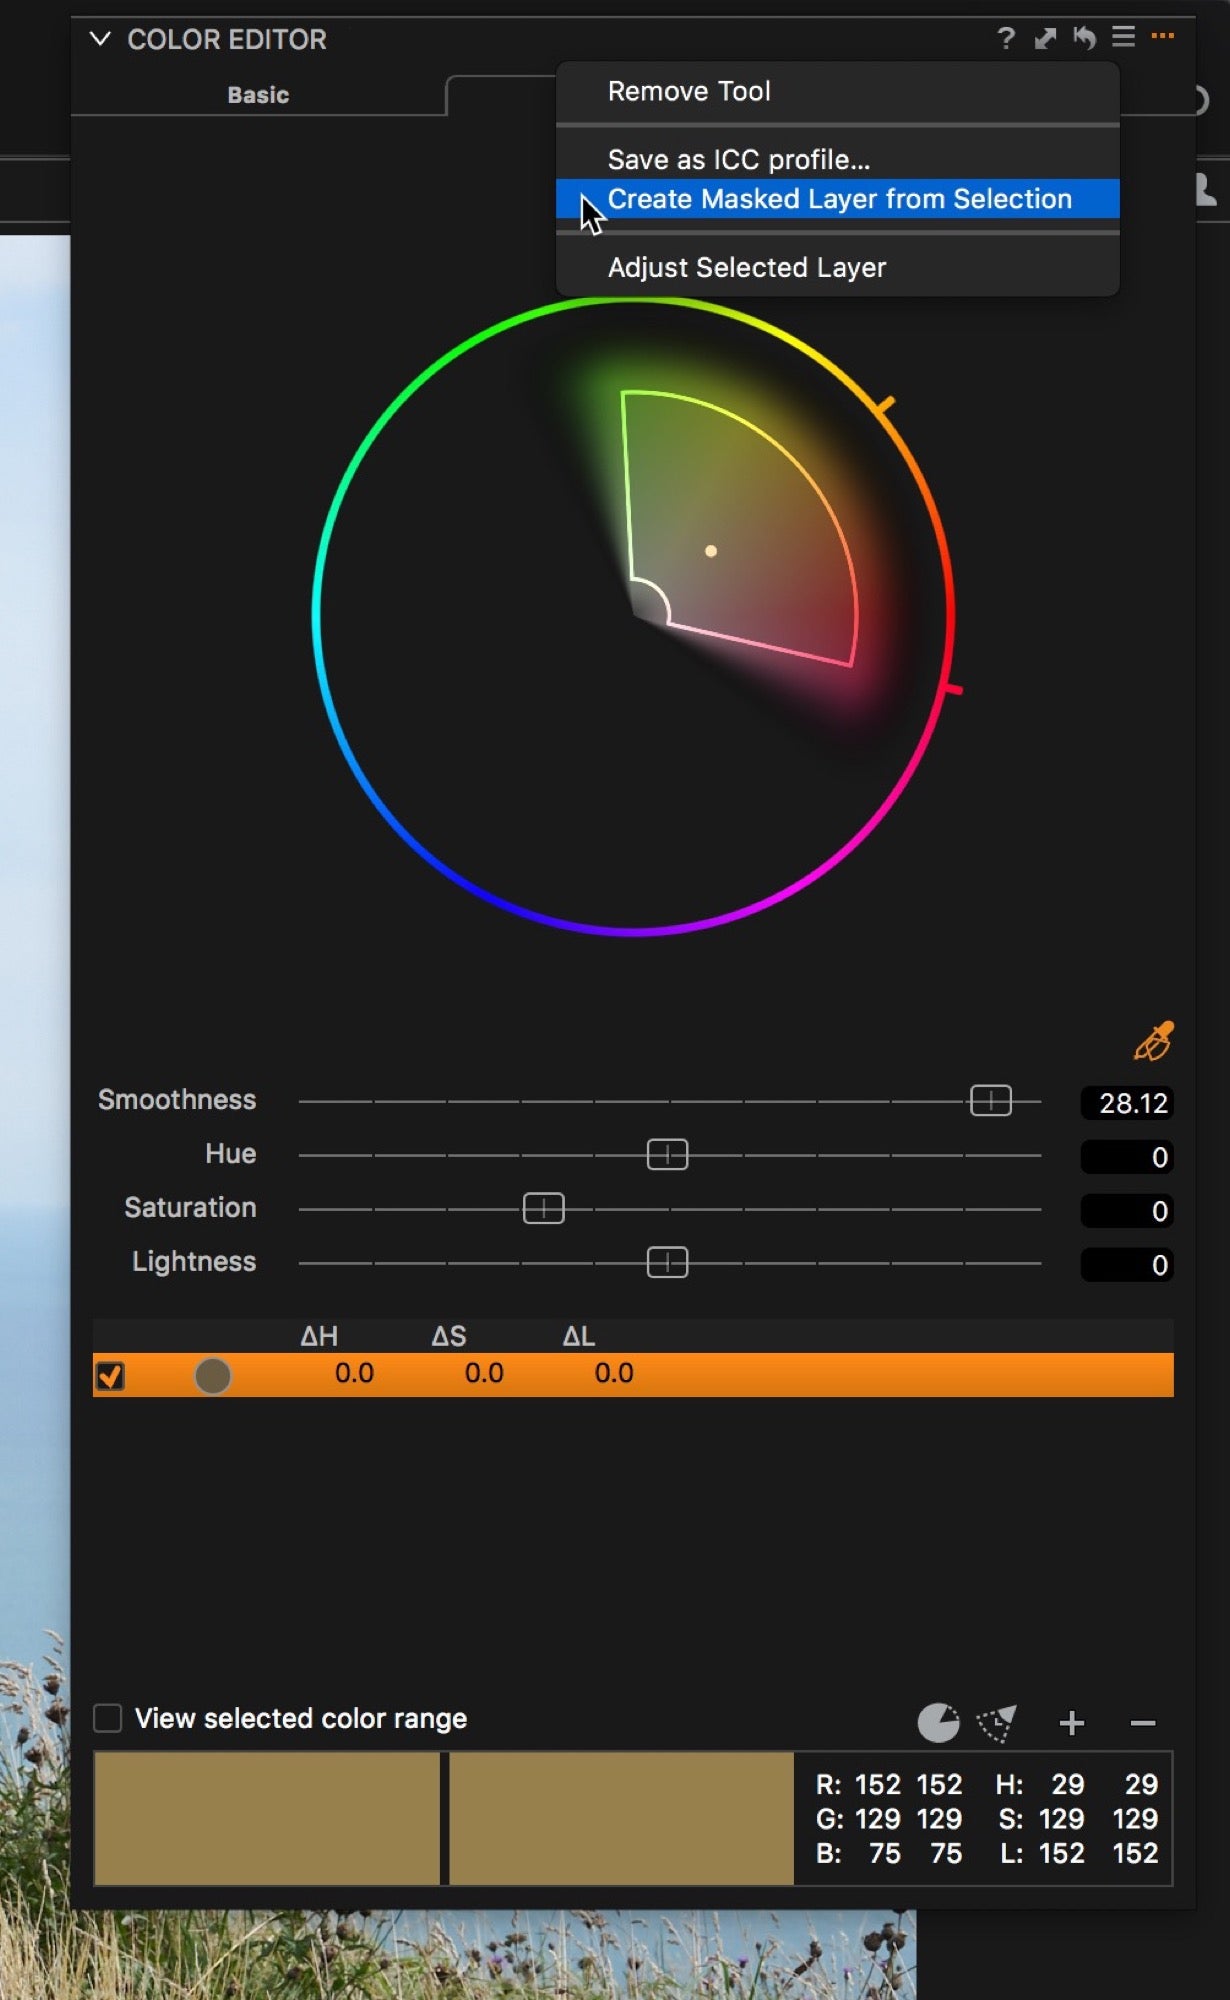
Create Masked Layer from Selection option
The mask is made in quick time and automatically shown in the Local Adjustments tool.
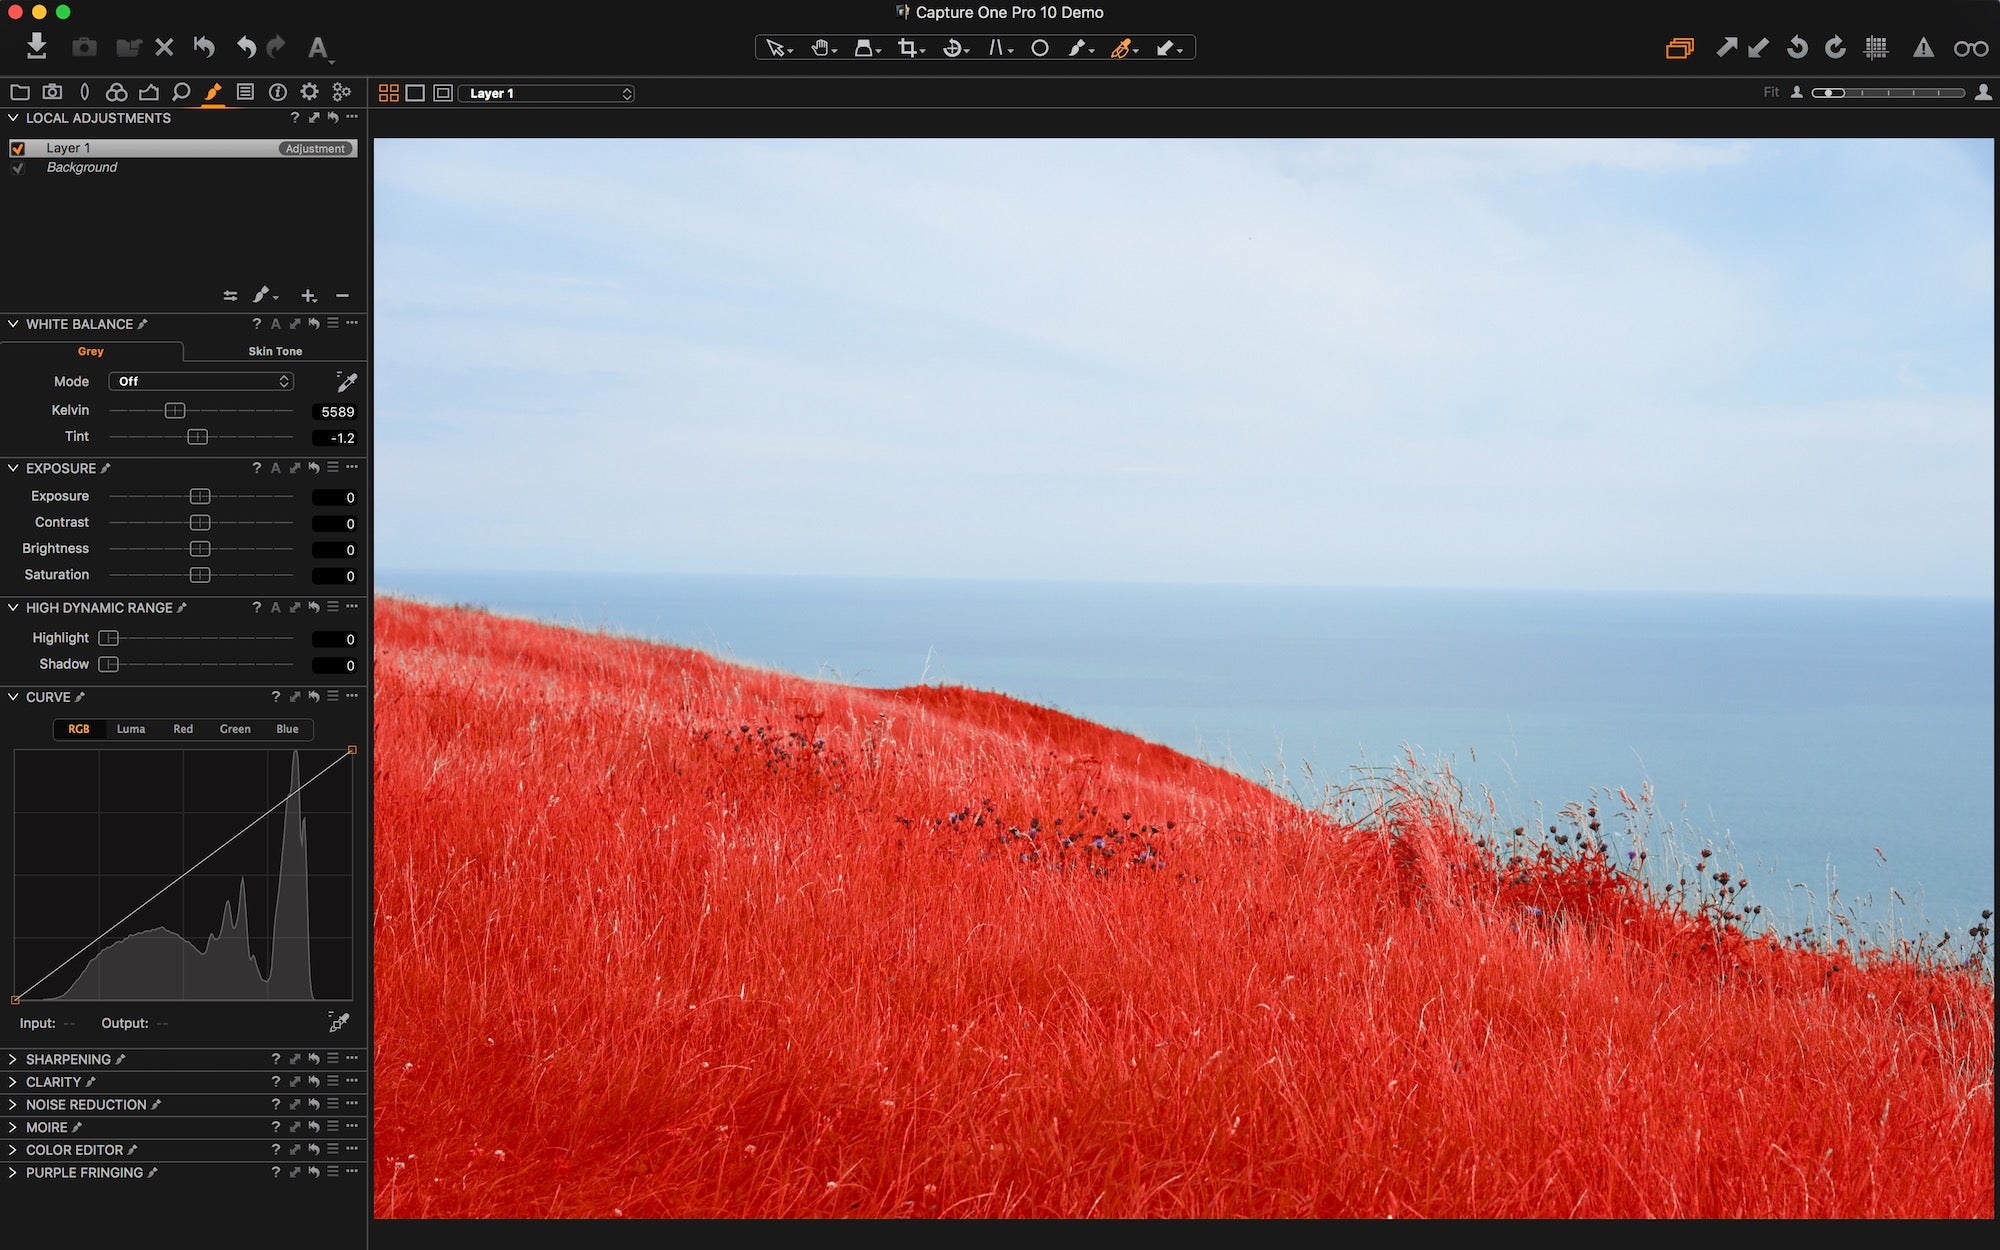
Automatically generated mask shown in red, within the Local Adjustments tool.
Mastering the Color Editor tool is a must to gain complete control of the colors in your images. The above examples show the extreme possibilities. More often than not, a simple click to define the color range is more than enough, without the need to edit the range or Smoothness further. But in those cases where selection is critical, you will be glad to know that you can.

