Instagram is a fantastic platform for sharing images with the world, but it’s really designed for photos taken with a smartphone. Sony cameras offer a relatively painless way to transfer photos from your camera to the mobile device with NFC or WiFi via the Send To Smartphone feature or automatically with the free PlayMemories Sync To Smartphone Camera app and this lets you post a photo directly from your camera to Instagram. But what if you want to edit the image or adjust the RAW file using post-processing software like Capture One. If you’re like a lot of photographers, you might find Instagram’s post-processing to be heavy-handed. Also, if you have a set of adjustments you frequently make (contrast, color, etc), you can’t automate that process within Instagram.
There is, however, an easy way to do all of this AND get your images onto your smartphone using Capture One’s Process Recipes and any kind of cloud storage that can be used on both your desktop and mobile device.
Setting up an Instagram Process Recipe
Process Recipes are a way of locking down a certain export type (PSD, JPEG, TIFF etc) with set output scaling, ICC profile and more. This way you can always repeat the same outputs and be consistent.
You can define as many recipes as you like. They can have completely different parameters and even export to specific destinations, a feature which we will use in this example!
Process Recipes are defined in the ‘Output’ tool tab. Click on the ‘plus’ icon to make a new Recipe and call it something sensible like ‘Instagram Upload’.
Then set the following parameters in the ‘Process Recipe’ tool.
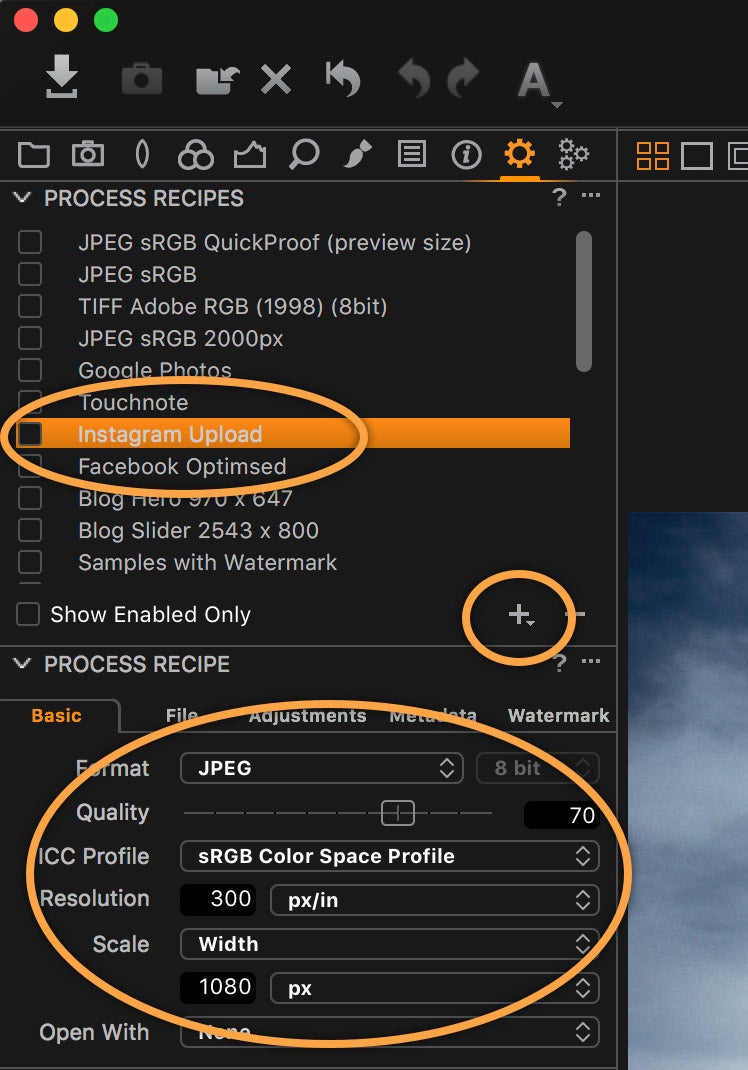
Setting up a new Process Recipe
Currently, the maximum width you can upload to Instagram is 1080 pixels. Set that in the ‘Scale’ dialog making sure the parameter is set to width. There is no point uploading anything higher as it will simply be resized down to 1080 pixels.
This will work with both Landscape and Portrait images.
The clever part comes in the ‘File’ tool tab. Here we can set a specific destination for the Process Recipe. In this case, Dropbox is used as an example but the same will work with any cloud storage that is cross compatible between Desktop and Mobile.
Click on the ‘Root Folder’ drop down menu and choose a location in your cloud storage. I made a folder called ‘For Instagram’ on my Dropbox and chose that.
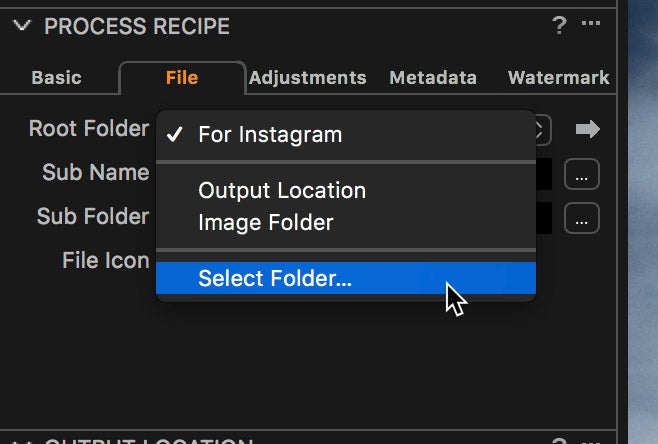
Selecting a folder on your Cloud Storage
Additionally, so we can keep track of our Instagram post history, the ‘Current Date’ token makes perfect sense here. Using this token creates a subfolder automatically in the ‘For Instagram’ folder based on today’s (the current) date.
It also makes locating the image on your mobile device much easier.
To access the full list of tokens, click on the “…” and pick from the list.
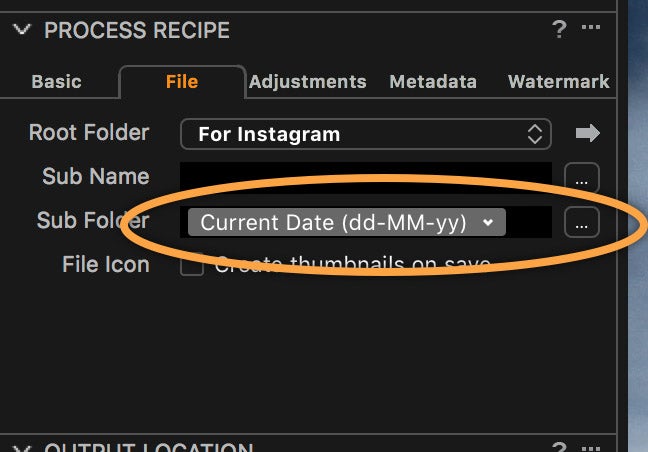
Using the Current Date token
Tip – to change the Date format, click on the downward arrow in the token itself.
Downsizing an image will always soften it slightly, so add a little extra sharpening for output in the ‘Adjustments’ tab.
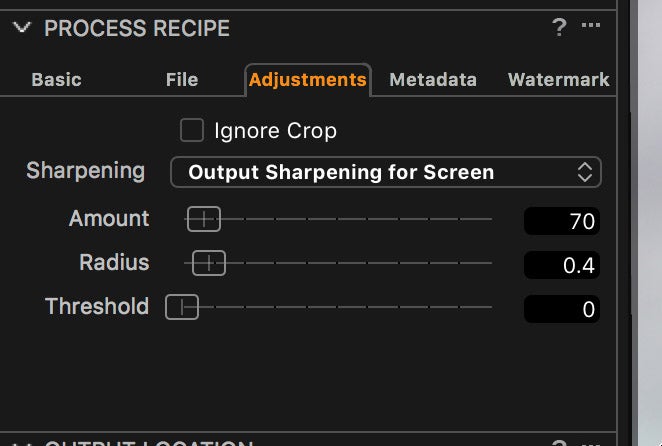
Adding some output sharpening
This will ensure your Instagram images won’t lack in the sharpness they deserve!
To export an image, choose your freshly created Process Recipe and crop how you like. Notice that the width will be locked to 1080 pixels. The height will be dynamic.
Then simply click on ‘Process’ in the Process Summary tool. Your image will be downsized, sharpened and exported to your chosen Cloud Storage.
In my Dropbox example, it looks like this…
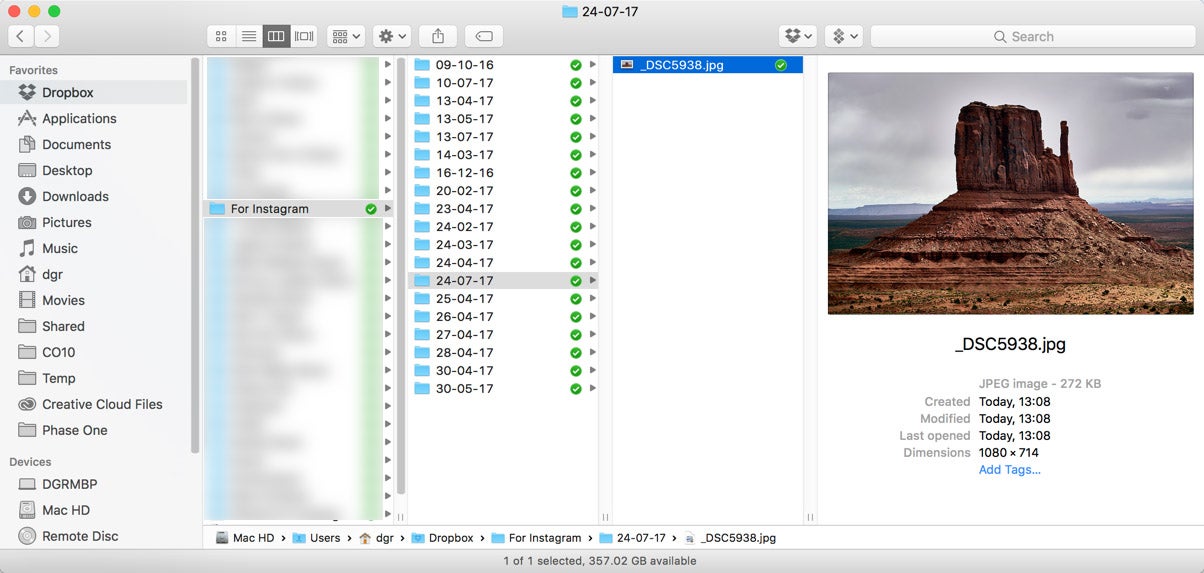
Finder showing Dropbox Folder
Now all I have to do is go to my mobile device, download the image and upload to Instagram in the approved way. The benefit here is that it is perfectly sized and sharpened and will look its best on Instagram.
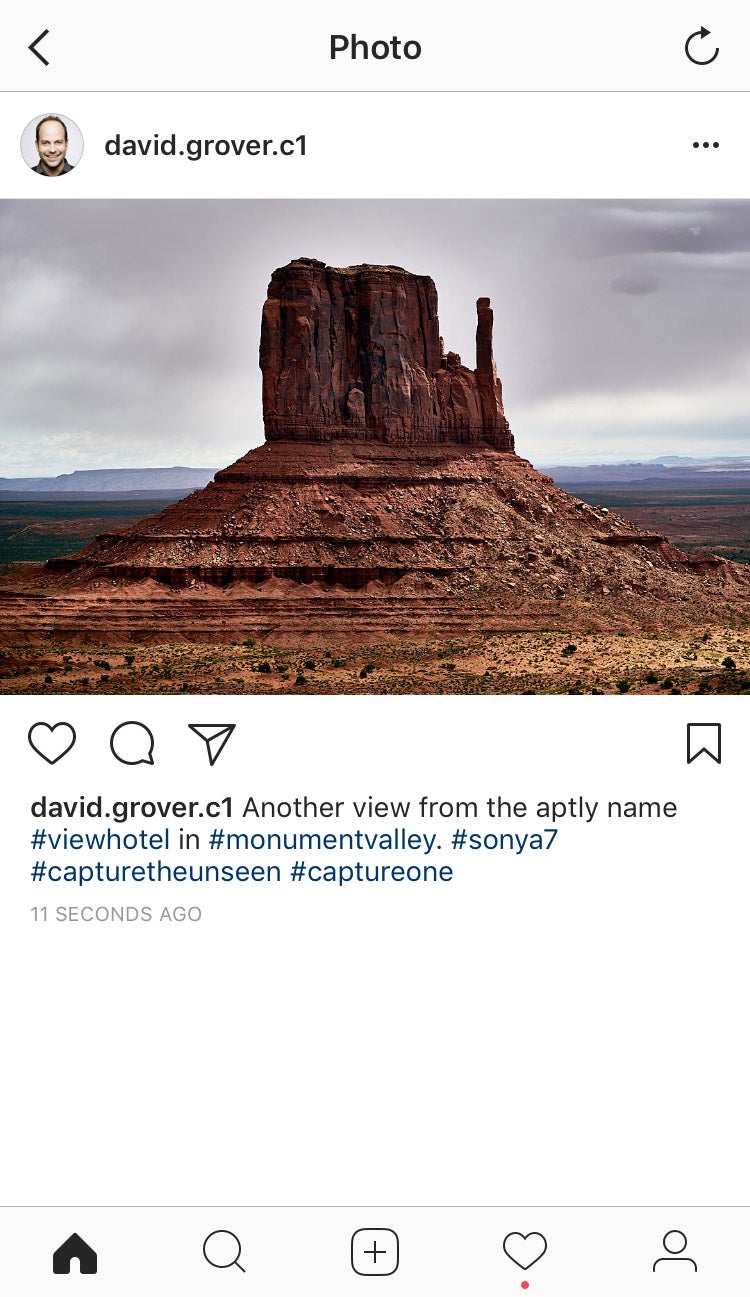
On Instagram!
This scratches the surface of what’s possible with Process Recipes. Take a look at this in-depth webinar if you want to know more.

