We're continuing the Alpha Universe department about post-production workflow with Phase One Capture One with a primer on Luma Curves. As a Sony camera owner you get Capture One Express (for Sony) with your purchase. This series of articles will show you how to get more out of the software. Of course, you don’t have to be a Sony shooter to make use of these tips. They’re for anyone who wants to use Capture One.
The notion of a Curve as an adjustment tool is no new thing. It has been present in Photoshop (for example) since the first release. Therefore, it is no surprise that the same functionality can be found in RAW converters such as Capture One.
However, a stand out feature of Capture One’s curve is the availability of two different modes:
RGB Curve – The traditional way to adjust contrast
Luma Curve – A more sophisticated method that only affects contrast, and does not have any influence over color.
It is a little-known fact that using RGB curves will always have an influence over the color of your image. Therefore, the use of Luma curves for precise control over contrast is a very handy tool to have at your disposal.
In the following example the same image in Capture One has four different Variants. A variant (Image>New Variant in Capture One) is simply a virtual copy of an image which allows you to try out different processing, for example a color and black and white version.
This will work with any image, but the strong blue sky in this shot is a good indicator of the differences.
Here are all the variants together. The top left image has no contrast adjustments of any kind:

Top left image with no contrast adjustments.
The next image has a Contrast adjustment of 20 points in the Exposure tool. This is a good comparison to how RGB and Luma Curves behave. More on that at the end of the article!

Contrast slider adjustment of 20 points
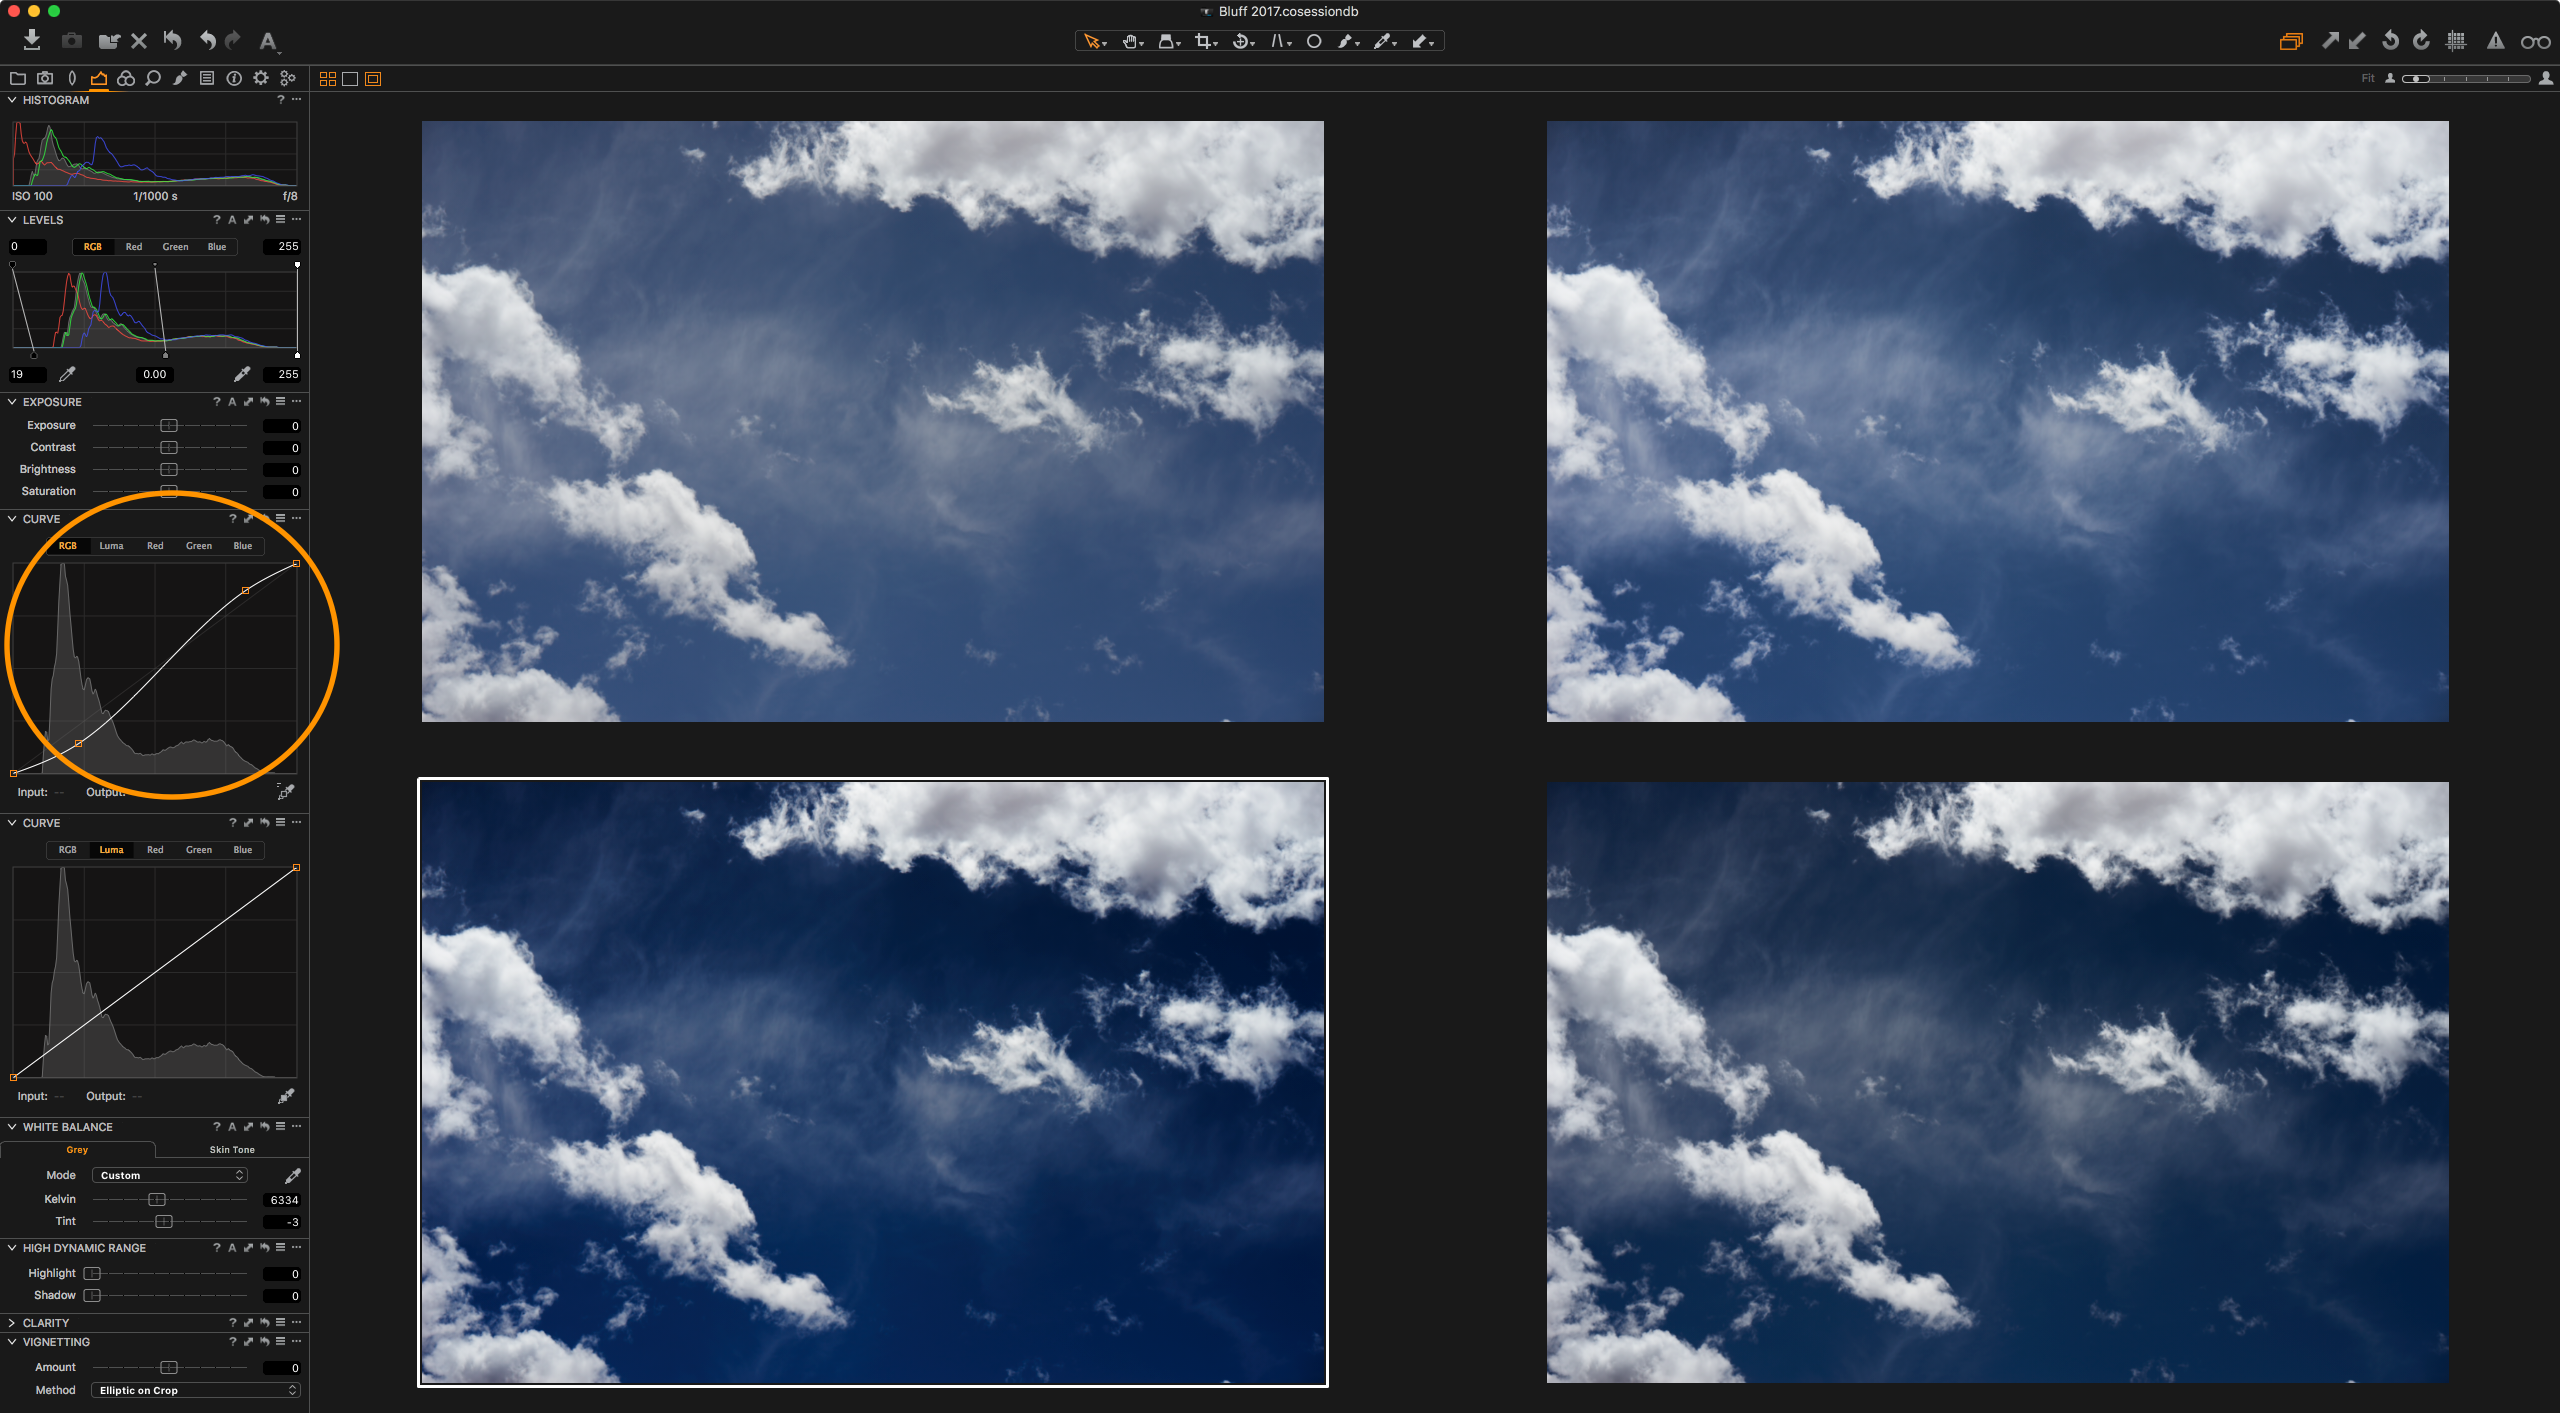
It gets interesting with the third image which has a standard RGB ‘S’ curve to increase contrast, but notice that the color saturation has taken quite a jump too:

RGB ‘S’ Curve
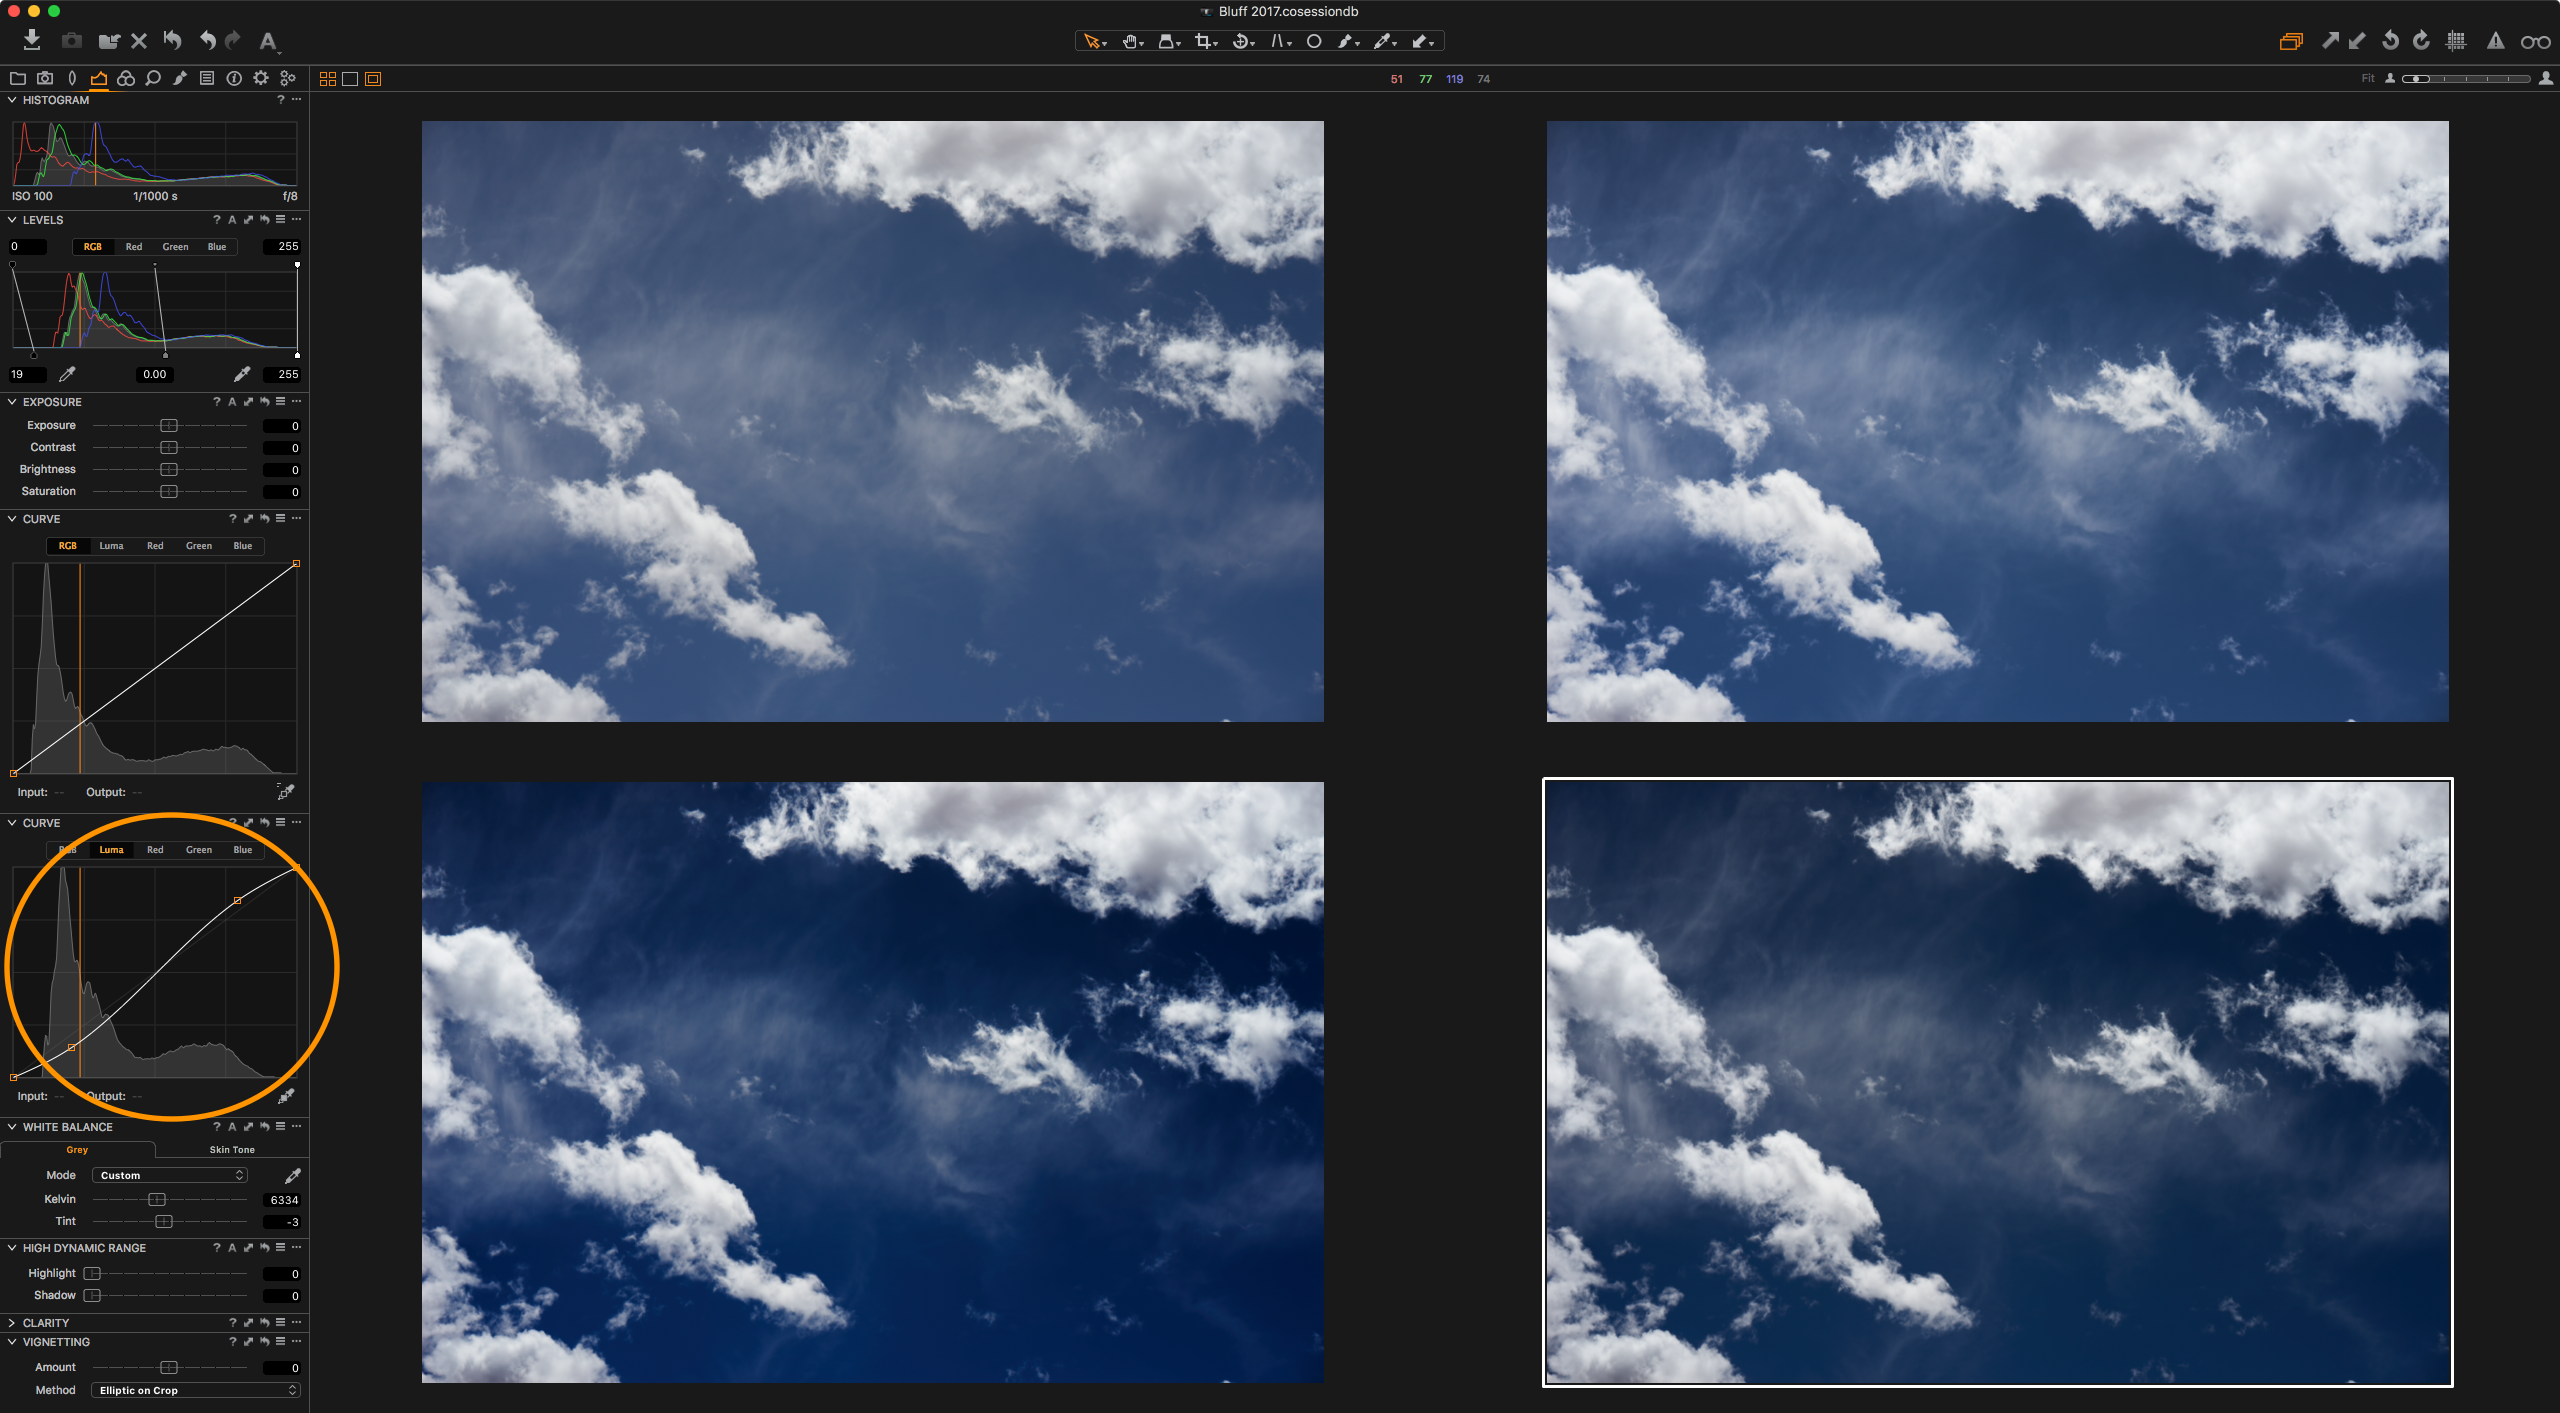
The final image is using a Luma curve. Luma curves can be chosen by clicking the second tab in the curve tool. It’s a similar curve to the RGB curve but notice that the color has not shifted at all. Its completely stable but the contrast has had the desirable increase:

RGB Luma Curve
The key benefit to the Luma curve is that the adjustment of contrast is completely separated from color. This is incredibly useful with color sensitive subjects, especially skin tones.
The second dose of good news concerns the traditional Contrast slider in the Exposure tool. This adjustment is a really good compromise between RGB and Luma curves. It has some increase in color saturation as you increase the slider, but it is far more controlled than a pure RGB curve. The adjustment can look more natural as, visually, we are used to a bump in saturation with contrast as in the real world. i.e.: A sunny day has brighter and more contrasty colors than an overcast day.
Try using this slider in Capture One. It can often give the best result for simple contrast adjustments.
If you haven't sed Capture One, check out this video on getting started with the software:

