Sony Artisan of Imagery Drew Geraci is one of the world’s leading timelapse filmmakers. From a career that began with service in the US Navy, Geraci has gone on to create stunning timemapses that make you stare in wonder as the spectacle plays out before your eyes. As he’s traveled around the world to shoot his high-impact work for trend-setting film, television and commercial projects, Geraci has pioneered time-bending shooting and editing techniques. There are a lot of elements to a timelapse and Geraci’s developed a workflow that makes the whole process work, from concept through to the final delivery. As timelapse continues to boom in popularity, we reached out to Geraci to find out how a pro does it.
Geraci strictly follows this entire process because he knows that not only will it get him the results he wants, it will also save him a ton of time.
Before The Shoot: Gear Selection, Camera Setup & How To Scout For Timelapse
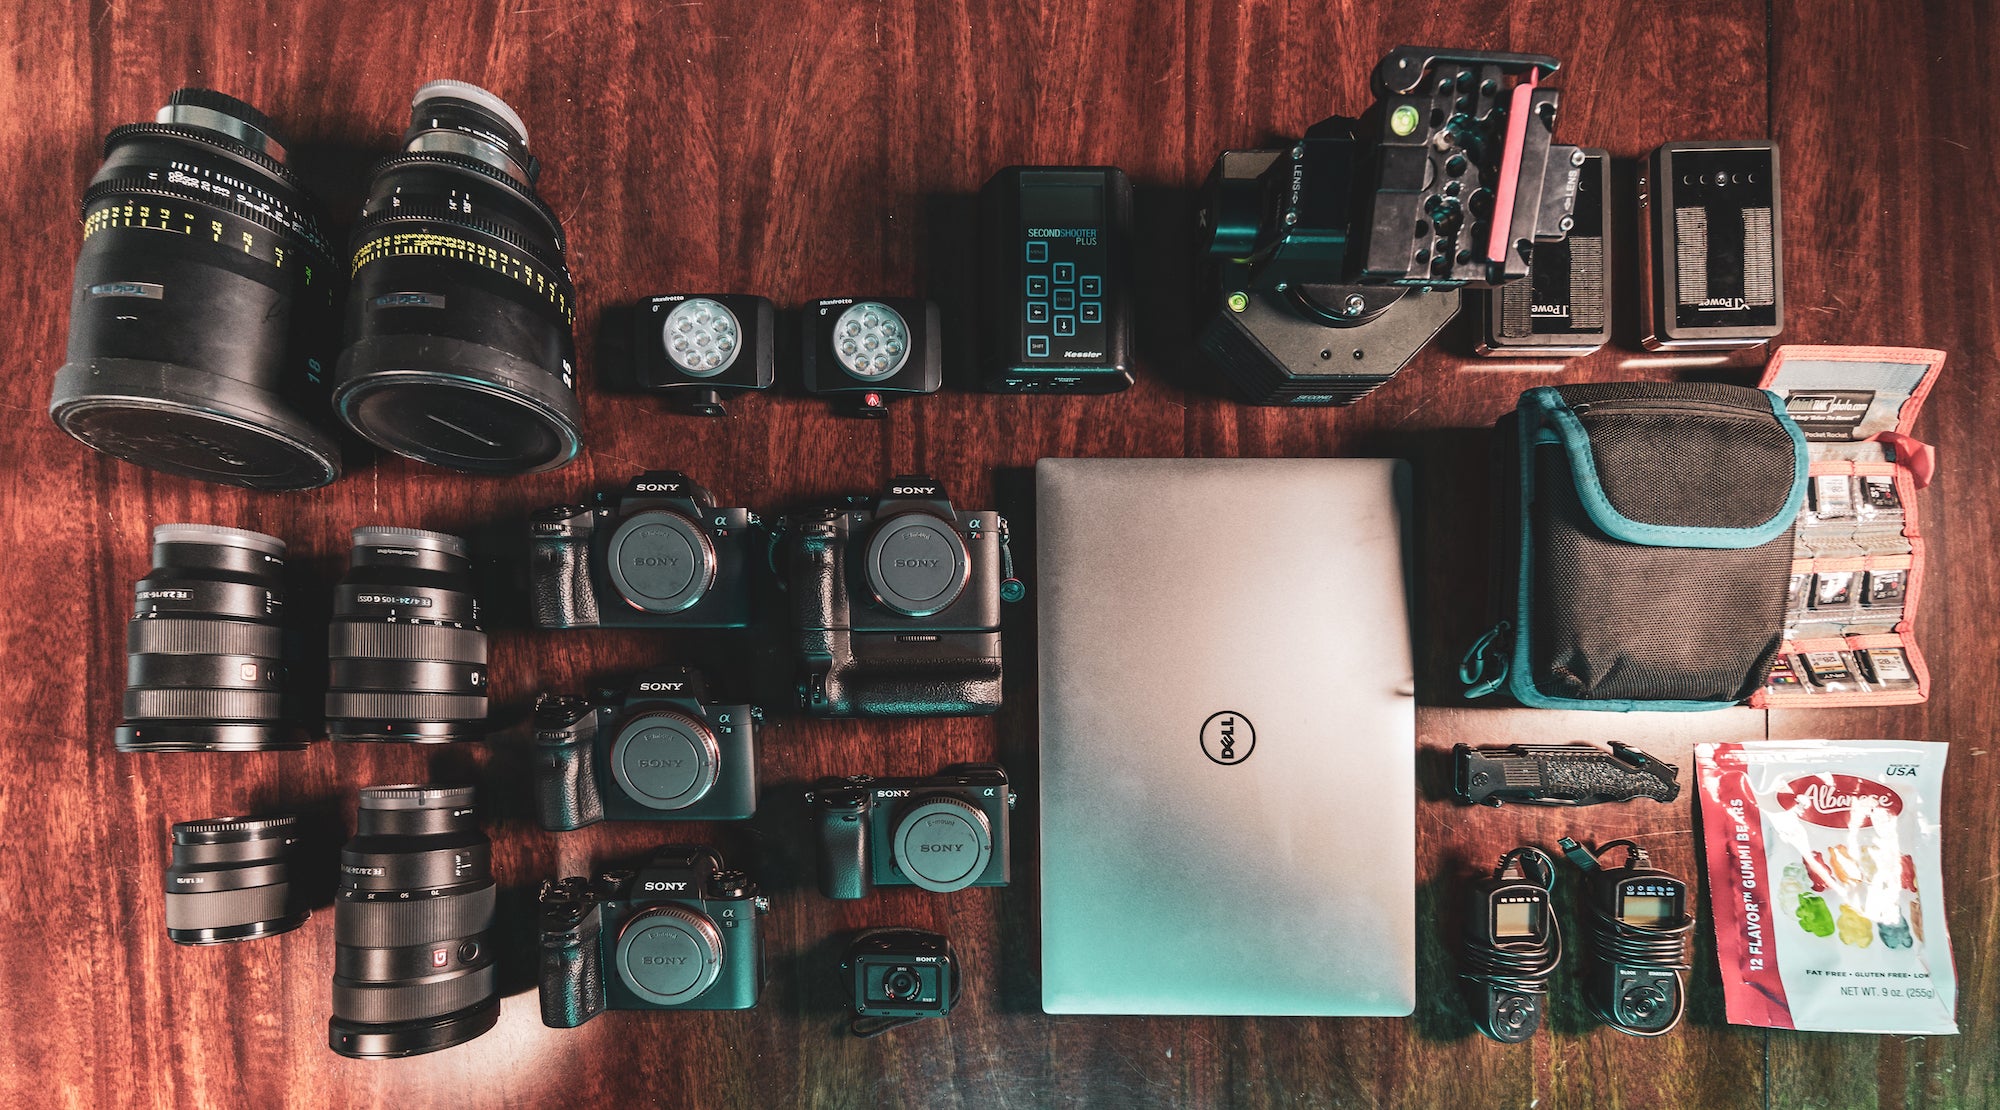
“The first thing I start with is figuring out what cameras I want to shoot on for the assignment, Geraci says. “It all affects the workflow so I need to find out if we're shooting 4K, 6K or 8K resolution.” For shoots that require maximum resolution, his main camera, the Sony α7R III, “It gives me 15-stops of dynamic range and really allows me the latitude to work in post without having to worry about losing certain areas of my image.“ (See more about Drew Geraci’s timelapse gear in What’s In My Bag: Drew Geraci’s High-End Timelapse Kit)

Camera setup is pretty straight forward and done with an eye to efficiency down the line. “We make sure that all the cameras are turned to RAW so we can maximize the amount of information we can pull from the files in post-production,” he says. “On top of that, I want to make sure everything is set to manual when shooting time lapses. No image stabilization, no IBIS, no auto ISO or white balance. This way we don’t have to add more steps, like removing noise, to the workflow when we’re editing in post.”
With the cameras setup, he takes care to make sure that all of the cameras and lenses are clean. This is extremely important for every shoot and it’s never skipped. “We always make sure that our cameras are clean and free of dust,” he says. “so we'll go through and do a full cleaning before every shoot, every day.”
Scouting is a key step in Geraci’s workflow and when he scouts for a timelapse, he looks for particular element in the scene. “We look for any kind of obstacles that could be in the way. If, for example, we’re shooting a city scene, we make sure it’s an area that is congestion-free where there isn’t a lot of traffic or pedestrians possibly hitting the camera. We also want to see where the light’s going to hit and how it’s going to move and change through the time of day we’re shooting. Because stability is so important, we want to avoid shooting on bridges or other locations where cars might be creating vibration. Then, if we need them for the kind of shoot we’re doing, we make sure we have all of our permits and certificates of insurance in order because we want to do things by the books.”
If Geraci is shooting a commercial production, he will have a full squad with him – five team members set up and as many as eight cameras rolling. If he’s doing a more localized shoot that only requires himself to be there, he makes sure that his backpack is ready to roll with the proper cameras and lenses, all of his ND filters and plenty of memory cards. “I've been in plenty of situations where I've forgotten memory cards,” he says, “so now I always make sure I have them, as well as backup hard drives to house all the images. I’ll have several two or four terabyte SSD hard drives with me, ready to roll so we can offload as soon as we get the photos.”
During The Shoot
Once he gets to his location, Geraci sets up all of his equipment with stability in mind. “When it comes to shooting timelapse,” Geraci explains, “the biggest thing you want to make sure of is that you have a steady foundation. We make sure that the tripod, or the motion control rig we’re shooting on, is firm and doesn't have any kind of vibration to it. If there’s any kind of motion or vibration that hits that tripod or touches it, you've pretty much ruined the shot, and you have to start all over again. So we always make sure to bring sandbags to weigh down the tripods so the cameras have the best foundation possible.”
Once all the cameras are set on tripods and stabilized, Geraci also sets up his motion control rigs – two six-foot sliders with three-axis control heads on them. This allows him to create the most cinematic and dynamic timelapse that he possibly can.
Before pushing the button on the sequence, Geraci makes final adjustments to the intervalometer settings. “We’re now using the new internal intervalometer settings in the α7R III Firmware 3.0 update, which is fantastic,” he says. Depending on the scene and the project, Geraci programs the interval, shutter speed and duration of the shoot. With everything locked and loaded, he starts shooting…and waits. “After rushing to get it all together, the beauty of timelapse is that for the next couple hours you just sit back, relax and protect the camera. That’s about it.”
After The Shoot: Making Post Production Fast & Efficient
As soon as the shoot is over, Geraci takes any memory cards that were used and flips them upside down in his memory card holder so he knows that those are the ones that need to be downloaded. He takes them back to his office (or hotel if traveling) and starts downloading all of the material into unique folders. Then he imports the folders into Lightroom and names them according to the scene and take number.
“Once we get the thousands of photos into Lightroom,” says Geraci, “if it was a pretty straightforward sequence without a much in the way of changes to exposure, what we'll do is actually go through each individual scene that we've created and each individual take, and then pick one photo from that scene. Then we edit it to the desired specifications that the clients have or we have so that we can get the whole sequence processed efficiently. If we're at a 400- or 1000-frame sequence, we'll just edit one photo and then apply that preset to all the others in that sequence.”
“If we're doing any kind of day-to-night shooting,” he continues, “we'll use a program called LRTimelapse. It allows you to create ramping inside of your sequence. We'll create five key frame points where we want to ramp the exposure, the white balance, and anything in between that we want to add like highlights, midtones, shadows and contrast. LRTimelapse actually ramps it through Lightroom. If you were to skip this and just import it into Lightroom, you'd have a very bright set of photos and a very dark set of photos. So this program actually smooths out that exposure so that it's equal across every frame.”
When it comes to exporting the frames for the next steps, Geraci says it all depends on what the client wants. He usually exports them as JPG with a quality level of 88, which he says is just a good all around high quality with low file size export. Then when the files are brought into After Effects next, he won’t be bogged down with huge RAW files that can take hours to render in a preview. “Utilizing the JPG allows us to do things almost instantaneously. It also allows us to apply any added effects like deflicker or image stabilization without having to wait hours to see the actual results.”
Each individual sequence has its own processed folder and is brought into After Effects, where it all comes together. “We'll create an image sequence inside of After Effects,” Geraci explains, “and then it takes that sequence of photos that we've just created, and actually combines it to create a movie or a video. Then we can apply smoothing or deflicker plugins and any type of additional coloring we want to add. After Effects is also where we'll do any kind of in-post zoom or motion control. Then after that, we can export the final timelapse clip and it can be imported into Premiere or Final Cut Pro and edited together with any other footage to create the video for the client or posting to our channels.”
Geraci strictly follows this entire process because he knows that not only will it get him the results he wants, it will also save him a ton of time.
“This workflow has been incredibly important. I've been establishing it for the last eight or nine years, and it's always evolving. We try to make things more efficient and effective along the way, and when we first started doing this I was bringing in tens of thousands of photos and not processing them the correct way and it ended up costing me hours or days worth of work. Now we've simplified it into something that really only takes a few minutes to do and to process throughout.”

