Jack Anstey (@jack_anstey) is an outdoor and adventure photographer from the UK. Most of his images, both commercial and personal, are shot in the wild and feature more raw landscapes, with a particular focus on Scotland and the Scandinavian countries. When Anstey heads out on a hike he packs a bit heavy, bringing a wide range of lenses to ensure that he has the right tool to capture any scene that presents itself. Below Anstey gives us a look inside his his full bag. "80% of the time this is what I’d take out with me on a days shoot," he says, "the exceptions being that sometimes I look to save weight by leaving the Sony 200-600mm f/5.6-6.3 G in the van, or if I’m looking for a super-lightweight mountain set-up I would likely only take the Sony 24mm f/1.4 G Master and the Sony 70-200mm f/4 G." Read on to find out more about the pair of Sony Alpha full-frame cameras Anstey packs as well as why he uses a combination of overlapping zoom and prime Sony lenses.
A bag built for versatility. Outdoor photographer Jack Anstey shows his combination of Sony Alpha full-frame cameras & lenses for scenics, lifestyle and more.
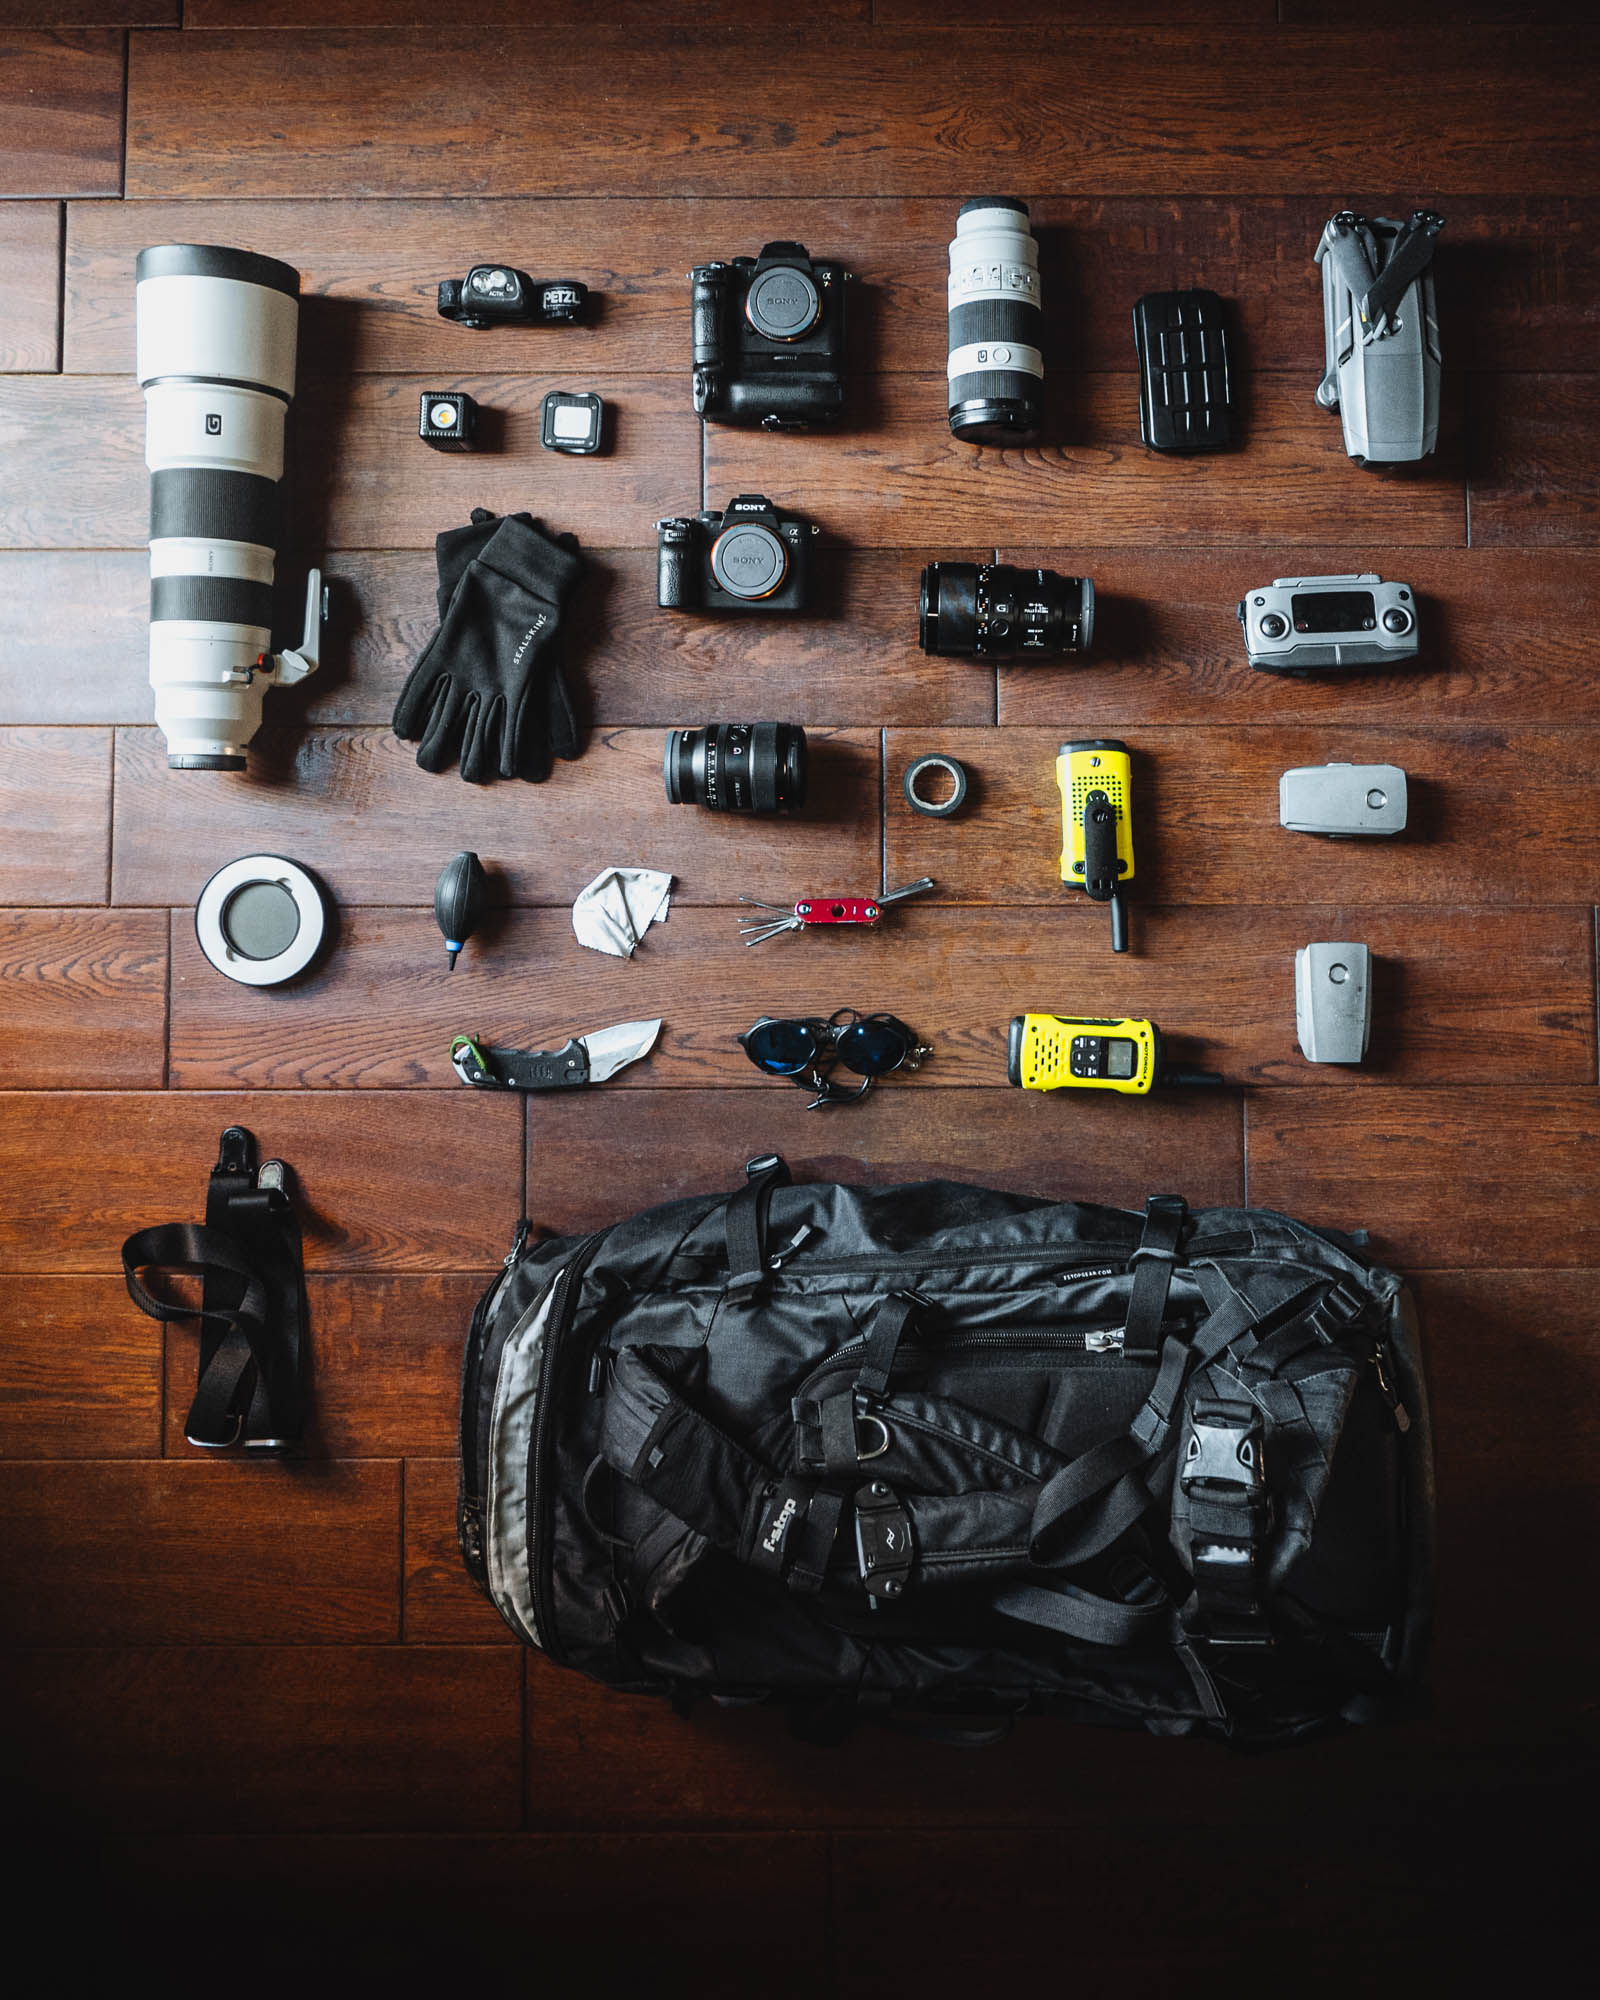
Cameras
Sony α7 III: The Sony α7 III is my main shooter, it’s the camera that’s usually in my bag ready to go with the 24mm strapped on. It’s my go-to camera because of its versatility in such a wide range of situations, whether I’m shooting in the morning blue hour, golden sunsets or capturing some northern lights. Most of the time I’m out shooting there’s a heavy focus on personal images, which the α7 III is perfect for, allowing me to shoot away as much as I’d like.
I shot this image whilst on a personal trip to the Finnish Arctic last winter. The landscape here really is as mind-blowing and amazing as you could imagine. This was one of the days I was thankful for shooting on the α7 III as it enabled me to capture hundreds of images, from the morning blue hour all the way through into the evening.
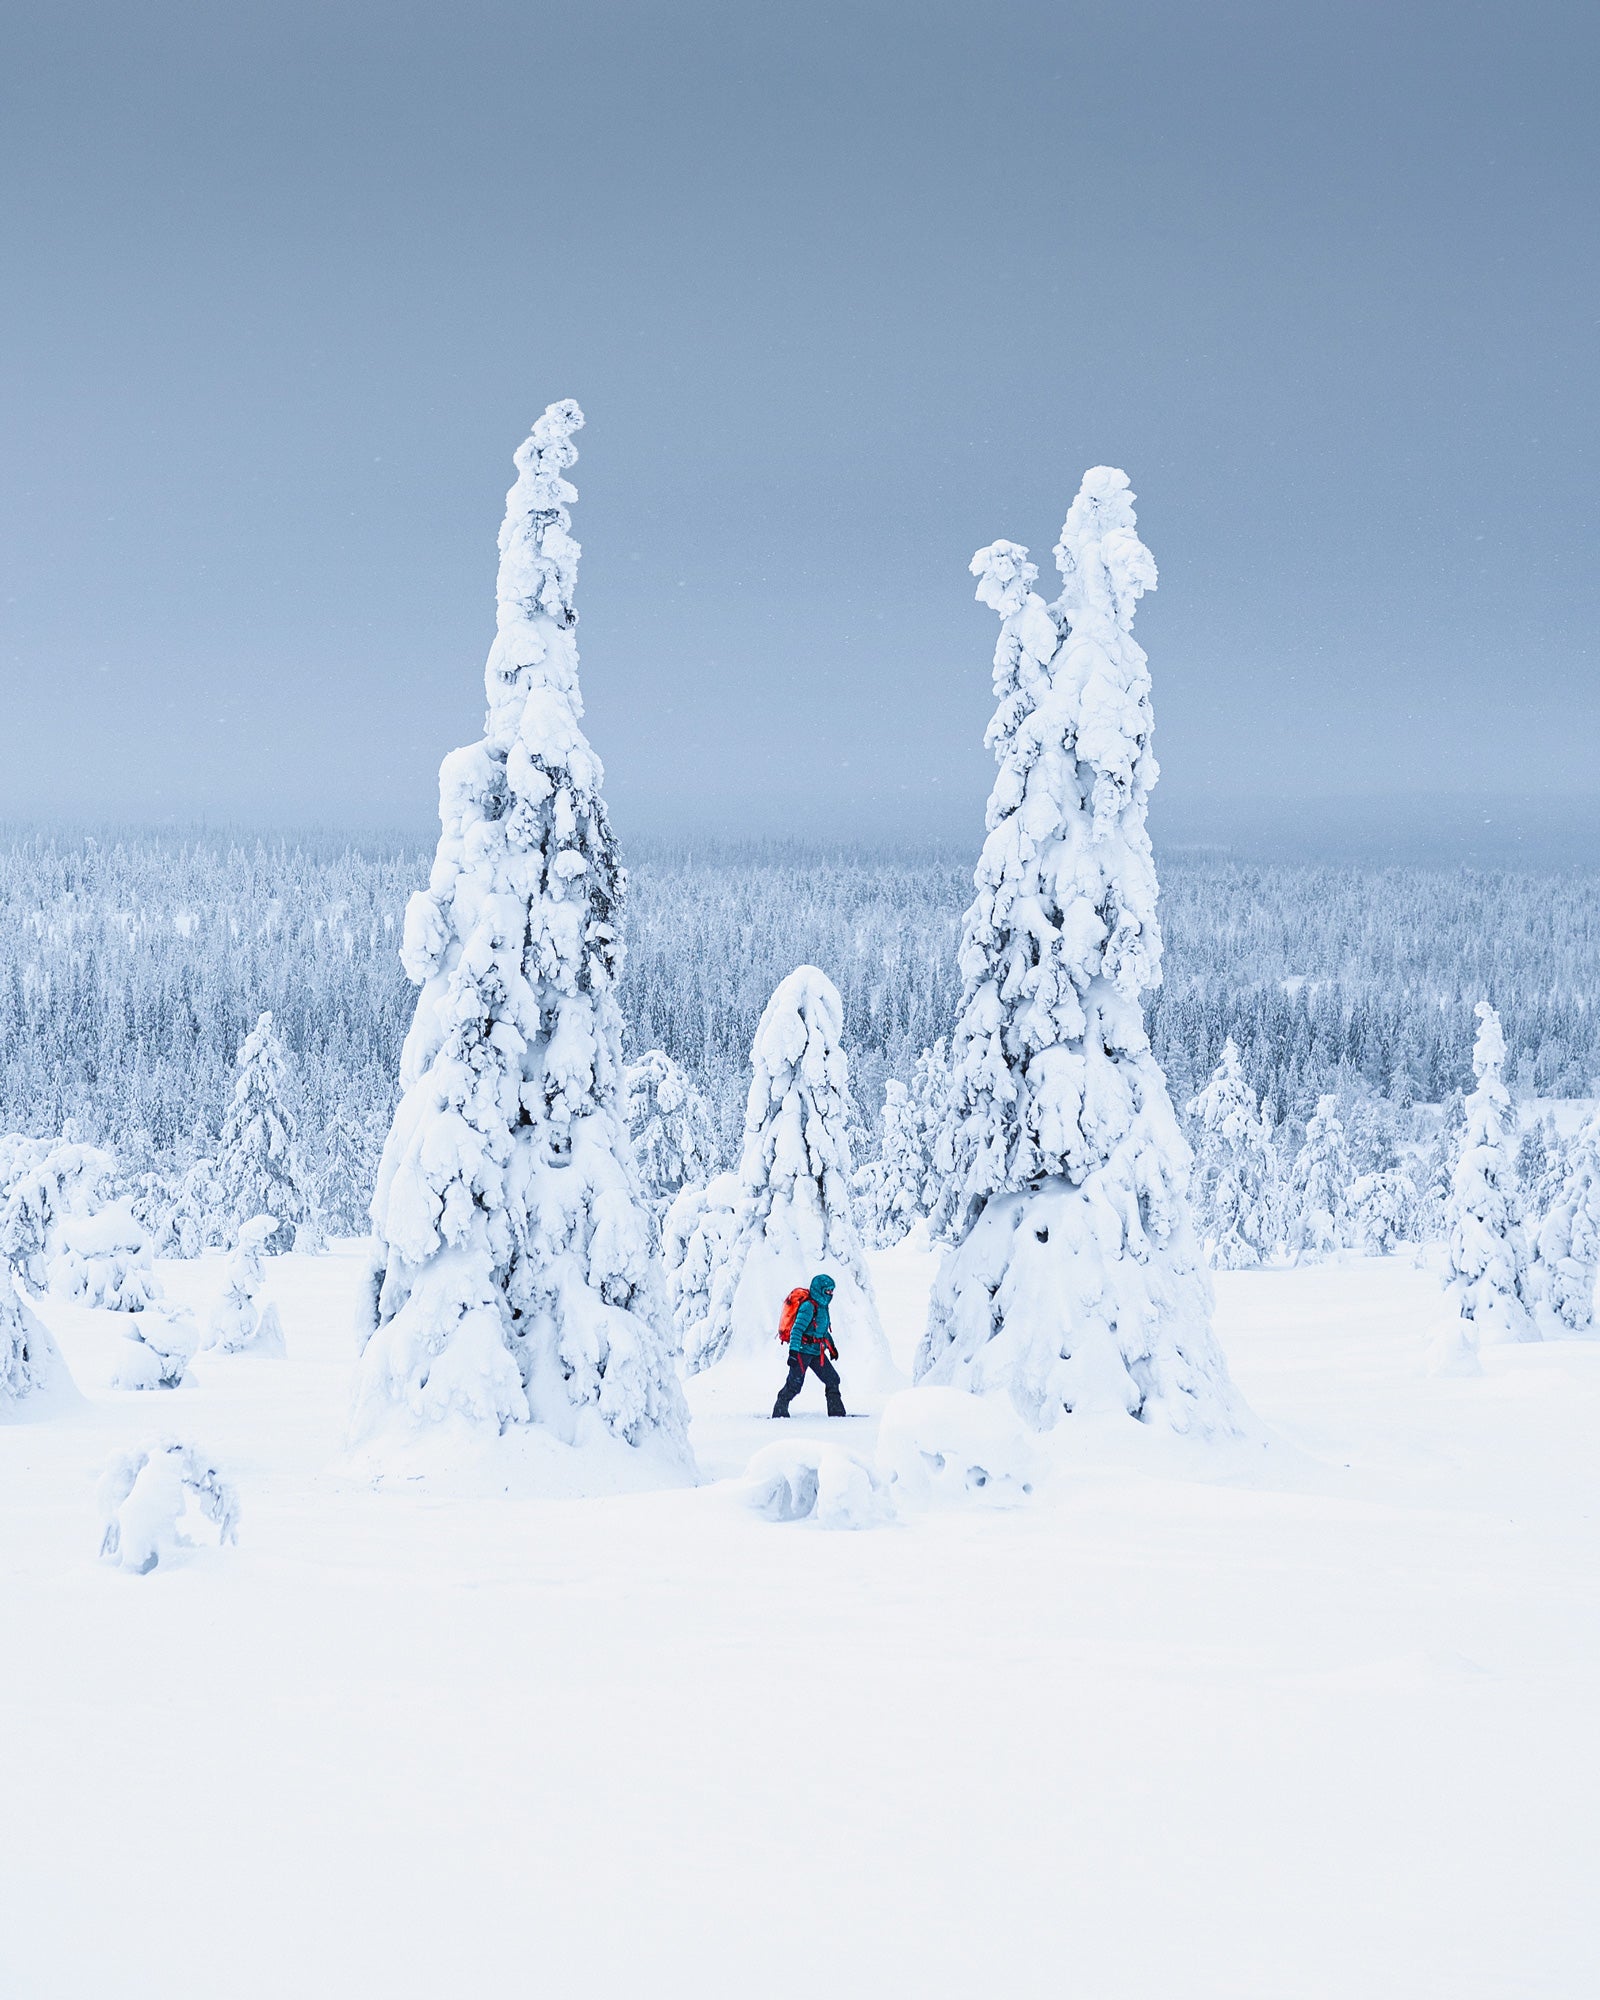
Photo by Jack Anstey. Sony α7 III. 1/400-sec., f/1.4, ISO 160.
Sony α7R III: The α7R III is my commercial workhorse. The extra high resolution of this body means I’m able to produce fantastically high quality images when working for clients in a commercial setting. I would love to be able to capture images in this quality all the time, but for the majority of my shooting the high resolution isn’t always necessary, so to save on the storage, transfer speeds and editing processes I tend to be quite cautious about using this body. I primarily use it for commercial work, or shots where I know there’s a high likelihood of cropping in post (e.g. wildlife) or printing.
The high resolution of the α7R III really helped me to pull all the detail out of this image. Coupled with the 200-600mm and a tripod, I was able to capture some really high quality images of the moon, and was so happy with them I got this image printed for my bedroom wall.
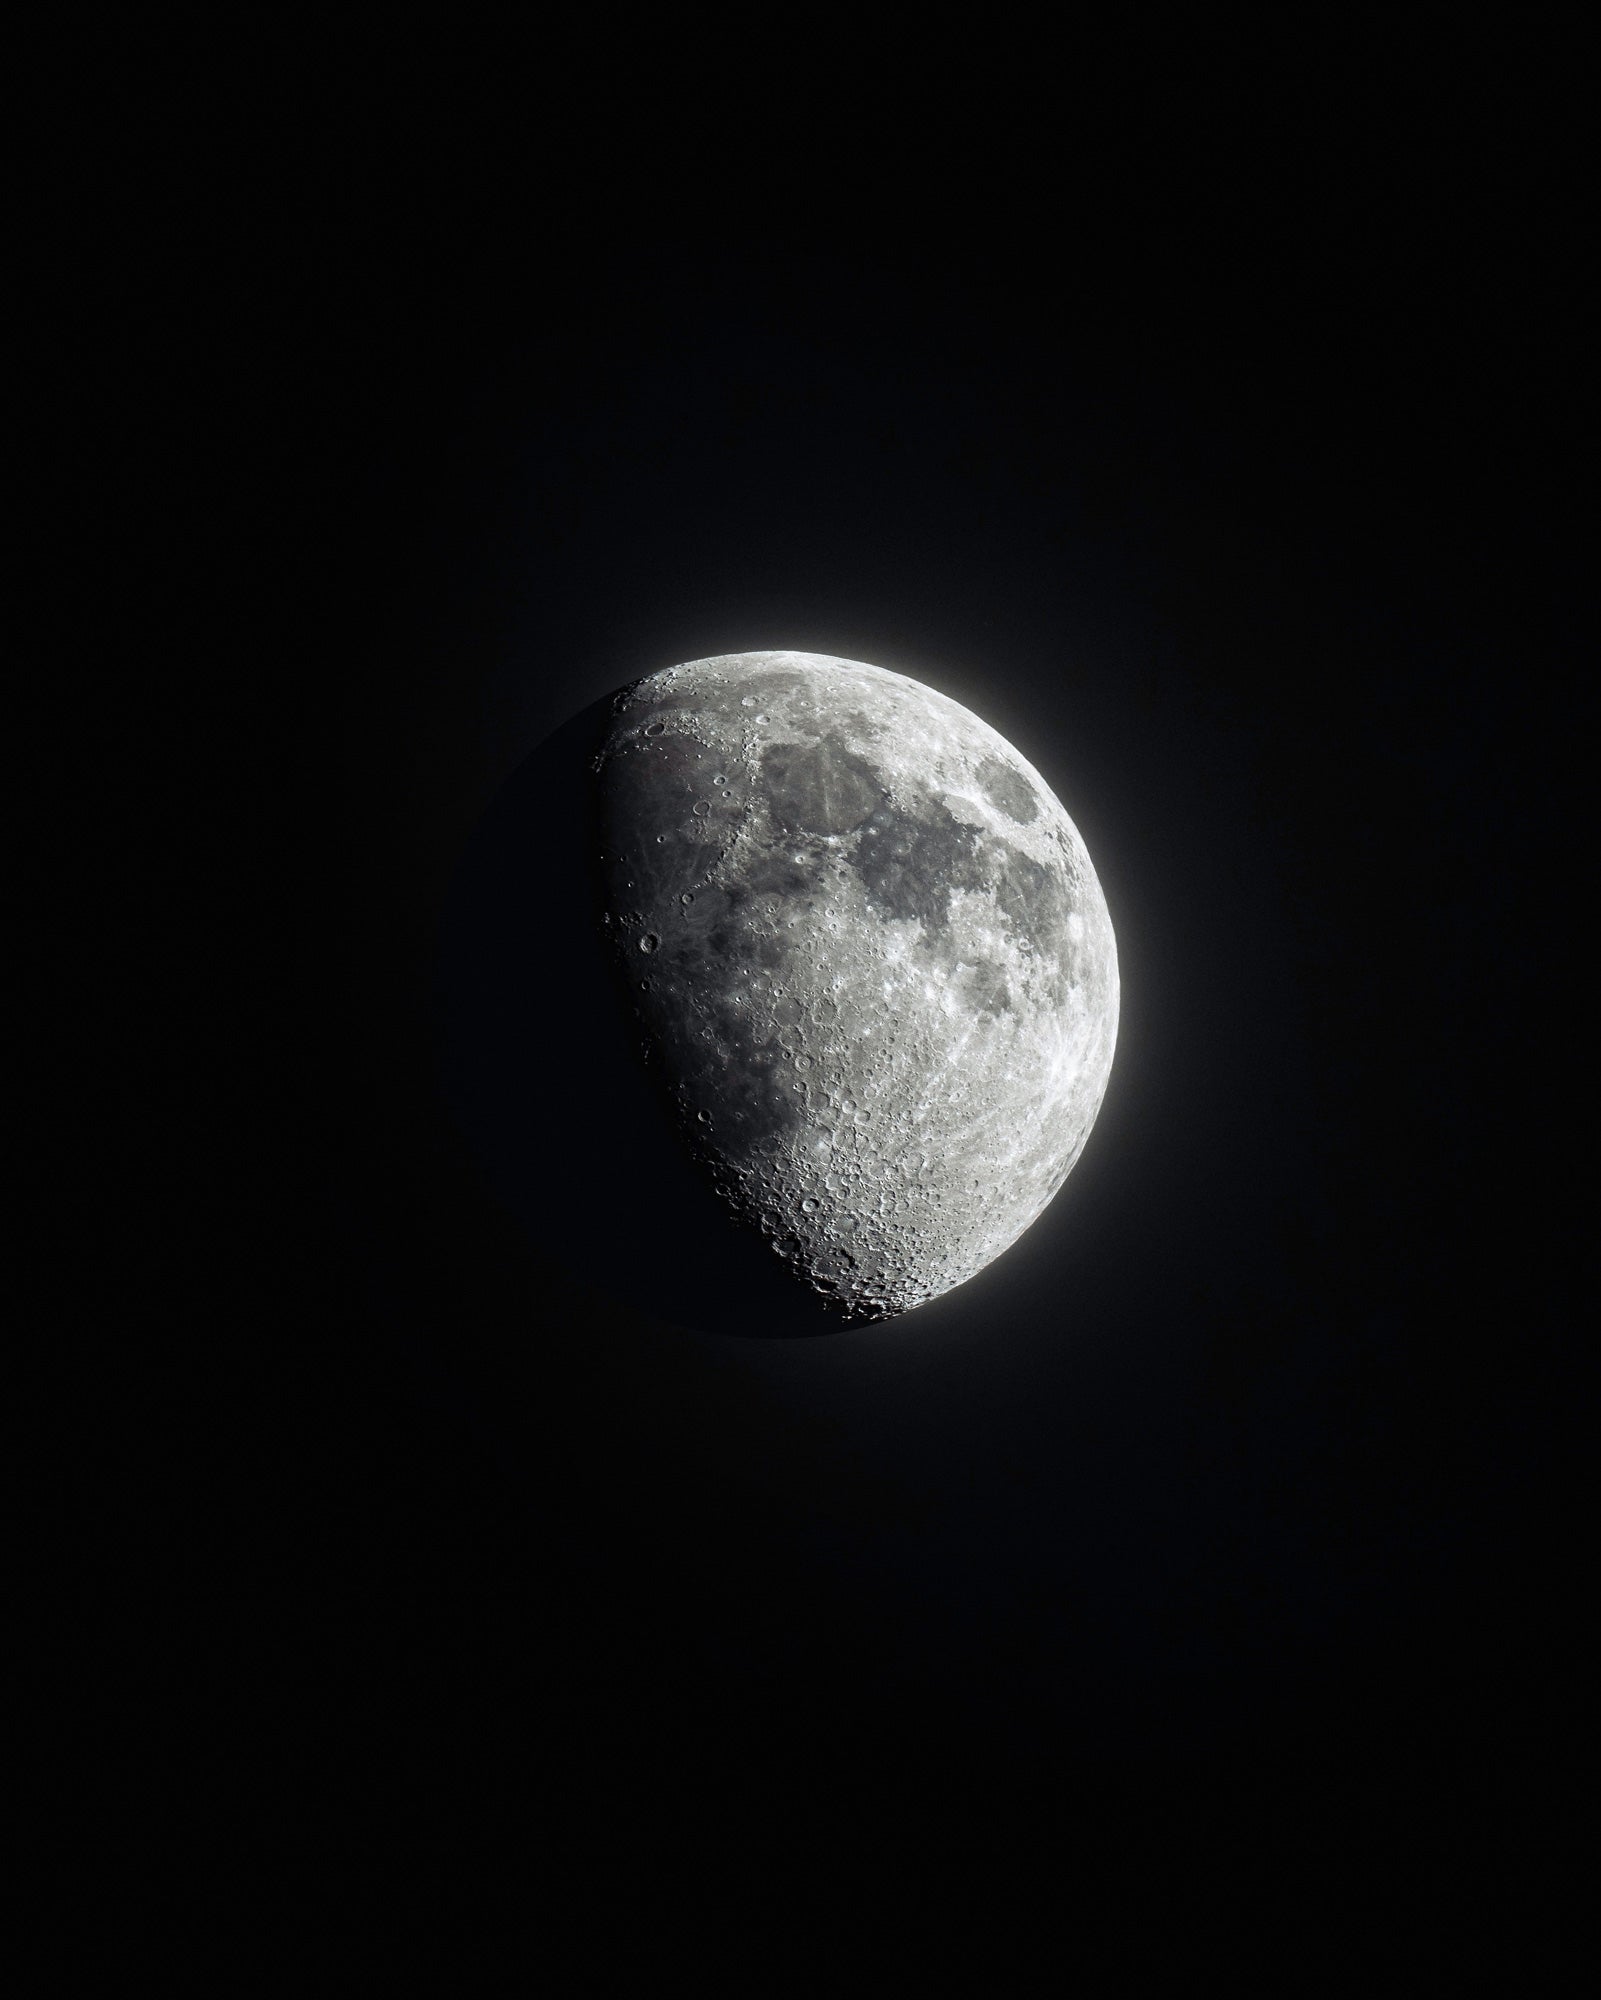
Photo by Jack Anstey. Sony α7R III. Sony 200-600mm f/5.6-6.3 G. ⅛-sec., f/6.3, ISO 1250
Lenses
Sony 24mm f/1.4 G Master: The 24mm is the lens that lives on my body most of the time. From experience I’ve found that it seems to be the most useful focal length in a wide range of situations: whether I’m taking traditional landscape shots, action and fast paced images, or shooting lifestyle images. This lens is seriously sharp, and the quality of the colours and detail within the images always blows me away, definitely one of my most used lenses. And that’s before we even start talking about the low-light capabilities at f/1.4.
With its lightweight build, wide field of view and crisp quality, the 24mm is my go-to lens for mountain expeditions like this. Being able to capture the scene with so much clarity and detail is refreshing, and what makes this lens so fabulous is that you can also use it for wide vista shots as well as close-ups showing more detail within the scenes.
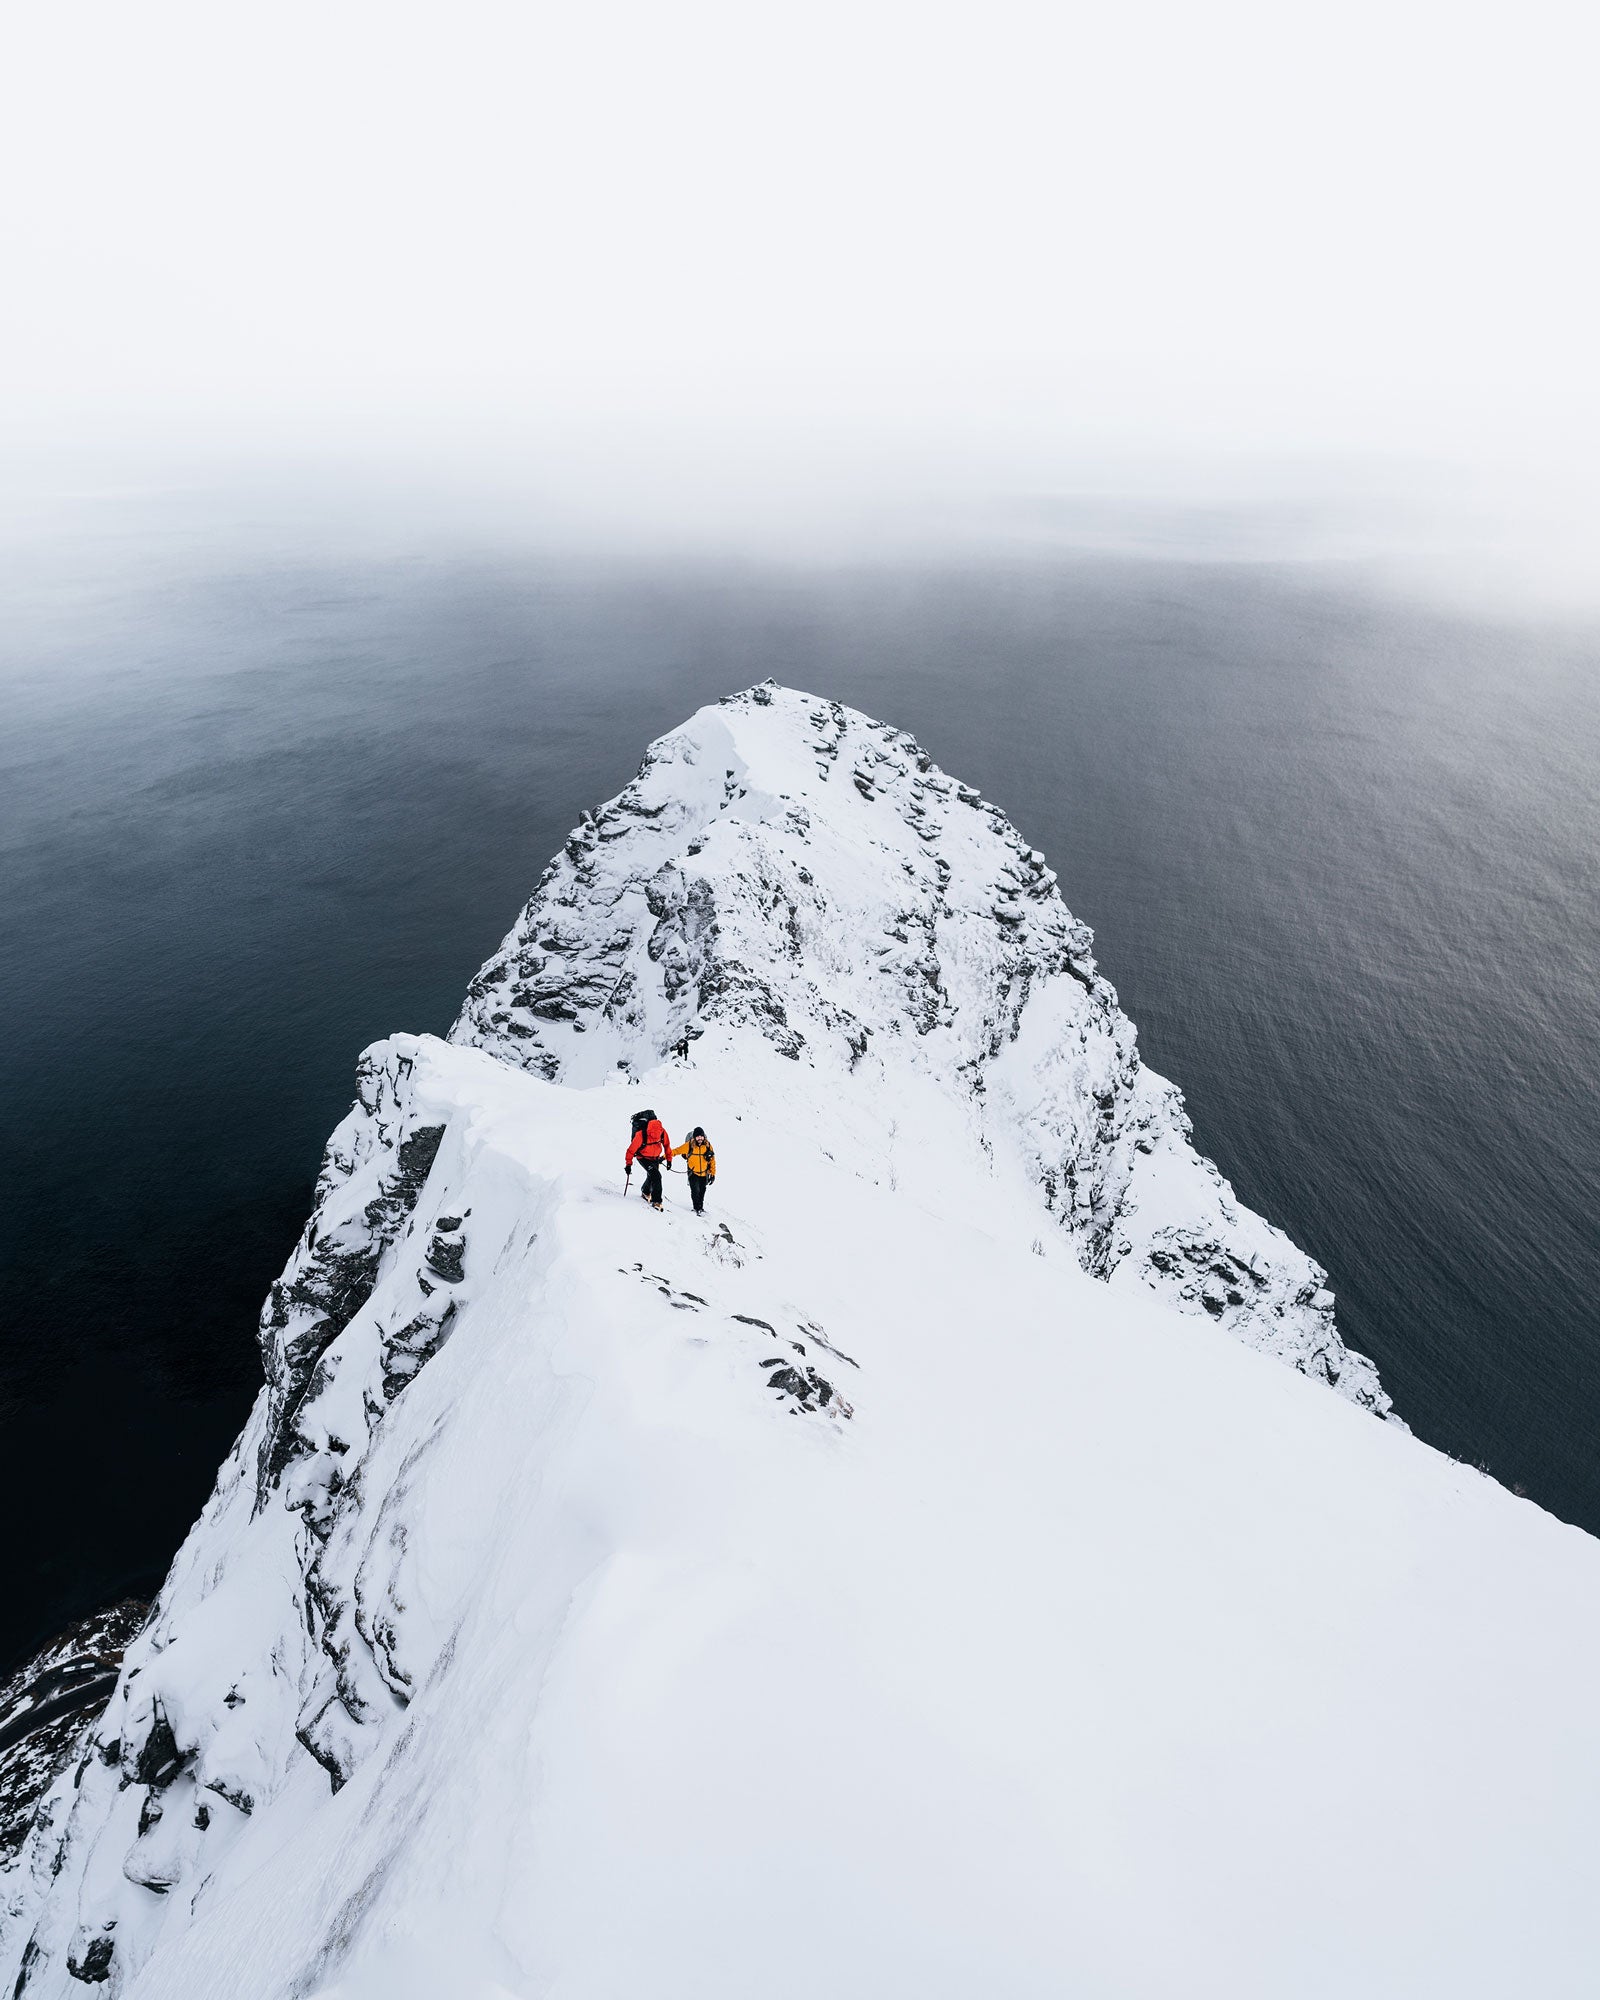
Photo by Jack Anstey. Sony α7R III. Sony 24mm f/1.4 G Master. 1/400-sec., f/2.8, ISO 100
Sony 200-600mm f/5.6-6.3 G: The 200-600mm is definitely one of my favorite lenses to use. The extra long focal length really allows me to capture some magical moments and help to bring my ideas to life. I like to use it not only for shooting wildlife, where it excels, but also to create images that really capture a sense of scale and compression. A lot of the time these images require a little more planning, sometimes with the subject a great distance from my camera, but all that extra effort just makes the final images more rewarding.
This is an image that really wouldn't have been possible without the 200-600. After spotting this ridgeline on our approach to the glacier, we knew we wanted to try and capture it with some heavy compression. I left my friend Sarah to walk up to the hilltop, whilst I set off in the other direction. With the lens maxed out at 600mm, and the Sony’s Super 35 Mode engaged, we use walkie-talkies to perfectly line up the shot and make our vision come to life.
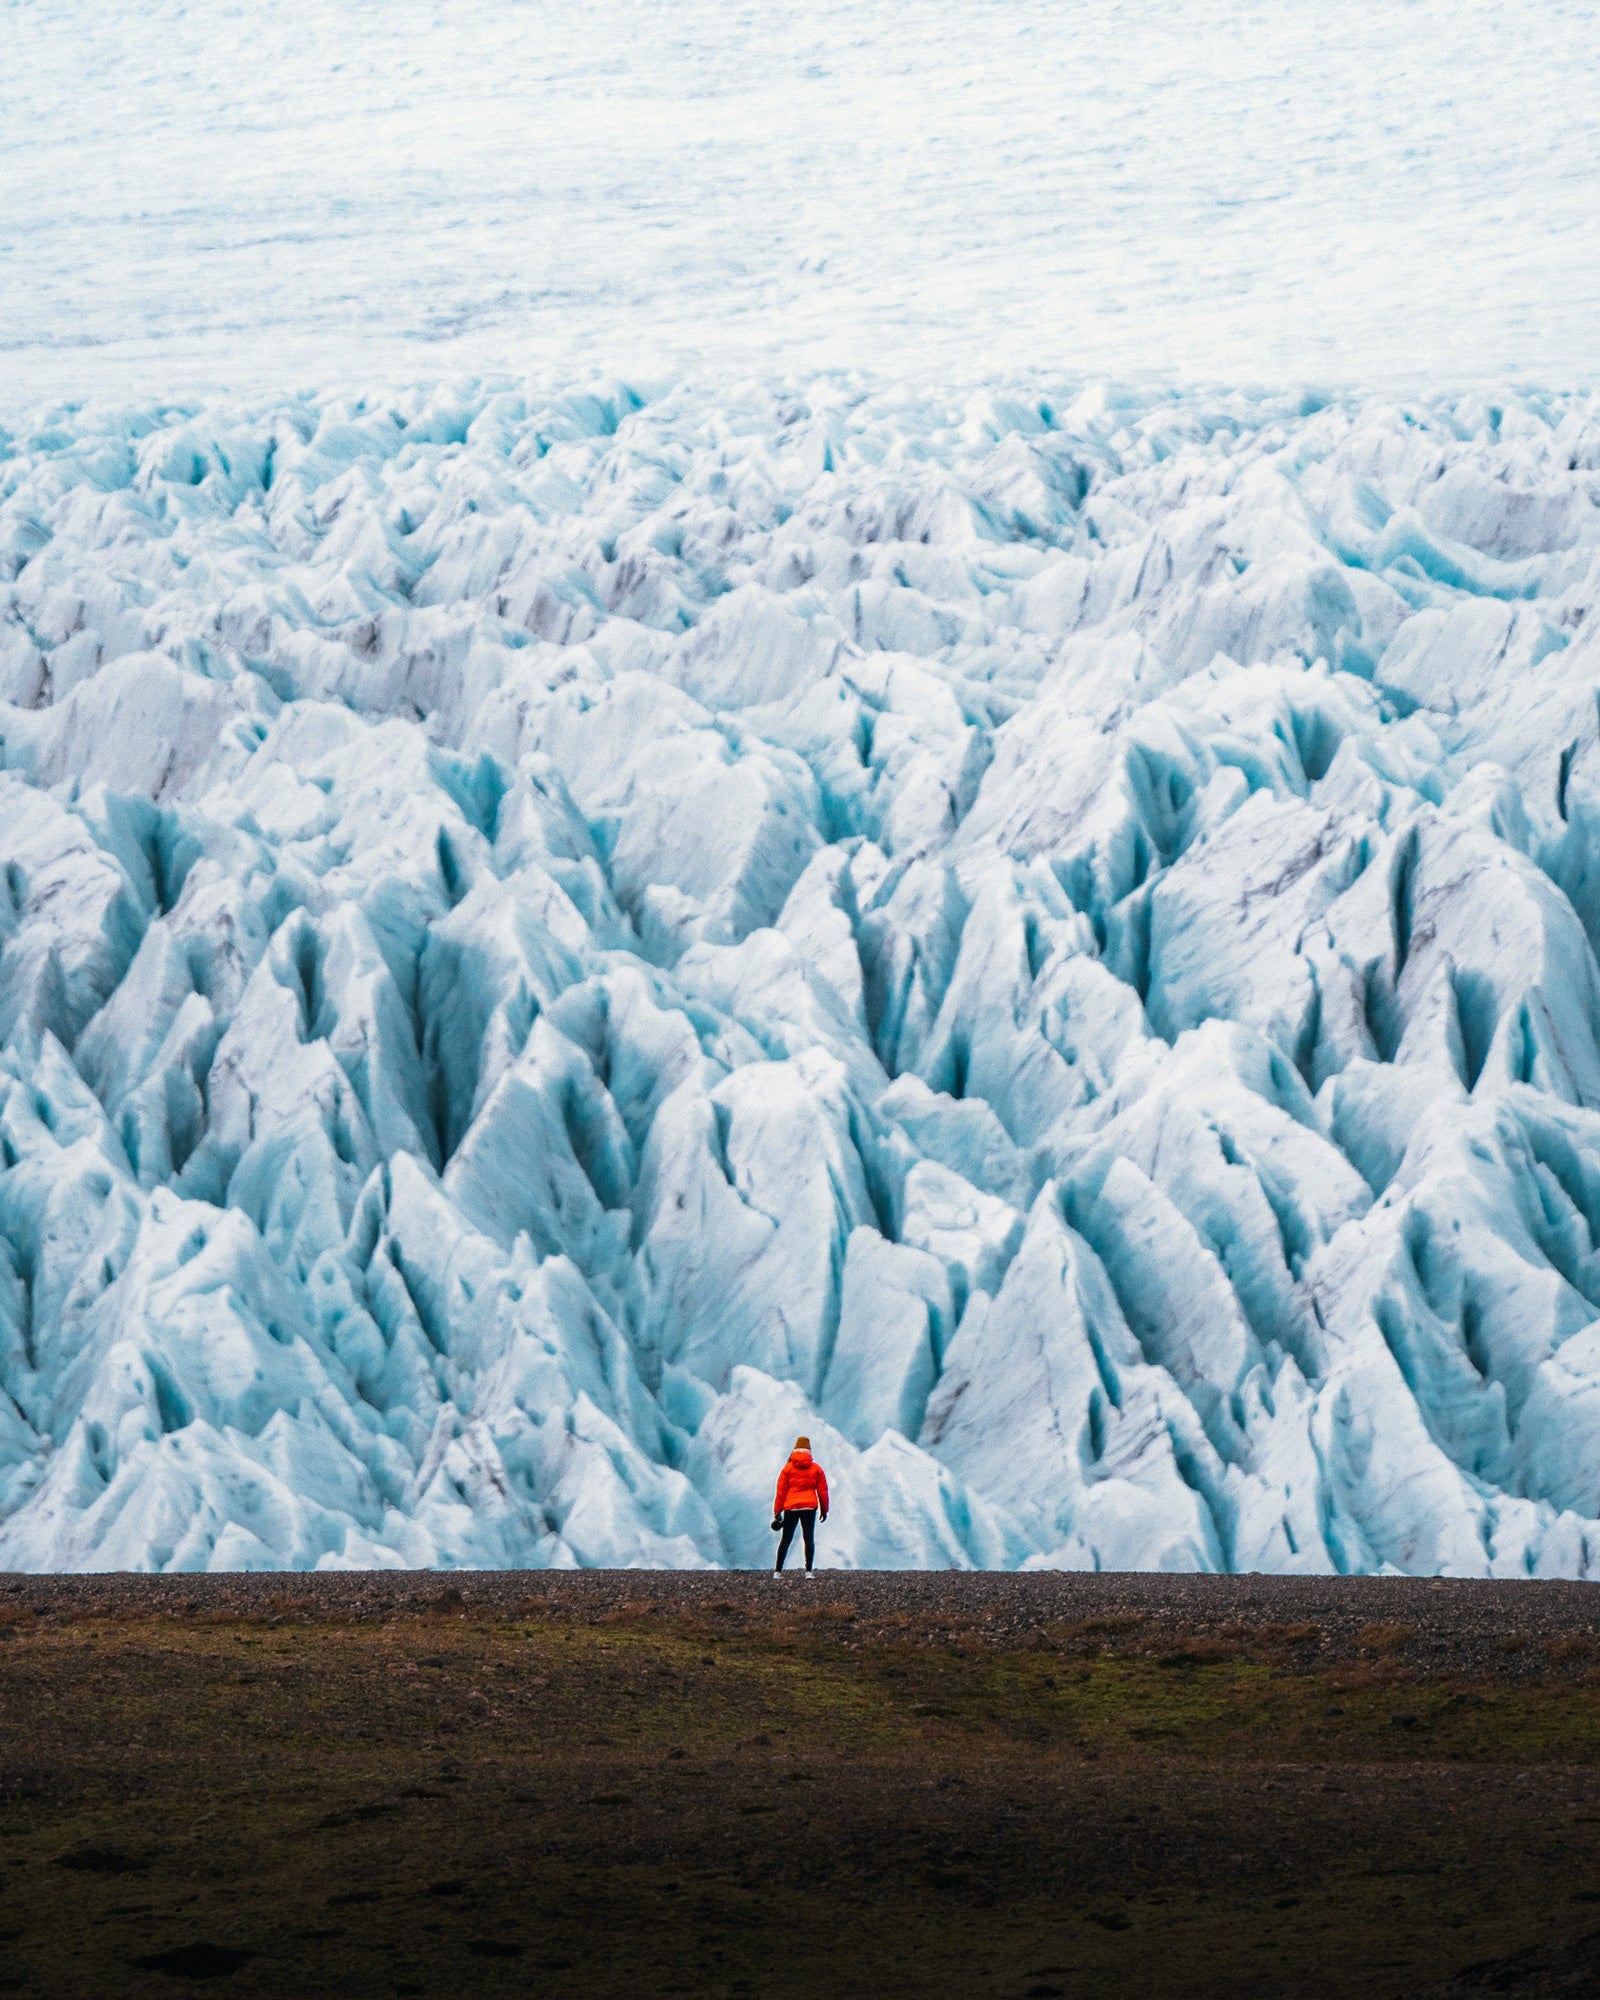
Photo by Jack Anstey. Sony α7 III. Sony 200-600mm f/5.6-6.3 G. 1/500-sec., f/6.3, ISO 400
Sony 70-200mm f/4 G: The 70-200 is a lens that always gets a lot of use. I love the extra compression and detail I can get when using a telephoto lens and the 70-200mm is always a part of my kit as a result. Unusually, I use the f/4 and not the f/2.8, and there’s a very good reason for this. Because I frequently bring several lenses and multiple cameras, the weight of my gear is important, especially when heading out on longer days hiking in the mountains, so the lighter build of the f/4 lens plays heavily on my decision. I also find that the depth of field when shooting f/4 at a longer focal length is already relatively shallow and more than enough for my images, and although it’s performance in low-light can sometimes be a little more challenging I think the trade off for size and weight is definitely worth it.
This is a prime example of an activity where I choose to go for a lightweight setup. Taken in the summer of 2019 on a trip to Chamonix, where most of our time would be spent on tiring hikes, alpine climbs and mountaineering excursions, I chose to take with me a lightweight lens set up, consisting of 24mm, 85mm and 70-200mm. I had the 24mm available for any wide or landscape shots, the 85mm would work perfectly for portraits and low-light at a longer focal length, and then the 70-200mm can be used to capture detail in the distance and add scale to a scene.
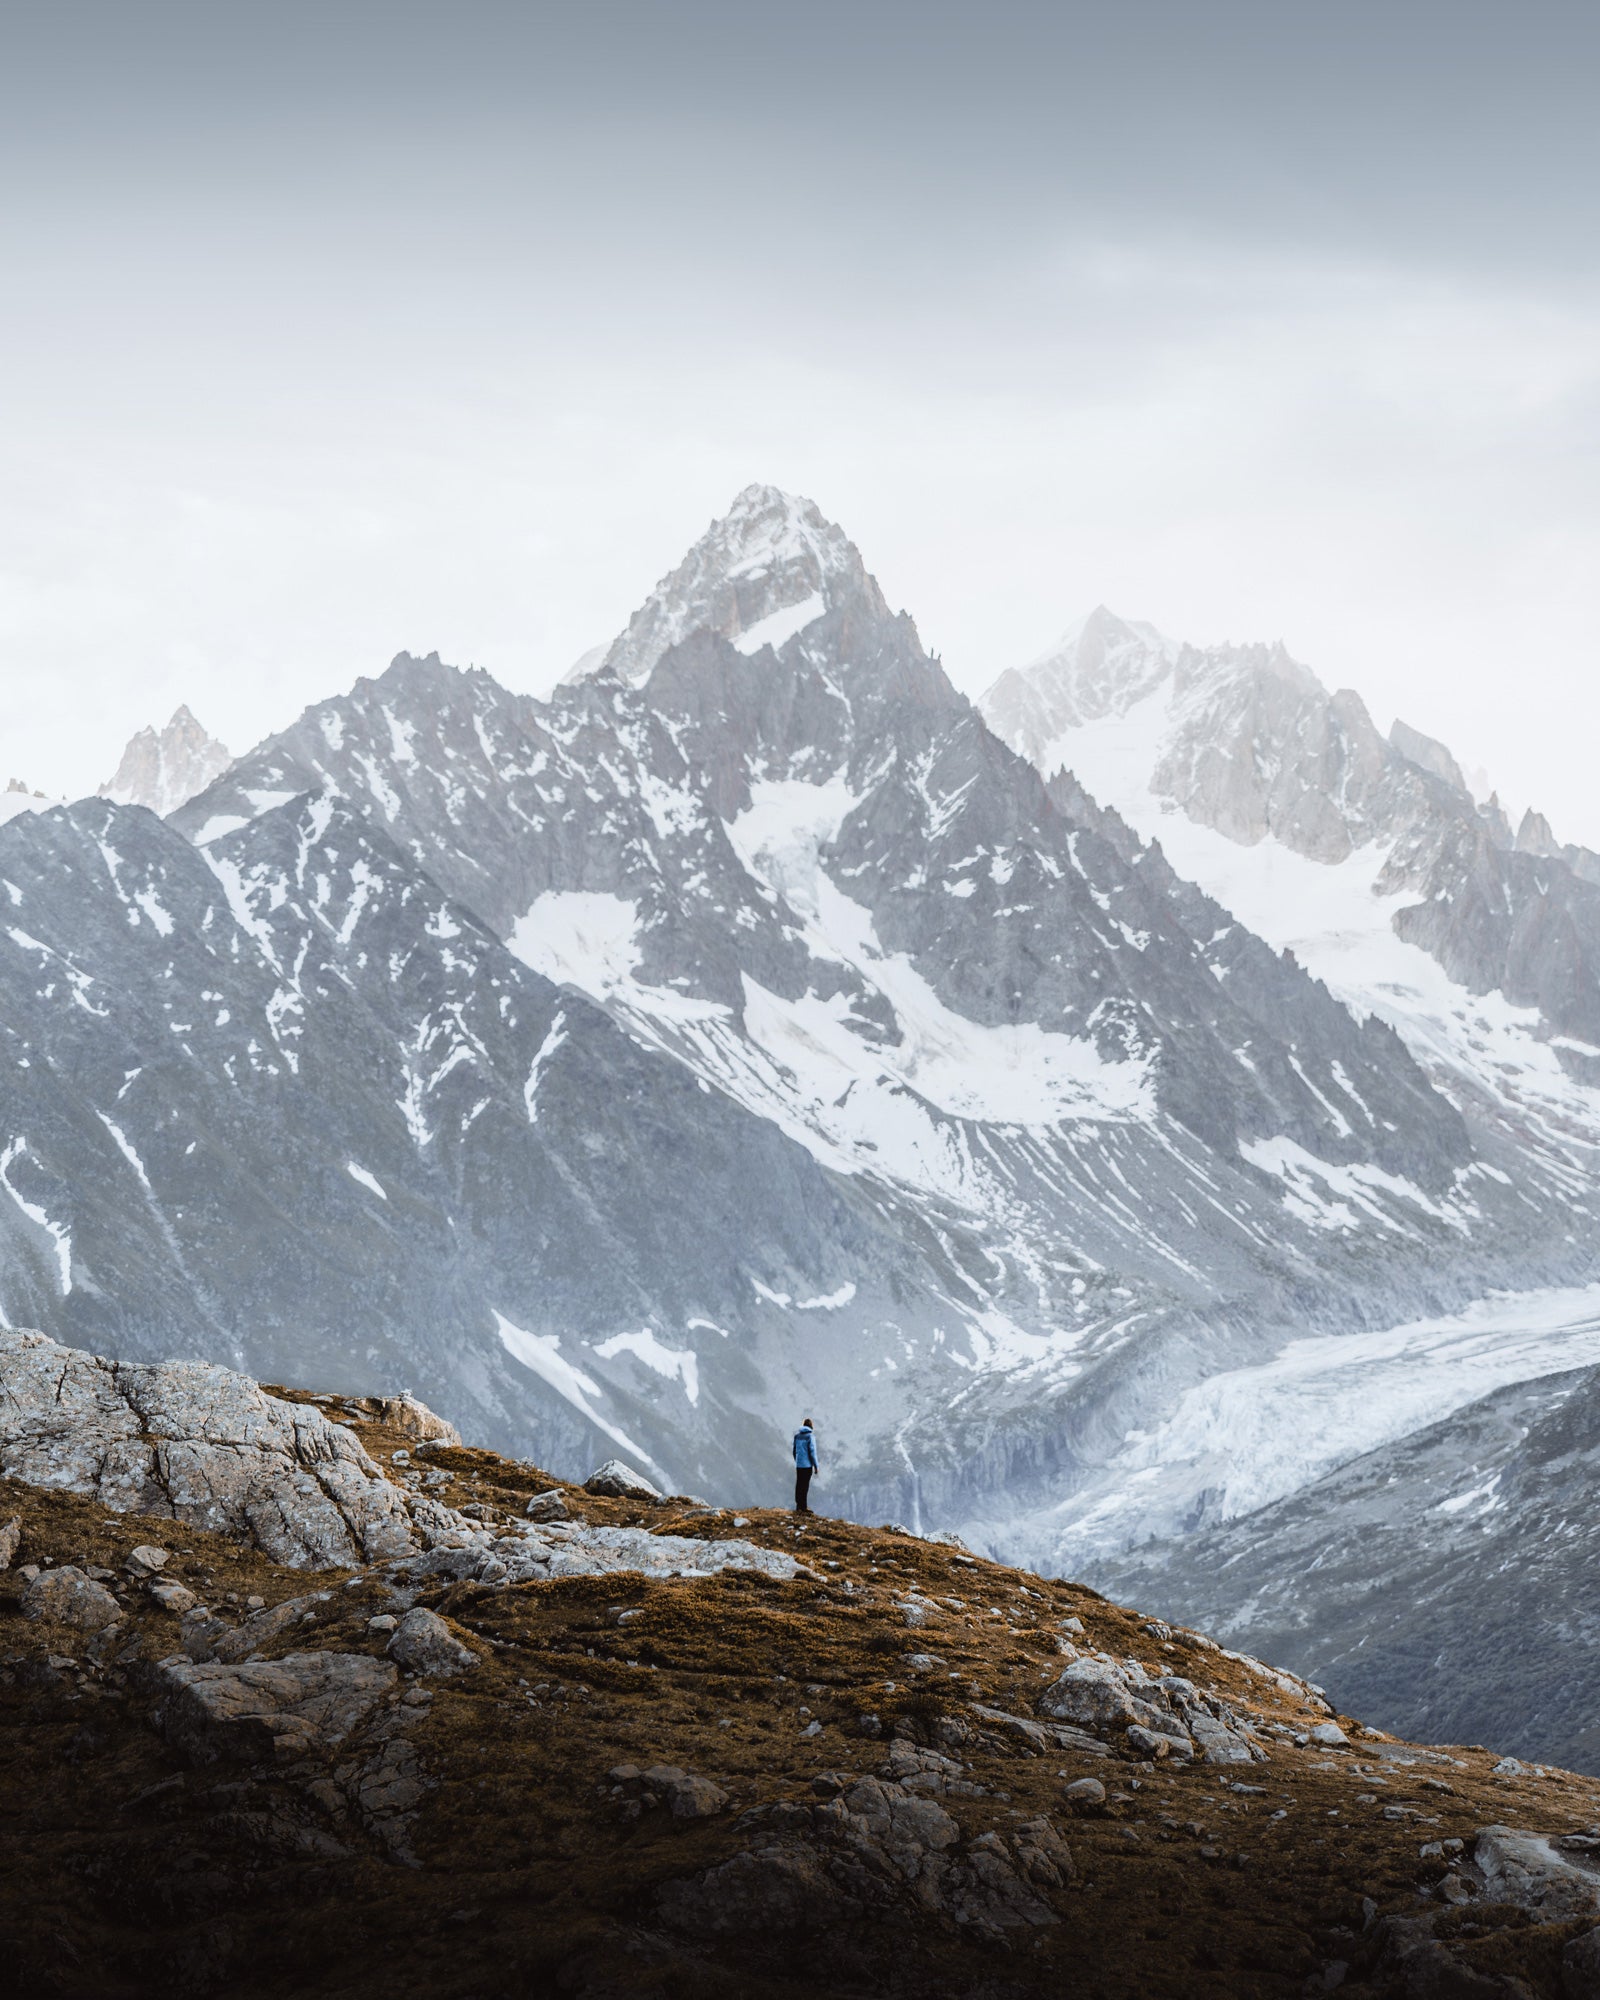
Photo by Jack Anstey. Sony α7 III. Sony 70-200mm f/4 G. 1/500-sec., f/4, ISO 200
Sony 90mm f/2.8 Macro G: The 90mm f/2.8 Macro G doesn't get as much use as some of my other lenses, but that’s not because I don’t love it as a lens, it’s more that it has a specific purpose. The 90mm Macro G is an absolute beast when it comes to commercial and product photography. Because of its incredibly low minimum focus distance it’s perfect for getting up close and personal with details, whether it’s details of moss or grass in nature, or some of the fine finishing details and logos on products. Although it doesn’t get as much use as my other lenses, when it comes to commercial work it really is worth its weight in gold.
This is a perfect example of where the close focusing distance and shallow depth of field has enabled an interesting product shot that wouldn’t have been possible with my other lenses. Consistently I’m amazed by the images that are able to be captured with the 90mm Macro, and I always value its quality.
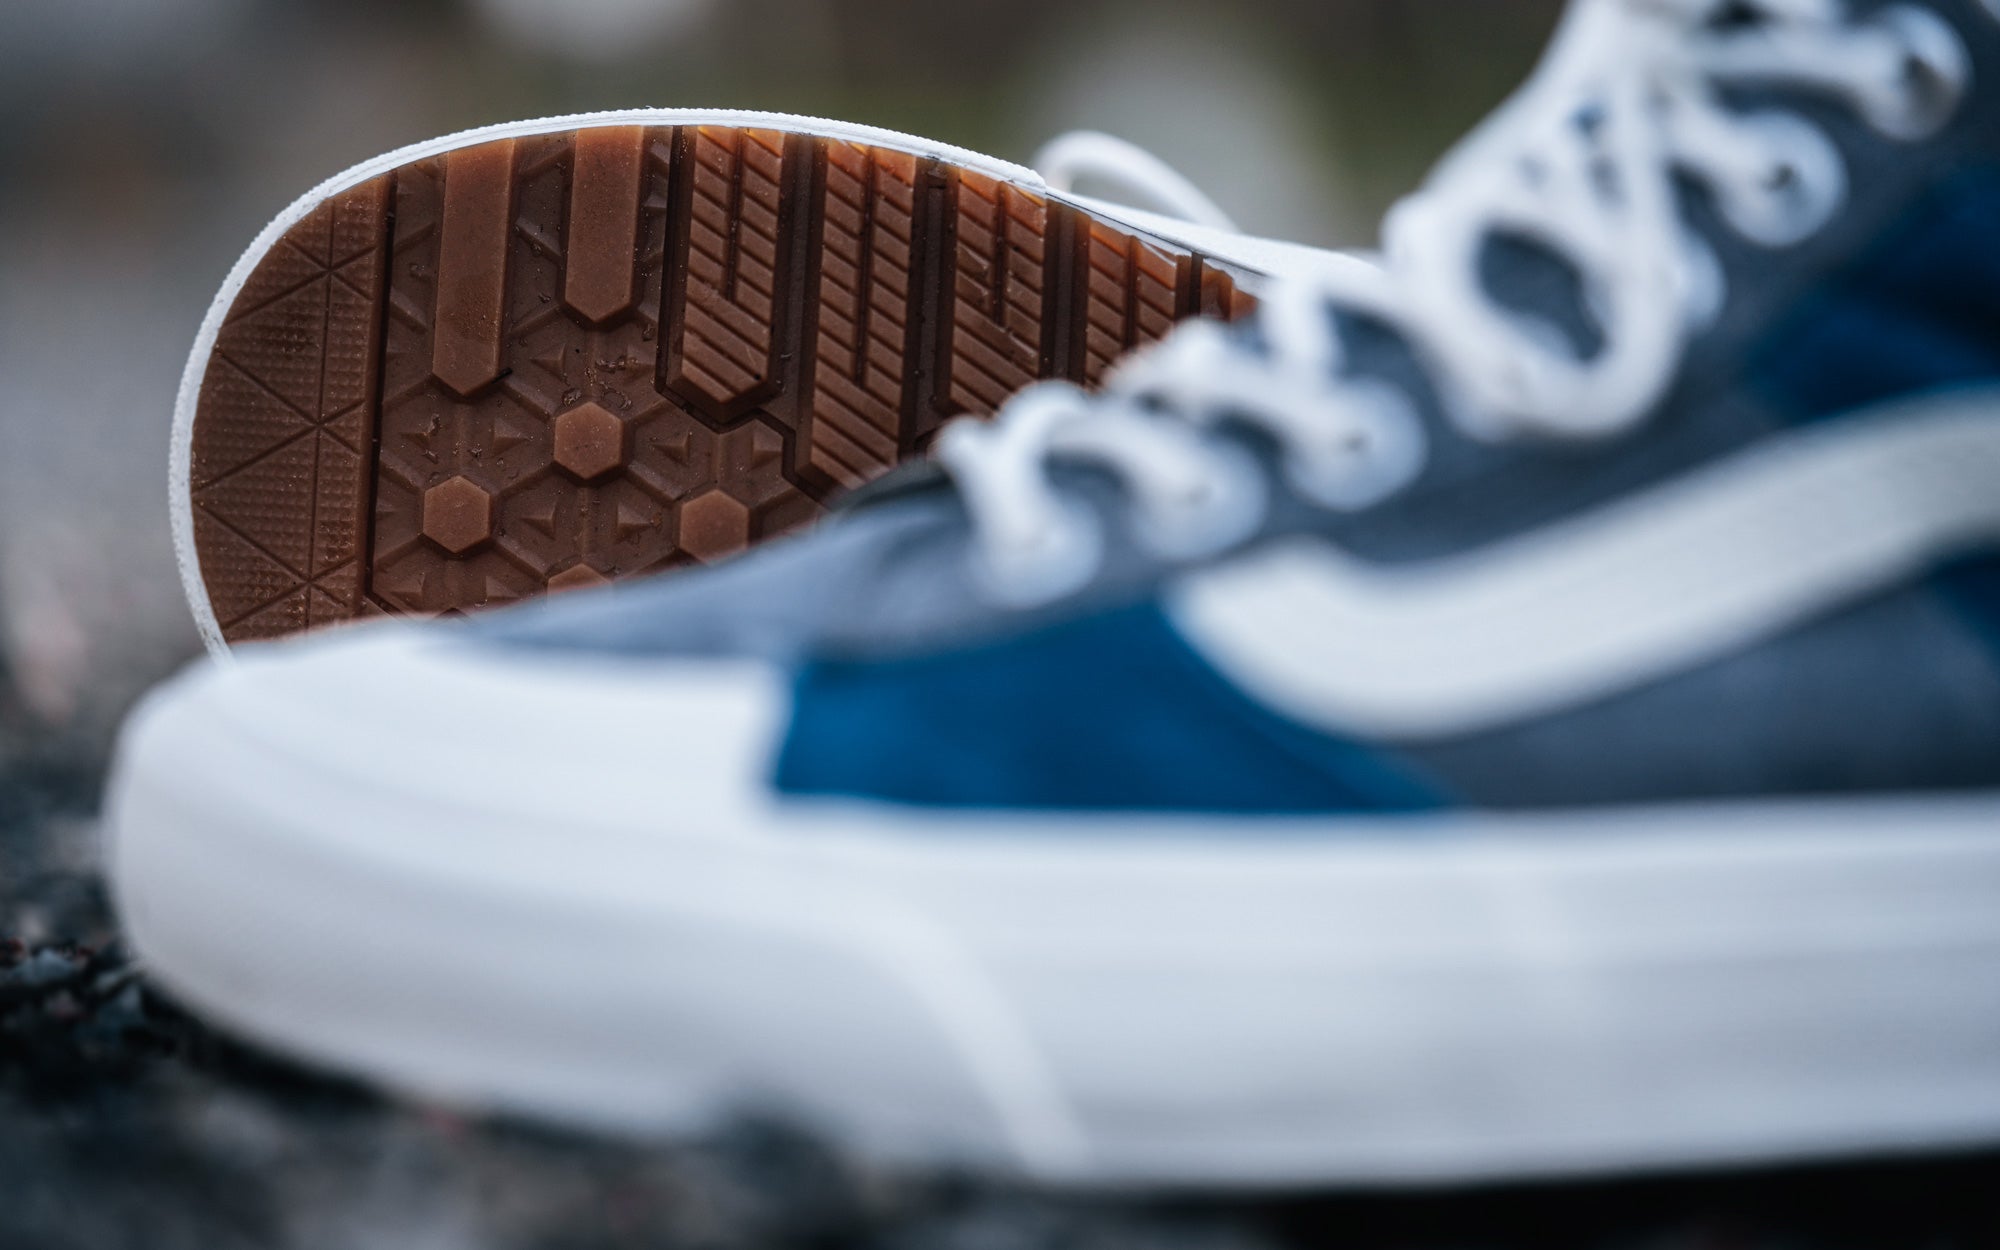
Photo by Jack Anstey. Sony α7R III. Sony 90mm Macro f/2.8 G. 1/320-sec., f/2.8, ISO 100
Accessories
F Stop Sukha 70l Camera Bag: I opt for a very big camera bag as it means I have much more flexibility with what I want to carry out on a day. With this bag I can comfortably carry my overnight gear (sleeping bag, tent, cooking equipment), as well as having full access to all my lenses and camera gear. It’s also helpful when shooting commercial projects as I’m able to carry around a lot of products and extras.
Lume Cube: I don’t often use artificial light within my images, as I much prefer the look and feel you get from using natural light. But on the occasion that I do want to add some light into an image the Lume Cube is perfect. Really robust, waterproof, with interchangeable filters and controllable from your phone means you can really perfect the lighting in your shot to your needs. It’s great when using it to light tents at night time, as you can remotely adjust the brightness of the LEDs to ensure nothing is blown out when shooting.
Black Tape: I always carry a roll of black electrical tape in my bag, and find it comes in handy a lot. I use it to make fixes and repairs to gear when I’m out, to hold a product piece in place when shooting commercial work, and it’s also really helpful to cover over the orange LED when shooting astro with a self-timer (as this can show in other people’s long-exposures).
Pocket Knife: A really useful tool that I usually carry around to help out with all sorts of problems. You never really know when you’re going to find the need for a knife in your bag, but like the black tape it comes in handy more often than you would think.
Head Torch: An essential item when out walking in the mountains, especially when you often shoot into blue hour. I usually have two in my camera bag, which helps if batteries start to run low, but is also great in case someone else forgets theirs.
Thin soft gloves: Wind chill is a real factor when taking photos, and the bulk and size of warm and waterproof gloves often removes a lot of the dexterity you need for altering camera settings and taking photos. I always keep a pair of thin gloves in my bag to help when its a little cold outside, and the benefit of them being so thin is that I can keep them on whilst putting on warmer and waterproof gloves over the top.
SD Card Wallet: An essential for any photographer, this tough, waterproof, and drop proof case helps to keep all your SD and Micro SD cards organised and protected in your bag.
Sunglasses: Just like the gloves, you never know when you’re going to need a pair of sunglasses when out shooting. Both in the summer sun and bright winter snow, they come in really useful. Being able to comfortably see and study a landscape is really helpful as a photographer, and they definitely help you to do that in bright conditions! It’s also really useful on summer days to help keep your eyes adjusted for slightly darker light, so that the viewfinder is easier to see.
Walkie-Talkies: A must in any outdoor photographers bag, in my opinion. They come in handy far more often than you would think. I mainly use these when splitting up in order to scout locations and when trying to get a nice profiled silhouette of a figure in the distance. Being able to easily communicate with the people in your images is so useful, and I never head out on a shoot without them.
Lens Cloth + Rocket Blower: These always have a place in my bag and I regularly use them to keep my lenses dust and dirt free when I’m out shooting. I have a full cleaning kit with alcohol wipes, and sensor cleaning tools back in the van, and I usually do a full clean about once a week.
Variable ND Filter: This comes in use when shooting video in a Log format, as the ISO, Shutter Speed and Aperture can often be restricting. Having this Variable ND in my kit means its easy to quickly expose your video as you need. I also get a lot of use out of this during winter conditions, where the bright snow can also be restricting to your settings and you find you need to be willing to reduce the aperture in order to restrict the light entering the lens.
Circular Polarizing Filter: Very very important to help reduce glare, reflections and sunlight within your photos. It comes in handy when shooting waterfalls and rivers, but also is a vital piece of kit if you’re shooting automotive as it helps to reduce the reflections on the vehicles paintwork and windows.
Multi-tool: Just like the tape and pocket-knife, a multi tool is always worth carrying around, especially if you’re using the Peak Design infrastructure of straps and mounts.
DJI Mavic Pro: I carry a wide range of lenses around with me in order to be able to capture the landscape in unique and interesting ways, and the drone is just another extension of that. Being able to capture images from the air is incredible and the change of perspective can really help to produce some fantastic images.
Peak Design Slide Strap: I don’t often use a camera strap as I find it often gets in the way, and can whip around in strong winds, but for the times when I do the Peak Design strap is the perfect solution. It’s light, easy to adjust and can be connected/disconnected in a matter of seconds.
Peak Design Capture Clip: Another fantastic product from the guys at Peak Design, this clip enables you to store your camera out of the way on your bag strap. And just like the strap, you can connect/disconnect it quickly and easily. I used to put my camera away between locations but being able to have it to hand in a matter of seconds means you take more photos and miss less moments.

